Sylvania D6313CB Скачать руководство пользователя страница 30

- 30 -

ES

0B19

ANT.

AC 120V

DC 13.2V

28

26

27

• Púlselo para determinar los modos de ajuste desde el

menúde la pantalla.

• Púlselo para seleccionar un modo desde un menúpar-

ticular.
(Por ejemplo: IDIOMA o ADJUST DE USER)

8

Botón de grabación (REC)– 

Púlselo para iniciar la

grabación manual.

Botón de grabación de un toque (OTR)– 

Activa

la grabación de un toque. (Sólo en el
televisor/videograbadora)

9

Indicador de grabación (RECORD)– 

Parpadea

durante la grabación.
Se enciende en el modo de espera de la grabación con
temporizador.

10

Ventanilla sensora del mando a distancia–

Recibe las señales infrarrojas procedentes del mando a
distancia.

11

Botones de canales (CHANNEL

K

L

)– 

Púlselos

para seleccionar los canales deseados para ver o grabar.
Se puede mostrar el menú principal en la pantalla del
televisor pulsando repetidamente este botón del televi-
sor/videograbadora.

Función de seguimiento– 

Pulse los botones para

minimizar el ruido de vídeo (líneas o puntos en la pan-
talla) durante la reproducción.

12

Botones de volumen (VOLUME  

X

X

Y

Y

)– 

Ajustan

el nivel del volumen.

13

Botón de la alimentación (POWER)– 

Púlselo

para encender y apagar el televisor/videograbadora.
Púlselo para activar la grabación con temporizador.

14

Compartimiento del videocasete

15

Botones numerados– 

Púlselos para seleccionar los

canales deseados para ver o grabar. Para seleccionar
canales del 1 al 9, pulse primero el botón 0 y luego el
botón 1 a 9.

Botón +100–

Cuando seleccione canales de televisión

por cable cuyo número sea superior al 99, pulse
primero este botón, y luego pulse los dos últimos dígi-
tos. (Para seleccionar el canal 125, pulse primero el
botón “+100” y luego el “2” y el “5”.)

16

Botón de menú (MENU)–

Púlselo para visualizar el

menúprincipal en la pantalla del televisor.

17

Botón del visualizador (DISPLAY)–

Visualiza el

contador o el número del canal actual y la hora actual
en la pantalla del televisor.

18

Botón de velocidad de cinta (SPEED)–

Púlselo

para elegir la velocidad de grabación deseada: SP/SLP.

19

Botón T-PROG. CLEAR–

Púlselo para cancelar un

programa de temporizador.

Botón de reposición del contador (COUNTER
RESET)–

Púlselo para reponer el contador a 0:00:00.

20

Botón de juego (GAME)–

Establece el modo del

juego y el modo de entrada externa al mismo tiempo.

21

Botón de búsqueda con tiempo (TIME
SEARCH)–

Púlselo para activar el modo de búsqueda

con tiempo.

22

Botón de pausa/imagen fija (PAUSE/STILL)–

Púlselo para detener temporalmente la cinta durante la
grabación o para ver una imagen fija durante la repro-
ducción.

23

Botón de silenciamiento (MUTE)–

Silencia el

sonido. Púlselo de nuevo para recuperar el sonido.

24

Botón de retorno de canal (CHANNEL
RETURN)–

Púlselo para volver al canal anterior. Por

ejemplo, pulsando una vez este botón, la visualización
del canal cambiará de 3 (canal actual) a 10 (canal ante-
rior), y al pulsarlo por segunda vez, el canal cambiará
del 10 al 3.

25

Botón del temporizador despertador/para
dormir (WAKE-UP/SLEEP)– 

Ajusta el tempo-

rizador para despertarse/dormir.
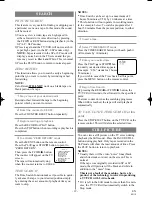
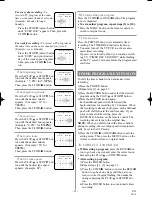
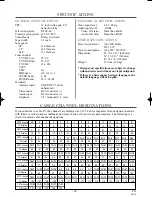
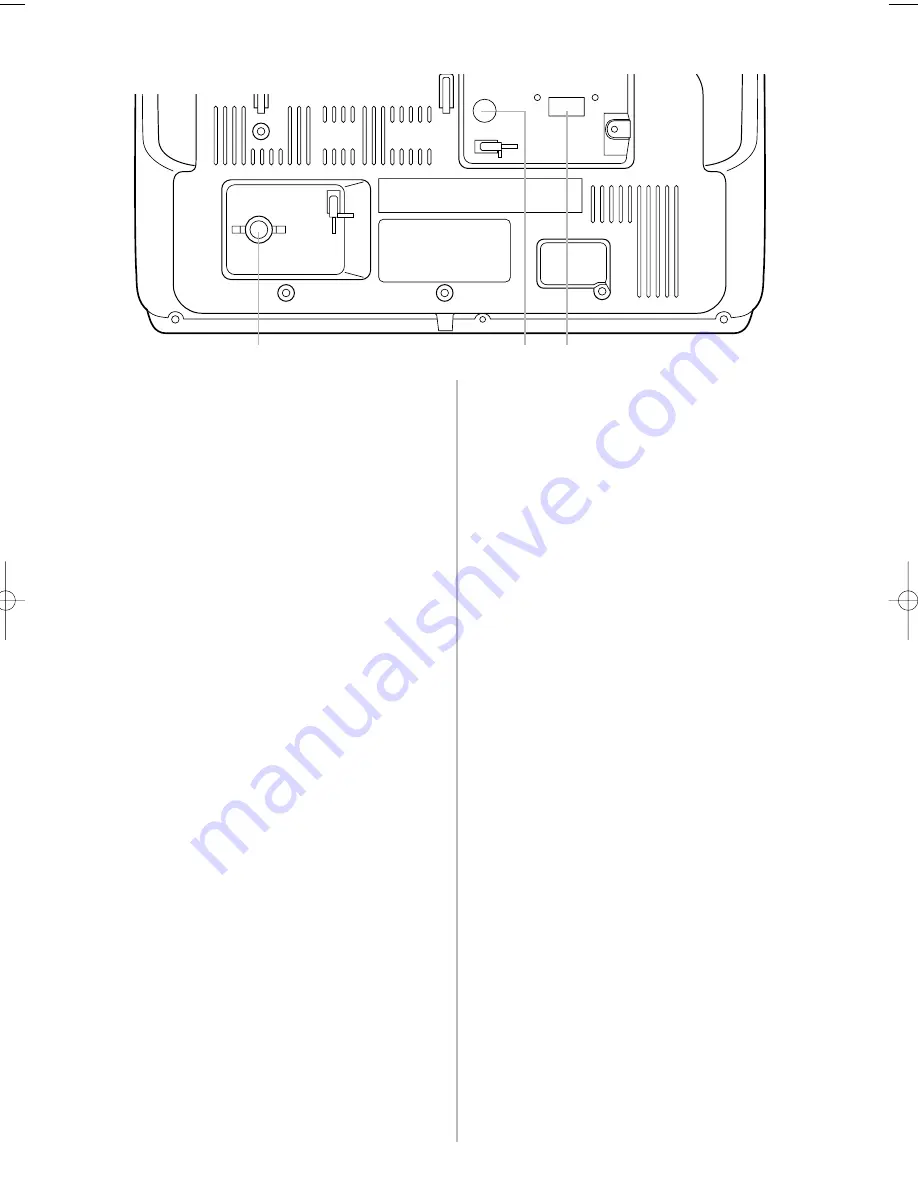
26

Terminal de antena (ANT.)–

Para conectar una

antena o sistema de televisión por cable.

27

Toma DC 13.2V–

Conéctela al cable de la batería del

automóvil.

28

Toma AC 120V–

Conéctela al cable de alimentación

de CA.

- PANEL TRASERO -

 T5207ES.QX33  01.3.19 10:24 AM  Page 30

Содержание D6313CB

Страница 1: ...NERGY STAR guidelines for energy efficiency ENERGY STAR is a U S registered mark If you need additional assistance for set up or operating after reading owner s manual please call TOLL FREE 1 800 968...

Страница 2: ...net and the back or bottom are provided for ventilation and to ensure reliable operation of the TV VCR and to protect it from overheat ing and these openings must not be blocked or covered The opening...

Страница 3: ...age Requiring Service Unplug this TV VCR from the wall outlet and refer servicing to qualified service per sonnel under the following conditions a When the power supply cord or plug is damaged or fray...

Страница 4: ...etic fields Avoid moving TV VCR to locations where temper ature differences are extreme Do not handle the power cord with wet hands Do not pull on the power cord when disconnecting it from an AC wall...

Страница 5: ...5 WATCHING A TV PROGRAM 15 GAME MODE 15 DEGAUSSING 15 PICTURE CONTROL 15 CLOSED CAPTION SYSTEM 16 V CHIP SET UP 16 C PLAYBACK 18 NORMAL PLAYBACK 18 AUTO REPEAT PLAYBACK 18 SEARCH 19 STILL PICTURE 19 N...

Страница 6: ...de will show a fairly clear picture Digital Auto Tracking DTR Automatically adjusts the tracking for each tape you play Rental play mode Improves playback picture quality from worn tapes such as renta...

Страница 7: ...setting clock or timer program 5 REW button Press to rewind the tape or to view the picture rapidly in reverse during playback mode Rewind Search s button Press to select a mode from a particular menu...

Страница 8: ...r recording To select channels from 1 to 9 first press the 0 button and then 1 to 9 100 button When selecting cable channels which are higher than 99 press this button first then press the last two di...

Страница 9: ...same channel CABLE WITH CONVERTER DESCRAMBLER BOX OR SATELLITE BOX If your cable service supplies you with a converter box or if you use a satellite system you can use the basic connection shown in t...

Страница 10: ...it from running down After you finish using the TV VCR be sure you unplug the car battery cord from the ciga rette lighter socket 1 The supplied indoor antenna is adequate when your vehicle is station...

Страница 11: ...L but ton to point to AUTO PRESET Then press the F FWD B button The tuner scans and memorizes all active channels in your area NOTES The TV VCR distinguishes between standard TV channels and cable ch...

Страница 12: ...ETTING TIME 5 40PM SETTING CLOCK B AUTO CLOCK ON AUTO CLOCK CH AUTO MANUAL CLOCK SET D S T OFF SETTING CLOCK AUTO CLOCK ON B AUTO CLOCK CH AUTO MANUAL CLOCK SET D S T OFF M E N U TIMER PROGRAMMING PIC...

Страница 13: ...int to AUTO PRESET Then press the F FWD B button The tuner scans and memorizes all the active channels in your area 3 After scanning The tuner stops on the lowest memorized channel M E N U TIMER PROGR...

Страница 14: ...RCH CHANNEL SET UP B ADD DELETE CH TV AUTO PRESET 08 ADD DELETE DAYLIGHT SAVING TIME Select this feature and the TV VCR s clock automati cally will advance one hour in April then reverse one hour in O...

Страница 15: ...s picture controls BRIGHT CON TRAST COLOR TINT and SHARPNESS are preset to factory specifications Although they are usually the best you may need to make some further adjustments for a natural lookin...

Страница 16: ...F FWD B or REW s button Press the MENU but ton on the remote control to return to TV mode WHEN THE CLOSED CAPTION MODE IS ON The On Screen Display will disappear after 5 sec onds This is also true wh...

Страница 17: ...ted TV 14 Unsuitable for children under 14 TV MA Mature audience only 4 Exit the V Chip setting mode Press the MENU button on the remote control to return to original mode MPAA RATING SET UP Make sure...

Страница 18: ...matically 2 To begin playback Press the PLAY button Note If any menu is activated on the screen the PLAY button does not function Press the MENU but ton to clear the menu then press the PLAY button If...

Страница 19: ...creen during playback the Still mode Press the PAUSE STILL button during playback Only tapes recorded in the SLP mode will show the least amount of lines Press the PLAY button to return to playback NO...

Страница 20: ...Then press the F FWD B button 2 Set RENTAL to ON Press the PLAY K or STOP L but ton to point to RENTAL Press the F FWD B or REW s button until ON appears 3 Exit the Rental setting Press the MENU butto...

Страница 21: ...This function enables you to set a recording length simply by pressing the REC OTR button on the TV VCR Make sure TV VCR power must be turned on Insert a cassette tape with its erase prevention tab in...

Страница 22: ...channel to be recorded is selected on the cable box or satellite box 4 Select once every day or weekly recording For once recording Press the PLAY K up button until the desired date appears Example 7...

Страница 23: ...atch ing TV TIMER REC STANDBY starts flashing on the TV screen 2 minutes before the programmed start time TIMER PROGRAMMING CH DATE BEGIN END B 61 7 06 FRI 7 12P M TIMER PROGRAMMING CH DATE BEGIN END...

Страница 24: ...UP Press the MENU button on the remote control Press the PLAY K or STOP L but ton to point to USER S SET UP Then press the F FWD B button M E N U TIMER PROGRAMMING PICTURE CONTROL SETTING CLOCK CHANNE...

Страница 25: ...the remote control until SLEEP TIMER appears To view the time left for sleep timer press the WAKE UP SLEEP button twice then press the MENU button on the remote control to exit the sleep timer settin...

Страница 26: ...our help line at 1 800 968 3429 to locate an Authorized Service Center To check the Counter Clock and Channel number on the TV screen press the DISPLAY button on the remote control Each time you pres...

Страница 27: ...video tape You are experiencing when making a copy of a video tape copy guard protection Can not set the auto clock to ON Make sure the AC cord is connected to an AC outlet CLOSED CAPTION PROBLEM POSS...

Страница 28: ...Cable companies often designate channels with letters or letter number combinations Please check with your local cable company The following is a chart of common cable channel designations TV Display...

Страница 29: ...ccionar un modo desde un men par ticular Por ejemplo IDIOMA o ADJUST DE USER 6 Bot n de reproducci n PLAY P lselo para ini ciar la reproducci n Bot n K P lselo para seleccionar los modos de ajuste des...

Страница 30: ...rior al 99 pulse primero este bot n y luego pulse los dos ltimos d gi tos Para seleccionar el canal 125 pulse primero el bot n 100 y luego el 2 y el 5 16 Bot n de men MENU P lselo para visualizar el m...

Страница 31: ...v a sat lite usted podr utilizar las conexiones b sicas Utilizando estas conexiones usted tambi n podr grabar canales codificados Sin embargo la selecci n de los canales deber hacerse con el convertid...

Страница 32: ...se de utilizar solamente el cable de bater a de autom vil suministrado La utilizaci n de otro cable puede estropear el televisor videograbadora Aseg rese de que el z calo no tenga ceniza ni otros rest...

Страница 33: ...e recepci n En este caso pruebe el preajuste autom tico de nuevo en los condiciones finas de recepci n 5 El sintonizador se para en el canal memorizado m s bajo Si desea recuperar canales seleccionado...

Страница 34: ...34 ES 0B19 MEMO...

Страница 35: ...35 ES 0B19 MEMO...

Страница 36: ...ance commercial use such as hotel rental or office use of this product or damage which results from fire flood lightning or other acts of God THIS WARRANTY DOES NOT COVER PACKING MATERIALS ANY ACCESSO...

Отзывы: