background image


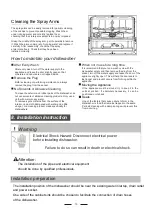
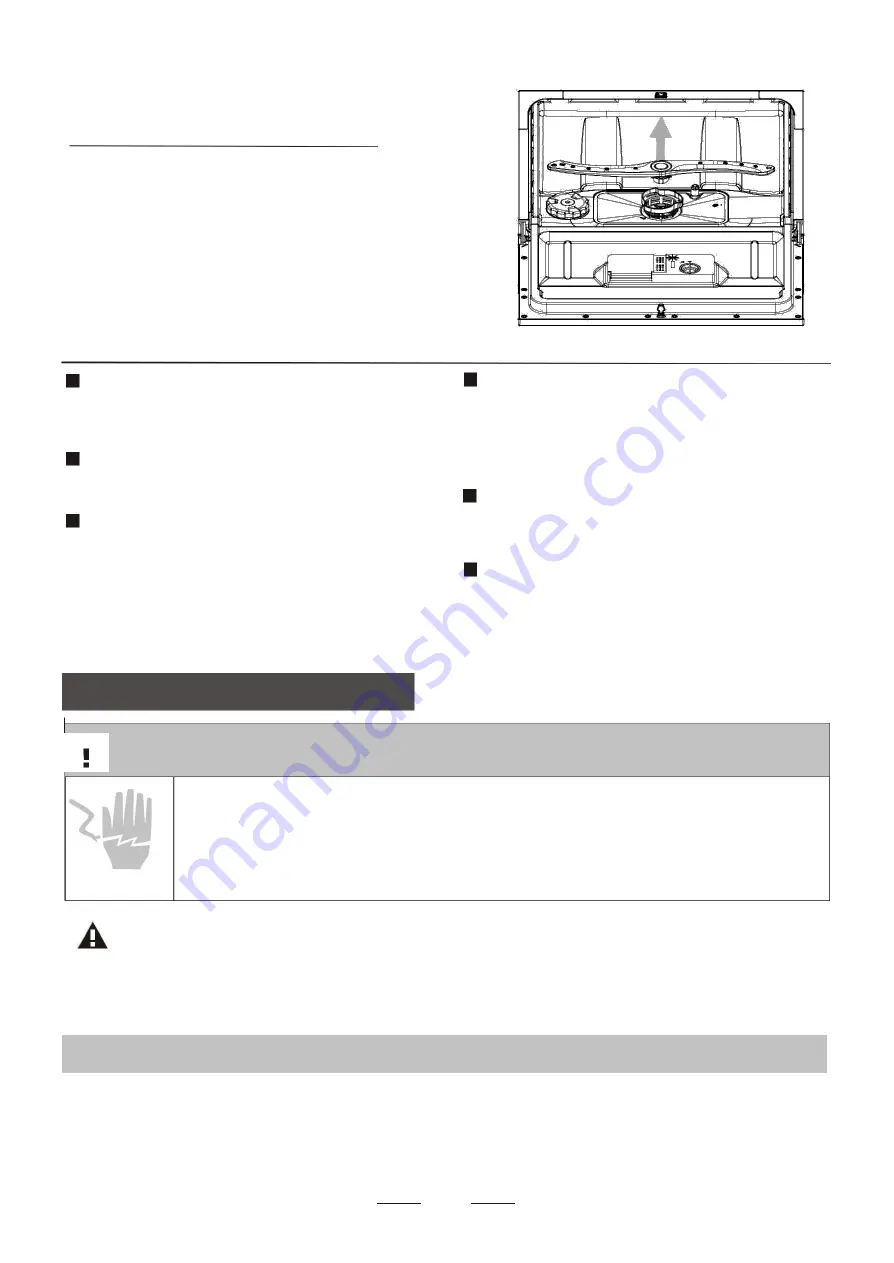
Cleaning the Spray Arms 


The spray arms can be easily removed for periodic cleaning 


of the nozzles to prevent possible clogging. Wash them 
under running water and carefully replace them, 
checking that their rotary movement is in no way impeded. 


Grasp the middle of the spray arm, pull it upwards to remove 


it. Wash the arms under a jet of running water and replace it 
carefully. After reassembly, check that the spray 
arms rotate freely. Check that they have been 
installed correctly. 


How to maintain your dishwasher  


 After Every Wash 


After every wash, turn off the water supply to the 
appliance and leave the door slightly open so that 
moisture and odours are not trapped inside. 


 Remove the Plug 


Before cleaning or performing maintenance, always 
remove the plug from the socket. 


 No Solvents or Abrasive Cleaning 


To clean the exterior and rubber parts of the dishwasher, do 
not use solvents or abrasive cleaning products. Only use a 
cloth with warm soapy water. 


To remove spots or stains from the surface of the 
interior, use a cloth dampened with water and a little 
vinegar, or a cleaning product made specifically for 
dishwashers. 


 When not in use for a long time 


It is recommend that you run a wash cycle with the 
dishwasher empty and then remove the plug from the 
socket, turn off the water supply and leave the door of the 
appliance slightly open. This will help the door seals to 
last longer and prevent odours from forming within the 
appliance. 


 Moving the Appliance 


If  the  appliance  must  be  moved,  try  to  keep  it  in  the 
vertical  position.  If  absolutely  necessary,  it  can  be 
positioned on its back. 


 Seals 


One of the factors that cause odours to form in the 
dishwasher is food that remains trapped in the seals. 
Periodic cleaning with a damp sponge will prevent this 
from occurring. 


8. Installation instruction 


Warning 


Electrical Shock Hazard: Disconnect electrical power 
before installing dishwasher. 


Failure to do so can result in death or electrical shock. 


Attention: 


The installation of the pipes and electrical equipment 


should be done by qualified professionals. 


Installation preparation 


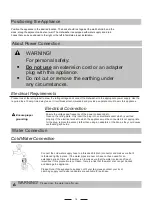
The installation position of the dishwasher should be near the existing water inlet tap, drain outlet 

and power socket. 

One side of the cabinet sink should be chosen to facilitate the connection of drain hoses 

of the dishwasher. 


15 


Содержание DW3202A-W

Страница 1: ...Dishwasher Instruction Manual DW3202A W ...

Страница 2: ...ck Operating Guide 2 3 Operating Instruction 3 Control Panel 3 Dishwasher Features 3 4 Before Use 4 A Loading the Salt into the Softener 4 B Filling the Rinse Aid Dispenser 5 C Function of Detergent 6 5 Loading the Dishwasher Basket 8 Loading the Dishwasher Baskets 9 Loading the Basket 9 Cutlery Basket 10 6 Starting a washing programme 11 Wash Cycle Table 11 Turning on the Appliance 11 Change the ...

Страница 3: ...water or other liquids Please unplug before cleaning and before doing any maintenance on the appliance Use a soft cloth moisten with mild soap and then use a dry cloth to wipe it again EARTHING INSTRUCTIONS This appliance must be earthed In the event of a malfunction or breakdown earthing will reduce the risk of an electric shock by providing a path of least resistance of electric current This app...

Страница 4: ... equivalent For plastic items not marked check the manufacturer s recommendations Use only detergent and rinse additives designed for an automatic dishwasher Never use soap laundry detergent or hand washing detergent in your dishwasher Children should be supervised to ensure that they do not play with the appliance The door should not be left open since this could increase the risk of tripping If ...

Страница 5: ...ecycling centre Cut off the power supply cable and make the door closing device unusable Cardboard packaging is manufactured from recycled paper and should be disposed of in the waste paper collection for recycling By ensuring this product is disposed of correctly you will help prevent potential negative consequences for the environment and human health which could otherwise be caused by inappropr...

Страница 6: ...the programme 1 A running cycle can only be modified if it has been running for a short time otherwise the detergent may have already been released and the water already drained If this is the case the detergent dispenser must be refilled 2 Press the Start Pause button then press the program button for more than 3 seconds to cancel the running programme 3 Select a new programme WARNING Add additio...

Страница 7: ...t or pause the dishwasher 8 9 10 11 4 5 6 8 Extra cleaning indicator 9 Child lock indicator Express indicator 10 11 Water faucet indicator 12 Program indicator light Extra drying 13 indicators To show Extra drying function Rinse Aid Warning Light To be on when the 14 Rinse aid dispenser needs to be refilled 7 Display screen to show the remaining time And the state running state delay time etc 15 S...

Страница 8: ...our machine Place the end of the funnel supplied into the hole and pour about 1kg of salt It is normal for a small amount of water to come out of the salt container 2 After filling the container screw the cap back on tightly clockwise Usually the salt warning light will switch off within 2 6 days after the salt container has been filled with salt VERY IMPORTANT Immediately after filling the salt i...

Страница 9: ...ll move into standby status There are 6 levels of salt consumption It is recommended to select the level according to below table Water Hardness level Setting on the Digital display stalls dH1 mmol l 2 water softener 0 5 0 0 9 1 H1 6 11 1 0 2 0 2 H2 12 17 2 1 3 0 3 H3 18 22 3 1 4 0 4 H4 23 34 4 1 6 1 5 H5 35 45 6 2 8 0 6 H6 Note 1 German degree of measurement for the water hardness 2 millimol inte...

Страница 10: ...k dot decreases You should never let the rinse aid get below 1 4 full C Rinse Aid indicator As the rinse aid diminishes the size of the black dot on the rinse aid level indicator changes as illustrated below Full 3 4 full l 1 2 full l 1 4 full Should refill to eliminate spotting Empty 1 2 3 1 To open the dispenser turn the cap to open left arrow and lift it out 2 Pour the rinse aid into the dispen...

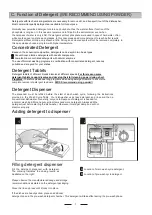
Страница 11: ... different brands dissolve at different speeds For this reason some detergent tablets cannot dissolve and develop their full cleaning power during short Programs Therefore please use long programs when using detergent tablets to ensure the complete removal of detergent residuals SWISS recommend using powder Detergent Dispenser The dispenser must be refilled before the start of each wash cycle foll...

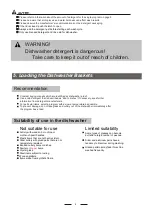
Страница 12: ...as kind to dishes If necessary seek further information from detergent manufacturers For particular items select a program with as low a temperature as possible To prevent damage do not take glass and cutlery out of the dishwasher immediately after the program has ended Suitability of use in the dishwasher Not suitable for use Cutlery with wooden horn china or mother of pearl handles Plastic items...

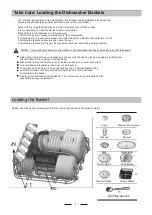
Страница 13: ...shed in the dishwasher as they could easily fall out of the basket Load hollow items such as cups glasses pans etc with the opening facing downwards so that water cannot collect in the container or a deep base Dishes and items of cutlery must not lie inside one another or cover each other To avoid damage to glasses they must not be touched Long bladed knives stored in an upright position are a pot...

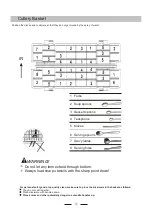
Страница 14: ... spoons 7 Gravy ladles 8 Serving forks WARNING Do not let any item extend through bottom Always load sharp utensils with the sharp point down For personal safety and a top quality clean make sure to place the silverware in the basket as follows They do not nest together Place silverware with handles down Place knives and other potentially dangerous utensils handles up 10 ...

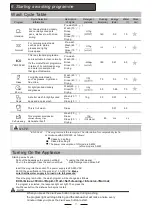
Страница 15: ...0 Fruit This is fruit wash Rinse 0 01 4 3 This program provides an Wash 70 15g Rinse 80 Self cleaning effective cleaning of the Rinse 65 Or1piece 0 58 6 6 dishwasher itself Drying NOTE EN 5 0242 This programme is the test cycle The information for comparability test in accordance with EN 50242 as follows Capacity 6 setting Rinse aid setting 6 The power consumption of off mode is 0 45W left on mode...

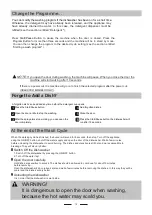
Страница 16: ... door a little to stop the washing After the spray arms stop working you can open the door completely 4 5 6 Add forgotten dishes Close the door Press the Start Pause button the dishwasher will run after 10 seconds At the end of the Wash Cycle When the working cycle has finished the buzzer will sound for 8 seconds then stop Turn off the appliance using the ON OFF button shut off the water supply an...

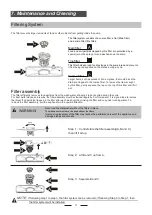
Страница 17: ...ssembly The filter efficiently removes food particles from the wash water allowing it to be recycled during the cycle For best performance and results the filter assembly must be cleaned regularly For this reason it is a good idea to remove the larger food particles trapped in the filter after each wash cycle by rinsing the filter and cup under running water To remove the filter assembly pull the ...

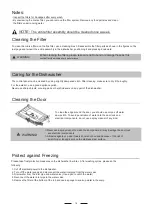
Страница 18: ...rp objects scouring pads or harsh cleaners on any part of the dishwasher Cleaning the Door To clean the edge around the door you should use only a soft warm damp cloth To avoid penetration of water into the door lock and electrical components do not use a spray cleaner of any kind n Never use a spray cleaner to clean the door panel as it may damage the door lock WARNING and electrical components n...

Страница 19: ...tle vinegar or a cleaning product made specifically for dishwashers When not in use for a long time It is recommend that you run a wash cycle with the dishwasher empty and then remove the plug from the socket turn off the water supply and leave the door of the appliance slightly open This will help the door seals to last longer and prevent odours from forming within the appliance Moving the Applia...

Страница 20: ...cal Connection Ensure the voltage and frequency of the power corresponds to those on the rating plate Only insert the plug into an electrical socket which is earthed properly If the electrical socket to which the appliance must be connected is not appropriate for the plug replace the socket rather than using an adaptors or the like as they could cause overheating and burns Water Connection Cold Wa...

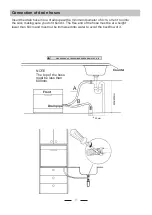
Страница 21: ... into the sink making sure you don t bend it The free end of the hose must be at a height lower than 60cm and must not be immersed into water to avoid the backflow of it PLEASE HANG UP THE DRAIN HOSE EITHER WAY OF A B NOTE The top of the hose must be less than 600mm A Front B Drain pipe Counter MAX600mm 40mm 17 ...

Страница 22: ...a drain hose extension make sure to use a similar drain hose It must not exceed 4 meters as the cleaning effect of the dishwasher could be reduced Starting the dishwasher The following things should be checked before starting the dishwasher 1 The dishwasher is level and fixed properly 2 The inlet valve is open properly 3 Inlet hose connections are fully tightened and not leaking 4 The wires are ti...

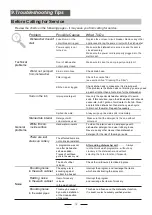
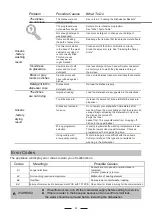
Страница 23: ...cle to drain out the water Repeat if necessary Spilled rinse aid Always wipe up rinse aid spills immediately Stained tub interior Detergent with Make sure that the detergent is the one without colourant was used colourant White film on Hard water minerals To clean the interior use a damp sponge with General inside surface dishwasher detergent and wear rubber gloves problems Never use any other cle...

Страница 24: ...ttle rinse aid Increase the amount of rinse aid Refill the rinse aid dispenser Dishes are removed Do not empty your dishwasher immediately after Unsatis too soon washing Open the door slightly so that the steam can factory escape Begin unloading the dishwasher only once the dishes are cooled off drying Empty the lower basket first This prevents water from dropping off result dishes in the upper ba...

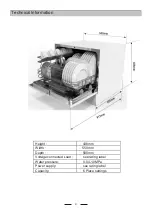
Страница 25: ...Technical Information Height 438mm Width 550mm Depth 500mm Voltage connected Load see rating label Water pressure 0 04 1 0MPa Power supply see rating label Capacity 6 Place settings 21 ...

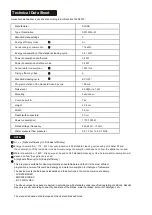
Страница 26: ...iency 2 Energy consumption 174 kWh per year based on 280 standard cleaning cycles using cold water fill and the consumption of the low power modes Actual energy consumption will depend on how the appliance is used 3 Water consumption 1820 litres per year based on 280 standard cleaning cycles Actual water consumption will depend on how the appliance is used 4 A highest efficiency to G lowest effici...

Отзывы: