

c. 3mm
c. 3mm
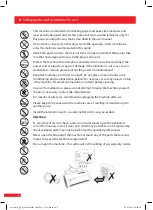
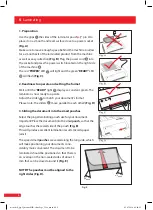
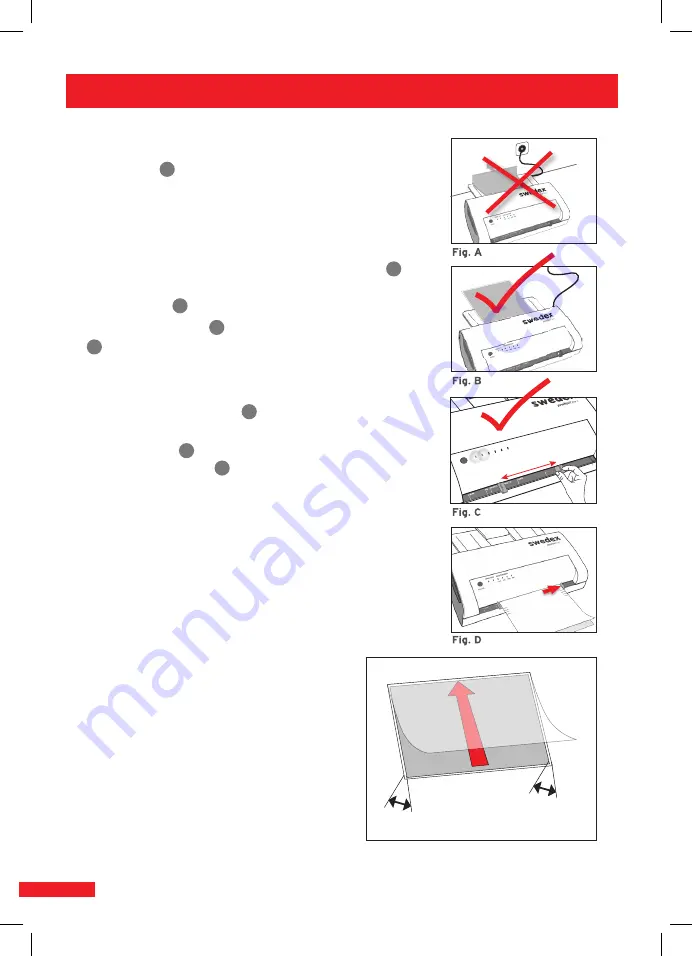
1. Preparation
Use the grips
J
the sides of the laminator pouch
jet
|® pro
II
to
place it on a smooth and level surface close to a power socket
(Fig. A)
.
Make sure to leave enough space behind the machine to allow
for a smooth exit of the laminated product from the machine
as well as easy collection
(Fig. B)
. Plug the power cord
A
into
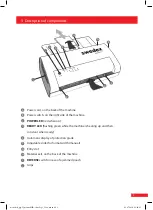
the socket and press the power switch located on the right side
of the machine
B
.
The red “
POWER
” LED
C
will light and the green “
READY
” LED
D
will flash
(Fig. C)
.
2. Readiness to operate and setting the format
Wait until the “
READY
” light
D
displays a constant green. The
laminator is now ready to operate.
Adjust the slider
F
to match your document’s format.
Please note, the sliders
F
move parallel to each other!
(Fig. D)
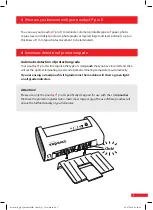
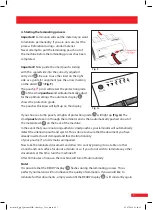
3. Sliding the document into the smartpouches
Select the proper laminating pouch size for your document.
Important! Place the document into the smart
pouch
, so that the
edge touches the sealed side of the pouch
(Fig. E)
.
This will produce excellent lamination results. (Avoids paper
jams!)
The speed smart
pouches
are sealed along the long side, which
will make positioning your documents consi-
derably more convenient. The document to be
laminated should be positioned so that there is
an overlap on the non-sealed sides of about 3
mm that can be closed around it
(Fig. E)
.
NOTE! The pouches must be aligned to the
right slider (Fig. D).
Fig. E
6
5
Laminating
REVERSE
POWER READ
Y
PROTECTION-GRADE
medi
maxi
mega
giga
monolith_pjp-II_manual(GB)-ohneLogo_Tray_neu.indd 6
03.07.2018 06:40:25


