


31
Click for contents
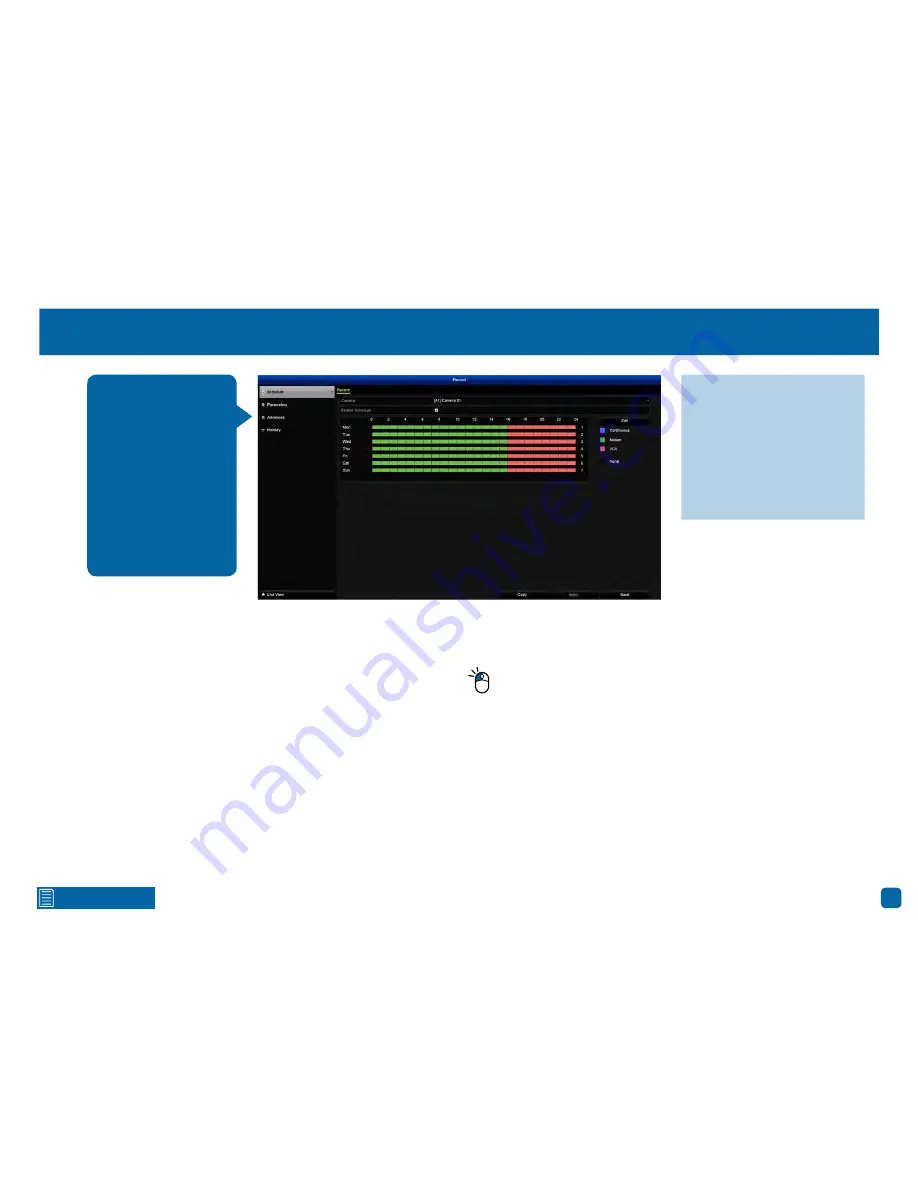
Record: Schedule
Camera:
Select a camera that you would like to edit.
Enable Schedule:
This is enabled by default. You can click the checkbox to
disable.
There are two ways that you can edit the schedule. You can click the “Edit”
button or you can use the mouse to drag the pen tool over segments that you
want to change.
Edit:
Click this button to edit. You can edit the schedule for one or more days
and different starting and ending times. You can select Continuous, Motion or
VCA for the recording type.
Continuous:
Your DVR will continuously record regardless of what is happen-
ing.
Motion:
Your DVR will only record when motion is detected.
VCA:
Select this mode when using Line Crossing Detection and or Intrusion
Detection for the camera that you’ve selected to edit.
None:
As the name suggests, your DVR will not record anything.
To edit using the pen tool, select the recording type (Continuous, Mo-
tion or VCA) then move the pen tool over the schedule. Click and hold
the mouse then drag the pen tool over the time segments that you want to
change. You can also edit each time segment individually.
In the above example, Motion has been enabled for 12:00 a.m. to 04:00 p.m.
and VCA has been enabled for 04:00 p.m. to 12:00 a.m. Monday to Sunday.
By default, a Motion
schedule has been en-
abled for each camera
connected, however you
change the schedule
to suit your needs. The
schedule is presented
as a 24-hour 7 days a
week grid and is color
coded to represent the
event type.
·
Don’t forget to click “Apply”
to save settings.
·
Use the “Copy” function to
apply all settings to the other
cameras.
·
Click the “Back” button to go
back to the Menu.


