


21
Click for contents
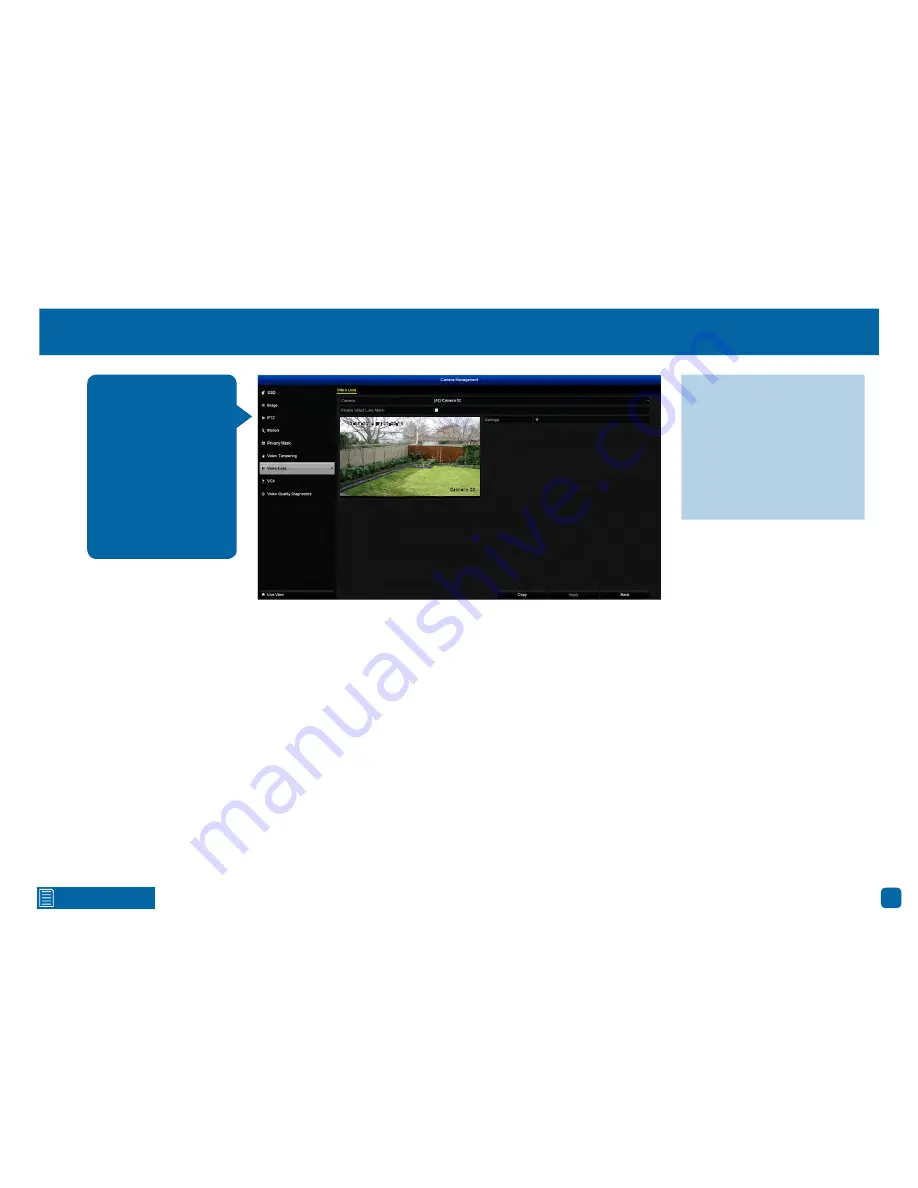
Camera: Video Loss
Camera:
Select a camera that you would like to edit.
Enable Video Loss Alarm:
Click the checkbox to enable.
Settings:
Here you can define what will happen when the camera you’ve se-
lected has no incoming video signal:
Arming Schedule:
Adjust your arming schedule by selecting a start day and a
time period (24-hour time). Click the “Copy” button to apply all settings to the
other cameras. Click “Apply” to save settings then click “OK” to exit.
Linkage Action:
Options available are full screen monitoring, enabling your
DVR’s internal buzzer, send alerts to the SwannView Plus Windows software
(software must be running on your computer to receive alerts) and to send an
email. Click “Apply” to save settings then click “OK” to exit.
If your DVR doesn’t re-
ceive an active video
signal from one or more
cameras, this is regard-
ed as a potential alarm
event. When a video
input has no incoming
signal, a “NO VIDEO”
message will appear
on-screen.
Camera 02
12-09-2016 Fri 09:30:15
·
Don’t forget to click “Apply”
to save settings.
·
Use the “Copy” function to
apply all settings to the other
cameras.
·
Click the “Back” button to go
back to the Menu.


