SVAT ClearVu CVDVR200 Скачать руководство пользователя страница 9

MENU SETTINGS

Main Menu Setting

Camera Select

1. When CAMERA SELECT option is selected, 4 different images from all 

cameras are initially displayed. (The default setting is 1234 all cameras on.)

2.  Use the view button on the front panel to select the camera for real-time 

viewing on the TV screen.    CH 1 (Camera 1),    CH 2 (Camera 2),    

CH 3 (Camera 3),    CH 4 (Camera 4).

3.  You can also use the SELECT button for different combinations of camera 

viewing. For example,

a). When you choose [----], all cameras will be disabled.

b). When you choose [1234], all cameras will be activated.

c). When choose [---4], only camera 4 will be activated.

d). When you choose [12-4], camera 1,2 and 4 will be activated.

* There are 16 different combinations of camera view for your choice.

Record Select

1. When you select RECORD SELECT , you may turn on or turn off the recording 

function of different channels (The default setting is 1234 all cameras on.).

2.  The selected camera channel on RECORD SELECT menu is same as CAMERA 

SELECT options.

3.  Please be reminded that only selected camera will record real-time events 

during the recording period.

Record Mode

1.  There are two different record mode - EACH and QUAD to be selected.

2.  When you set EACH mode, you can view each image display in a single full 

screen by using the button on front panel of the DVR.

3.  When you set QUAD mode, you can see the images from the cameras in 

the quad screen which shows four sections on the single TV screen.
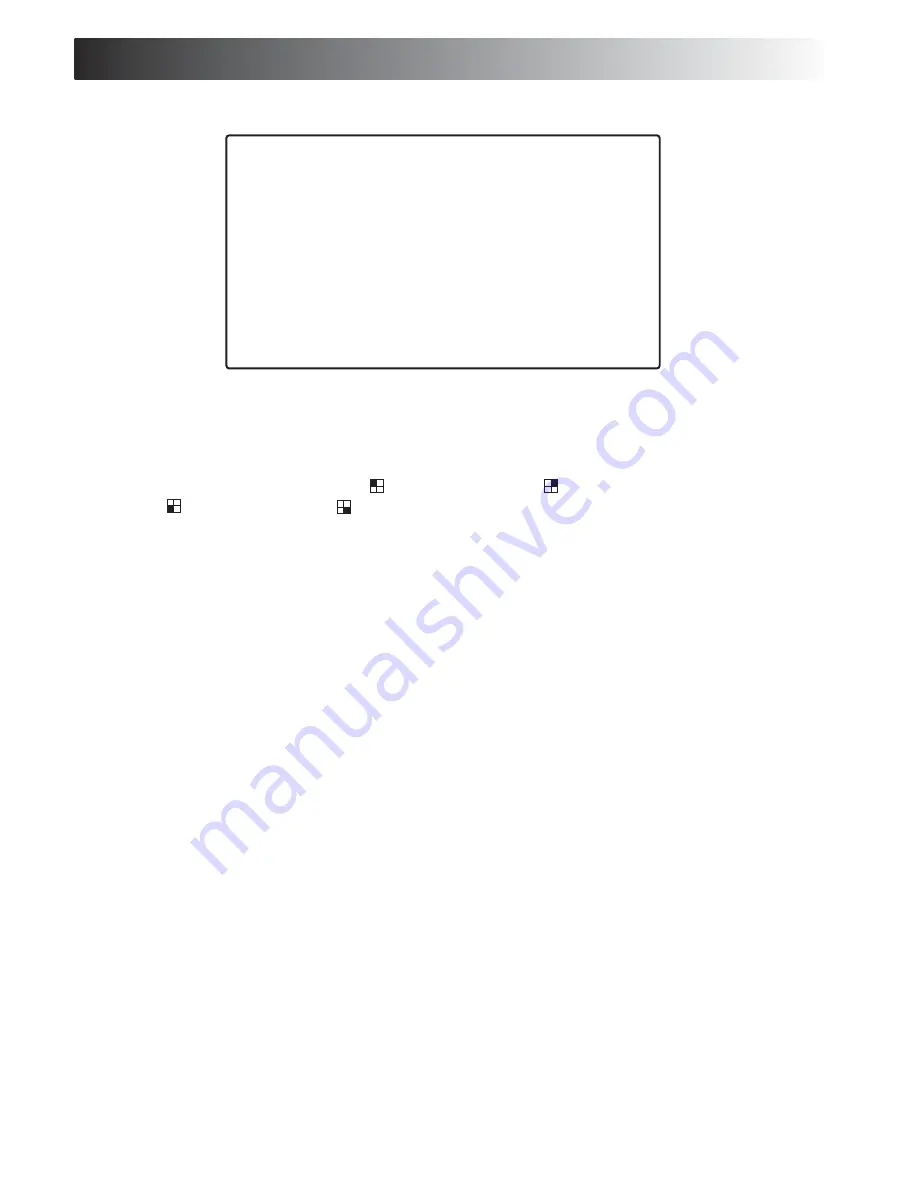
Main Menu

> CAMERA SELECT 

1234

RECORD SELECT 

1234

RECORD MODE 

EACH

RECORD FRAMERATE 

30

VIDEO QUALITY 

NORMAL

RECORD SCHEDULE 

Default setting 0~24 record.

SUB MENU

HARD DRIVE SETUP

SENSOR SETUP

NETWORK SETUP

PRESS (< , >) THEN (SELECT)

PRESS (MENU) TO EXIT

Содержание ClearVu CVDVR200

Страница 1: ...User Manual Model CVDVR200 www svat com now you can see...

Страница 2: ...ot use this product near water 5 Do not place this product on an unstable cart stand or table 6 Do not allow anything to rest on the power cords Do not place this product in a location where the cords...

Страница 3: ...ECT Select Button 12 Move Up Button 13 Move Down Button 14 MENU OSD Menu Button View Control Buttons 15 View Full Screen from Camera 1 16 View Quad Screen and display all cameras 17 View Full Screen f...

Страница 4: ...for recording SENSOR ALARM INSTALLATION When you want to install the sensor and or alarm to the DVR please refer to the following picture for installation 1 Sensor Connect the wire one end to sensor a...

Страница 5: ...ctory has preset various functions as following list If it can meet your usage requirement please just follow our instructions to use the unit If you want to change any pre set function please follow...

Страница 6: ...HDD SIZE Depends on HDD you choose MASTER HDD USED MB MASTER HDD FORMAT for format master HDD SLAVE HDD SIZE Depends on HDD you choose SLAVE HDD USED MB SLAVE HDD FORMAT for format master HDD PRESS T...

Страница 7: ...d it will notify the hard disk full warning by displaying the current hard disk ID in blinking Please make sure the Time is correct before recording If no please refer to Time Set section to change th...

Страница 8: ...peats the skipping and decoding one frame till it meets the end of event recorded 6 Fast forward function will work in FFx2 FFx4 FFx8 cycle During playback if the user presses button the playback mode...

Страница 9: ...lect 1 When you select RECORD SELECT you may turn on or turn off the recording function of different channels The default setting is 1234 all cameras on 2 The selected camera channel on RECORD SELECT...

Страница 10: ...to the DVR it will add additional function to your recording 1 Use SELECT button to change the record mode 2 You may choose T for non stop automatic recording 3 The selection S is for sensor recordin...

Страница 11: ...u press the MENU button your setting is memorized by the system Full Screen by Sensor When FULL SCREEN BY SENSOR is selected you can choose ON or OFF this function If you choose ON when sensor device...

Страница 12: ...driver for recording 7 Slave HDD Format If you format the hard disk driver it will crease all the data recorded on the Slave hard disk drive r HDD Format 1 When you select HDD FORMAT a password input...

Страница 13: ...ough DVR is cut off by an intruder the sensor recording will start NETWORK SETUP NOTE THE NETWORK SETUP MENU IS USED ONLY FOR THE SYSTEM WITH OPTIONAL LAN INTERFACE IF YOUR SYSTEM WITH BUILT IN LAN IN...

Страница 14: ...ork properly No color display on screen Only black and white 1 Check whether the Camera and Display are working with color function 2 Check whether the Camera and Display are using same specification...

Страница 15: ...rd function The system is working with key lock function If the system setting is with key lock while recording you are requested to key in password to release key lock function Then it can stop recor...

Страница 16: ...For Further Assistance call 1 866 946 7828 www svat com now you can see...

Отзывы: