background image

7-39

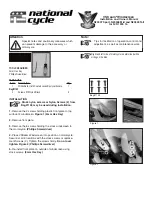
FRONT WHEEL REMOVAL

1. Place the motorcycle on the

side stand.

2. Remove the cap. Loosen the

axle holder bolt 

1

. Loosen the

axle 

2

 temporarily.

NOTE: A special tool is necessary
to loosen the axle. The special
tool is available at your Suzuki
dealer.

3. Place an accessory service

stand or equivalent under the
swingarm to help stabilize the
rear end. Carefully position a
jack under the engine or chas-
sis tubes and raise the jack
until the front wheel is slightly
off the ground.

4. Turn the axle counterclockwise

and draw it out.

5. Remove the speed sensor 

3

.

NOTICE

Improper jacking may cause
damage to the oil filter.

Do not place the jack under the
oil filter when jacking up the
motorcycle.

Содержание Intruder VL800

Страница 1: ......

Страница 2: ...se instructions explicitly you will ensure a long trouble free operating life for your motorcycle This motorcycle also conforms to the U S Environmental Protection Agency EPA and California Air Resour...

Страница 3: ...motorcycle Suzuki reserves the right to make production changes at any time without notice and without incur ring any obligation to make the same or similar changes to vehi cles previously built or so...

Страница 4: ...ND COOLANT RECOMMENDATIONS CONTROLS EQUIPMENT AND ADJUSTMENTS BREAK IN AND INSPECTION BEFORE RIDING RIDING TIPS ACCESSORY USE AND MOTORCYCLE LOADING INSPECTION AND MAINTENANCE TROUBLESHOOTING STORAGE...

Страница 5: ......

Страница 6: ...THING 1 3 SPECIAL SITUATIONS REQUIRE SPECIAL CARE 1 4 KNOW YOUR LIMITS 1 5 BE EXTRA SAFETY CONSCIOUS ON BAD WEATHER DAYS 1 5 PRACTICE AWAY FROM TRAFFIC 1 6 INSPECTION BEFORE RIDING 1 6 ACCESSORIES AND...

Страница 7: ...become better riders they also get more enjoyment from the free dom unique to motorcycling Please remember MOST ACCIDENTS CAN BE AVOIDED The most common type of motor cycle accident in the U S occurs...

Страница 8: ...ind and save your eyes from airborne hazards like bugs dirt or pebbles kicked up by tires IF A COLLISION IS IMMINENT DO SOMETHING Many riders fear locking up their brakes or haven t learned to swerve...

Страница 9: ...can improve his or her riding skills and pick up a few new skills through these courses Some insurance companies even offer discounts to course gradu ates SPECIAL SITUATIONS REQUIRE SPECIAL CARE Of c...

Страница 10: ...e influence of alcohol or other drugs Alcohol illegal drugs and even some prescription and over the counter drugs can cause drowsiness loss of coordination loss of balance and especially the loss of g...

Страница 11: ...downs far from home ACCESSORIES AND LOADING The accessories you use with your motorcycle and the manner in which you load your gear onto the bike might create hazards Aerody namics handling balance an...

Страница 12: ...le CONCLUSION Traffic road and weather condi tions vary Other motorist s actions are unpredictable Your motorcycle s condition can change These factors can best be dealt with by giving every ride your...

Страница 13: ......

Страница 14: ...2 1 2 FUEL OIL AND COOLANT RECOMMENDATIONS FUEL 2 2 ENGINE OIL 2 4 GEAR OIL 2 5 ENGINE COOLANT SOLUTION 2 6...

Страница 15: ...grade gasoline or another brand because there are differences between brands Oxygenated fuels which meet the minimum octane requirement and the requirements described below may be used in your motorcy...

Страница 16: ...meets these requirements check with the service station operator or the fuel supplier NOTE To help minimize air pollution Suzuki recommends that you use oxygenated fuels Be sure that any oxygenated f...

Страница 17: ...pecially formulated for your SUZUKI product and contributes to the desired motorcycle perfor mance and ideal riding experi ence SAE Engine Oil Viscosity Suzuki recommends the use of SAE 10W 40 engine...

Страница 18: ...These oils can affect engine life and clutch performance API SG SH SJ SL SM or SN Recommended API SH SJ SL or SM API SN Not recommended GEAR OIL Use an SAE90 hypoid gear oil which is rated GL 5 under...

Страница 19: ...e and ideal riding experience WARNING Engine coolant is harmful or fatal if swallowed or inhaled Solution can be poisonous to animals Do not drink antifreeze or cool ant solution If swallowed do not i...

Страница 20: ...ry to dilute SUZUKI SUPER LONG LIFE COOLANT when replacing coolant SUZUKI LONG LIFE COOLANT Green Water for Mixing Use distilled water only Water other than distilled water can cor rode and clog the a...

Страница 21: ......

Страница 22: ...TS LOCATION OF PARTS 3 2 KEY 3 5 IGNITION SWITCH 3 5 INSTRUMENT PANEL 3 8 LEFT HANDLEBAR 3 14 RIGHT HANDLEBAR 3 16 FUEL TANK CAP 3 18 GEARSHIFT LEVER 3 19 REAR BRAKE PEDAL 3 19 HELMET HOLDER 3 20 SIDE...

Страница 23: ...OLS EQUIPMENT AND ADJUSTMENTS LOCATION OF PARTS 1Clutch lever 2Left handlebar switches 3Instrument panel 4Front brake fluid reservoir 5Right handlebar switches 6Throttle grip 7Front brake lever 8Fuel...

Страница 24: ...3 3 VL800 9Spark plugs 0Battery and main fuse ATools BHelmet holder CGearshift lever DFootrests EEngine coolant reservoir FSide stand GFuses HPassenger footrests VL800T...

Страница 25: ...3 4 VL800 IAir cleaner JIgnition switch KEngine oil filler cap LEngine oil inspection window MEngine oil drain plug NEngine oil filter ORear brake light switch PRear brake pedal VL800T...

Страница 26: ...e will not start The key can be removed ON position The ignition circuit is completed and the engine can be started The headlight front turn signal light and taillight will automatically turn on The k...

Страница 27: ...ING Turning the ignition switch to the P PARKING or LOCK position while the motorcycle is moving can be hazardous Moving the motorcycle while the steering is locked can be hazardous You could lose you...

Страница 28: ...3 7 The key hole can be covered by turning the lid Align the lid hole position with the key hole position when inserting the key...

Страница 29: ...al display SPEEDOMETER 1 The speedometer indicates the road speed in kilometers per hour and miles per hour If the speedometer needle does not point to zero follow the proce dure below to reset the sp...

Страница 30: ...ned on may adversely affect the engine Make sure that the oil pressure indicator light has turned off before operating the throttle or running the motorcycle NOTICE Riding the motorcycle with the oil...

Страница 31: ...indicates FI continuously and the fuel injection system indicator light blinks the engine will not start When the display indicates CHEC check the following items Make sure that the engine stop switc...

Страница 32: ...ttern shown below for two seconds To change the display push the button 8 The display changes in the order below A B GEAR WARNING Changing the display while rid ing can be hazardous Remov ing a hand f...

Страница 33: ...0 to 999999 NOTE The odometer display locks at 999999 when the total distance exceeds 999999 Trip Meters The two trip meters are resettable odometers They can register two kinds of distances at the sa...

Страница 34: ...level indica tor displays all 5 segments when the fuel tank is full The segment comes on when the fuel level drops below 3 5 L 3 7 US qt The segment blink when the fuel drops below 1 5 L 1 6 US qt NO...

Страница 35: ...witch between the and position will light both the high and low headlight beam This improper operation can dam age the motorcycle s headlight Use the dimmer switch to select only the or position NOTIC...

Страница 36: ...di cators will flash simultaneously when the switch is turned on with the ignition switch in the ON or P position Use the hazard warning lights to warn other traffic during emergency parking or when y...

Страница 37: ...adjuster to the desired position Be sure the adjuster stops in the proper position a projection of the brake lever holder should fit into the depression of the adjuster This motorcycle is delivered f...

Страница 38: ...speed Turn it away from you to decrease engine speed NOTICE Engaging the starter motor for more than five seconds at a time can damage the starter motor and wiring harness from overheating Do not enga...

Страница 39: ...acity 15 5L 4 1US gal 1 Fuel level 2 Filler neck WARNING If you overfill the fuel tank fuel may overflow when it expands due to engine heat or heating by the sun Fuel that overflows can catch fire Sto...

Страница 40: ...arshift lever to downshift Neutral is located between 1st and 2nd gear When neutral is desired depress or lift the lever halfway between 1st and 2nd gear NOTE When the transmission is in neutral the g...

Страница 41: ...rovided to cut off the ignition circuit when the side stand is down and the trans mission is in any gear other than neutral The side stand ignition interlock system works as follows If the side stand...

Страница 42: ...side stand com pletely before starting off NOTICE If you do not take proper pre cautions when parking the motorcycle can fall over Park the motorcycle on firm level ground whenever possi ble If you mu...

Страница 43: ...be performed in seven posi tions To change the spring pre load setting follow the procedure below 1 Place the motorcycle on the side stand 2 Insert the ignition key into the lock and turn it counterc...

Страница 44: ...This motorcycles is delivered from the factory with its adjuster set on position 4 NOTE Use a hook type spring adjuster or Suzuki spring adjuster Part number 09822 00003 to adjust the rear suspension...

Страница 45: ......

Страница 46: ...4 1 4 BREAK IN AND INSPECTION BEFORE RIDING BREAK IN 4 2 INSPECTION BEFORE RIDING 4 3...

Страница 47: ...place some stress on the engine com ponents during break in you must be careful not to load the engine too much Breaking in the New Tires New tires need proper break in to assure maximum performance...

Страница 48: ...this Owner s Manual Pay particular attention to the caution and warning mes sages in MAINTENANCE SCHEDULE section INSPECTION BEFORE RIDING WARNING Failure to inspect your motor cycle before riding an...

Страница 49: ...eness Brakes 3 16 3 19 7 29 Proper pedal and lever operation Correct fluid level No fluid leakage No sponginess Proper pedal and lever play Brake pad wear Brake shoe wear Tires 7 35 Proper pressure En...

Страница 50: ...5 5 1 RIDING TIPS STARTING THE ENGINE 5 2 STARTING OFF AND SHIFTING 5 4 USING THE TRANSMISSION 5 5 RIDING ON HILLS 5 6 STOPPING AND PARKING 5 6 CARRYING A PASSENGER 5 8...

Страница 51: ...ttle completely 2 Squeeze the clutch lever and push the electric starter switch When the Engine is Warm Close the throttle completely and push the electric starter switch When a Warm Engine is Hard to...

Страница 52: ...he engine open ing the throttle or running the motorcycle with the oil pres sure indicator light turned on may adversely affect the engine Make sure that the oil pressure indicator light has turned of...

Страница 53: ...when the side stand is down the engine will stop running WARNING Riding at excessive speeds increases your chances of los ing control of the motorcycle which can result in an acci dent Always ride at...

Страница 54: ...en the motorcycle speed drops below 12 mph 20 km h Gear position mph km h 1st 2nd 12 20 2nd 3rd 19 30 3rd 4th 25 40 4th Top 31 50 Gear position mph km h Top 4th 19 30 WARNING Downshifting when engine...

Страница 55: ...throttle completely 2 Apply the front and rear brakes evenly and at the same time 3 Downshift through the gears as road speed decreases 4 Select neutral with the clutch lever squeezed toward the grip...

Страница 56: ...f control Brake lightly and with care on slippery or irregular surfaces WARNING Following another vehicle too closely can lead to collision As vehicle speeds increase stop ping distance increases pro...

Страница 57: ...this manual The passenger should always hold onto your waist or hips or onto the seat strap or grab bar as equipped Ask your passenger not to make any sudden move ments When you lean going around a c...

Страница 58: ...6 1 6 ACCESSORY USE AND MOTORCYCLE LOADING ACCESSORY USE 6 2 ACCESSORY INSTALLATION GUIDELINES 6 2 LOADING LIMIT 6 3 LOADING GUIDELINES 6 4 MODIFICATION 6 4...

Страница 59: ...h the operation of the suspension steering or other control oper ations Accessories fitted to the han dlebars or the front fork area can create serious stability problems The extra weight will cause t...

Страница 60: ...is the combined weight of the machine accessories pay load rider and passenger When selecting your accesso ries keep in mind the weight of the riders as well as the weight of the accessories The addi...

Страница 61: ...n 130 km h 80 mph when you are carrying cargo or have added accessories Adjust suspension setting as necessary MODIFICATION Modification of the vehicle or removal of original equipment may render the...

Страница 62: ...ENGINE OIL 7 17 ENGINE IDLE SPEED INSPECTION 7 22 THROTTLE CABLE ADJUSTMENT 7 22 FUEL HOSE 7 23 CLUTCH ADJUSTMENT 7 25 ENGINE COOLANT 7 26 FINAL GEAR OIL 7 28 BRAKES 7 29 TIRES 7 35 SIDE STAND IGNITIO...

Страница 63: ...OTORCYCLE REPAIR ESTABLISHMENT OR INDI VIDUAL USING ANY MOTOR CYCLE PART WHICH HAS BEEN CERTIFIED UNDER THE PROVISIONS IN THE CLEAN AIR ACT Sec 207 a 2 WARNING Improper maintenance or fail ure to perf...

Страница 64: ...nd odorless Breathing carbon monoxide can cause death or severe injury Never start the engine or let it run indoors or where there is little or no ventilation NOTICE Servicing electric parts with the...

Страница 65: ...l hose 7 23 I I I I Engine oil 7 17 R R R R R Engine oil filter 7 18 R R Throttle cable play 7 22 I I I I I Throttle valve synchronization I CA only I I Evaporative emission control system California...

Страница 66: ...for the California model Element Interval months 2 12 24 36 48 km 1000 6000 12000 18000 24000 miles 600 4000 7500 11000 14500 Brakes 7 29 I I I I I Brake hose 7 29 I I I I Replace every 4 years Brake...

Страница 67: ...ration and a long life for your motorcycle Be sure that all lubrication is performed during periodic maintenance on the motorcycle Increase fre quency when you use your motor cycle in severe condition...

Страница 68: ...from the battery can cause blindness or severe burns When working near the battery use proper eye protection and gloves Flush eyes or body with ample water and get medi cal care immediately if you su...

Страница 69: ...h down the front end of the rear seat 2 and pull the seat backward 4 Remove the bolts 3 and front seat 4 5 Disconnect the negative terminal 5 6 Remove the cap Disconnect the positive terminal 6 7 Remo...

Страница 70: ...the battery The recycling of materials will help to conserve natural resources For more detailed information about dispos ing or recycling of the used bat tery consult your Suzuki dealer NOTICE Rever...

Страница 71: ...back from the engine to the air intake box without the air cleaner element to stop it Severe engine damage can also occur if dirt enters the engine due to running the engine without the air cleaner el...

Страница 72: ...le on the side stand 2 Loosen the clamp bolt 1 3 Remove the bolts 2 and unhook the hook 3 Pull the air cleaner 4 4 Disconnect the tube 5 and coupler 6 5 Remove the screws Remove the air cleaner case 7...

Страница 73: ...at the air cleaner element is securely in position and is properly sealed NOTE Be careful not to spray water on the air cleaner box when cleaning the motorcycle NOTICE A torn air cleaner element will...

Страница 74: ...after motorcycle opera tion A light brown color indicates that the plug is correct A white or dark insulator indicates that the engine may need adjustment or another plug type may be needed Consult y...

Страница 75: ...Use only the recommended spark plugs Spark Plug Removal 1 Place the motorcycle on the side stand 2 Remove the air cleaner by referring to the AIR CLEANER section 3 Remove the bolt and air cleaner bra...

Страница 76: ...7 15 FRONT FRONT California model REAR REAR California model 5 Pull off the spark plug caps 6 Remove the spark plugs with a spark plug wrench...

Страница 77: ...e spark plug can damage your motorcycle An overly tight or cross threaded spark plug will damage the aluminum threads of the cylinder head Carefully turn the spark plug by hand into the threads If the...

Страница 78: ...ine and wait approximately three minutes 3 Hold the motorcycle vertically and inspect the engine oil level through the engine oil level inspection window The engine oil level should be between the L l...

Страница 79: ...ust pipes can burn you Wait until the engine oil drain plug and exhaust pipes cool before draining oil WARNING Children and pets may be harmed by swallowing new or used oil Repeated prolonged contact...

Страница 80: ...rn the oil filter 4 with a Suzuki cap type oil filter wrench or a strap type filter wrench of the proper size and remove the oil filter 5 Wipe off the mounting surface 5 on the engine where the new fi...

Страница 81: ...posi tion on the cap type filter wrench or on the oil filter Use an oil filter wrench to tighten the filter 2 turns or to specified torque Oil filter tightening torque 20 N m 2 0 kgf m 14 5 lbf ft NO...

Страница 82: ...and allow it to idle for three minutes 11 Turn the engine off and wait approximately three minutes Hold the motorcycle vertically and recheck the oil level on the engine oil inspection window The oil...

Страница 83: ...e motorcycle THROTTLE CABLE ADJUSTMENT 2 0 4 0 mm 0 08 0 16 in To adjust the cable play 1 Loosen the lock nut 1 2 Turn the adjuster 2 so that the throttle grip has 2 0 4 0 mm 0 08 0 16 in play 3 Tight...

Страница 84: ...to the boots when wash ing Wipe off dirt from the boots with a wet cloth when the boots are dirty FUEL HOSE Fuel Tank Lift 1 Place the motorcycle on the side stand Remove the seat by referring to the...

Страница 85: ...be replaced NOTE Lifting up the fuel tank too much can result in the fuel hose becoming bent or twisted Lift the fuel tank as little as possible and disconnect the fuel hose The fuel tank in the above...

Страница 86: ...ust clutch cable play according to the follow ing procedure Minor Adjustment 10 15 mm 0 4 0 6 in Loosen the lock nut 2 Turn the clutch cable adjuster 1 to provide the specified play Major Adjustment 1...

Страница 87: ...n the lock nuts 3 until clutch lever has proper free play 8 Tighten the lock nuts 2 and 3 NOTE Minor adjustment can be performed at the clutch lever side adjuster only ENGINE COOLANT Coolant level The...

Страница 88: ...engine coolant leakage If any defects are found ask your Suzuki dealer to replace the radiator hose with a new one WARNING Engine coolant is harmful or fatal if swallowed or inhaled Solution can be p...

Страница 89: ...motorcycle with too little final gear oil can cause the final drive unit to lock up and cause an accident Check for leaks and the correct level of final gear oil before each use Add oil if necessary T...

Страница 90: ...level in the front brake fluid reservoir and inspect for brake pad wear and leaks WARNING Failure to properly inspect and maintain your motorcycle s brake systems can increase your chance of having a...

Страница 91: ...use or mix with different types of brake fluid WARNING Brake fluid is harmful or fatal if swallowed and harmful if it comes in contact with skin or eyes Solution can be poison ous to animals If brake...

Страница 92: ...replace them when recommended can increase your chance of having an accident If you need to replace brake pads have your Suzuki dealer do this work Inspect and main tain the brake pads as recom mende...

Страница 93: ...n result in uneven braking action and can increase your chance of having an accident Always replace both pads together WARNING Too much play in the rear brake pedal can cause poor braking performance...

Страница 94: ...4 1 in 1 Loosen the lock nut 1 for the pedal stopper bolt 2 Adjust the brake pedal height by turning the pedal stopper bolt 2 to locate the pedal 95 105 mm 3 7 4 1 in above the top face of the footre...

Страница 95: ...e on the brake panel as shown in Fig A 3 If the extension line is out side this range as shown in the Fig B have the brake shoes replaced by your authorized Suzuki dealer or a qualified mechanic REAR...

Страница 96: ...mit or if you find damage such as cuts or cracks Always use the size and type of tires specified in this owner s manual Balance the wheel after tire installation Read this section of the owner s manua...

Страница 97: ...erformance Cuts or cracks in the tires can lead to tire failure and loss of motorcycle con trol Worn tires are susceptible to puncture failures and subsequent loss of motorcycle control Tire wear also...

Страница 98: ...ncture or replacing the tire Proper wheel balance is important to avoid variable wheel to road contact and to avoid uneven tire wear FRONT REAR SIZE 130 90 16M C 67H 170 80 15M C 77H TYPE IRC GS 23F I...

Страница 99: ...ng properly If the engine continues to run with the side stand down and the transmission in gear then the side stand igni tion interlock system is not work ing properly Have your motorcycle inspected...

Страница 100: ...aler 3 Place an accessory service stand or equivalent under the swingarm to help stabilize the rear end Carefully position a jack under the engine or chas sis tubes and raise the jack until the front...

Страница 101: ...areful not to damage the oil seal when installing the front wheel WARNING Failure to extend brake pads after installing the wheel can cause poor braking perfor mance and may result in an accident Befo...

Страница 102: ...ear frame with a rear fender 3 3 Remove the brake adjuster nut 4 and torque link nut 5 Remove the axle nut 6 NOTICE Removing the rear wheel with out use of an accessory stand can result in your motorc...

Страница 103: ...mbly rear ward 9 To replace the wheel reverse the complete sequence described above CAUTION A hot muffler can burn you Wait until the muffler cools before removing the axle nut WARNING If the bolts an...

Страница 104: ...1 2 LIGHT BULB REPLACEMENT The wattage rating of each bulb is shown in the following chart When replacing a burned out bulb always use the same watt age rating NOTICE Failure to use a light bulb with...

Страница 105: ...dlight assembly 2 3 Disconnect the socket 3 from the headlight and remove the rubber cap 4 4 Unhook the bulb holder spring 5 and pull out the bulb 6 5 To replace the headlight bulb reverse the above s...

Страница 106: ...t and left Turn the adjuster 2 clockwise or counterclockwise Turn Signal Light 1 Remove the screw 1 2 Turn the lens counterclockwise and remove it 3 Push in on the bulb 2 turn it to the left and pull...

Страница 107: ...If a blown fuse is found then the electrical problem must be inspected and repaired before replacing the blown fuse with a new fuse Consult your Suzuki dealer for the electrical system check and repa...

Страница 108: ...30A MAIN fuse protects all electrical circuits 10A HEAD HI fuse protects the speedometer and head light high beam 10A HEAD LO fuse protects the headlight low beam 10A FUEL fuse protects the ECM fuel p...

Страница 109: ...cial mainte nance is required on the con verter However it is very important to keep the engine properly tuned Engine misfiring which can result from an improp erly tuned engine may cause overheating...

Страница 110: ...stop riding the motorcy cle and turn off the engine and have the motorcycle ser viced promptly Do not shut off the engine or interrupt the ignition when the transmission is in gear and the motorcycle...

Страница 111: ......

Страница 112: ...8 1 8 TROUBLESHOOTING FUEL SUPPLY CHECK 8 2 IGNITION SYSTEM CHECK 8 3...

Страница 113: ...s FI showing signs of trou ble in the fuel injection system take your machine to an autho rized Suzuki dealer Refer to the INSTRUMENT PANEL section for an explanation of the fuel injection system indi...

Страница 114: ...el injection indicator displays FI showing signs of trouble in the fuel injection sys tem take your machine to an authorized Suzuki dealer Refer to the INSTRUMENT PANEL section for an explana tion of...

Страница 115: ......

Страница 116: ...9 1 9 STORAGE PROCEDURE AND MOTORCYCLE CLEANING STORAGE PROCEDURE 9 2 PROCEDURE FOR RETURNING TO SERVICE 9 3 CORROSION PREVENTION 9 3 MOTORCYCLE CLEANING 9 4 INSPECTION AFTER CLEANING 9 7...

Страница 117: ...tem ENGINE 1 Pour one tablespoon of motor oil into each spark plug hole Reinstall the spark plugs and crank the engine a few times 2 Drain the engine oil thoroughly and refill the crankcase with fresh...

Страница 118: ...s to come Important Information About Corrosion Common causes of corrosion Accumulation of road salt dirt moisture or chemicals in hard to reach areas Chipping scratches and any damage to treated or p...

Страница 119: ...rcycle cover can help protect the finish from the harmful UV rays in sunlight and can reduce the amount of dust and air pollution reaching the surface Your Suzuki dealer can help you select the right...

Страница 120: ...orcy cle or riding in the rain Headlight fogging will be cleared gradually when the headlight is turned on When clearing the headlight lens fogging run the engine to avoid battery discharge NOTICE Hig...

Страница 121: ...with a matte finish Friction while riding excessive rubbing or polishing of a surface with a matte finish will change its appearance WAXING THE MOTORCYCLE After washing the motorcycle waxing and poli...

Страница 122: ...ck your motor cycle for any problems that may have arisen during your last ride WARNING Operating the motorcycle with wet brakes can be hazardous Wet brakes may not provide as much stopping power as d...

Страница 123: ......

Страница 124: ...ARRANTIES 10 2 EMISSION CONTROL SYSTEMS 10 3 TAMPERING WITH NOISE CONTROL SYSTEM PROHIBITED 10 4 SERIAL NUMBER LOCATION 10 5 REPORTING SAFETY DEFECTS 10 6 ON BOARD MOTORCYCLE COMPUTER DATA INFORMATION...

Страница 125: ...Control System Limited Warranty Applies ONLY to Suzuki street legal emission con trolled motorcycles certified for sale and registered in Califor nia Suzuki limited warranties and the Federal and Cal...

Страница 126: ...s and electronic control units Evaporative Emission Control System if equipped The evaporative emission control system of your vehicle consists of the carbon canister fuel tank fuel hoses and fuel vap...

Страница 127: ...any person Among those acts presumed to constitute tampering are the acts listed below removing or puncturing the muffler baffles header pipes screen type spark arrester if equipped or any other comp...

Страница 128: ...rcycle You also need these numbers to help your authorized Suzuki dealer when you order parts The frame number 1 is stamped on the steering head as shown in the illustration The engine serial number 2...

Страница 129: ...etween you your dealer or Suzuki Motor of America Inc To contact NHTSA you may either call the Vehicle Safety Hot Line toll free 1 888 327 4236 TTY 1 800 424 9153 go to http www safercar gov or write...

Страница 130: ...ay be stored by the on board computer when malfunctions occur This stored information can assist techni cians in repairing the motorcycle To read the stored information special equipment is needed and...

Страница 131: ...any reason 1 2 WARNING To reduce the risk of injury Wear a helmet eye protection and protective clothing Read owner s manual carefully Theowner s manualcontainsimportantsafety informationandinstructi...

Страница 132: ...77H GS 23F RW GS 23R RW SOLO RIDING DUAL RIDING FRONT REAR COLD TIRE PRESSURE 225 250 2 25 2 50 33 36 kgf cm2 kPa psi 225 250 2 25 2 50 33 36 WARNING AVERTISSEMENT This unit contains high pressure ni...

Страница 133: ...SYSTEM VEHICLE EMISSION CONTROL INFORMATION SUZUKI MOTOR CORPORATION DISPLACEMENT cc IDLE SPEED ENGINE OIL API SF SG OR API SH SJ WITH JASO MA AND VISCOSITY RATING OF SAE 10W 40 REFER TO YOUR OWNER S...

Страница 134: ......

Страница 135: ...t sump DRIVE TRAIN Clutch Wet multi plate type Transmission 5 speed constant mesh Gearshift pattern 1 down 4 up Primary reduction ratio 1 690 71 42 Secondary reduction ratio 1 000 30 30 Gear ratios Lo...

Страница 136: ...light 12V 5W Front turn signal light 12V 21 5W Rear turn signal light 12V 21W Speedometer light LED Neutral indicator light LED High beam indicator light LED Turn signal indicator light LED Oil press...

Страница 137: ...CATALYTIC CONVERTER 7 48 CLUTCH ADJUSTMENT 7 25 CONCLUSION 1 7 CORROSION PREVENTION 9 3 E EMISSION CONTROL SYSTEMS 10 3 ENGINE COOLANT 7 26 ENGINE COOLANT SOLUTION 2 6 ENGINE IDLE SPEED INSPECTION 7...

Страница 138: ...L LABELS 1 7 LEFT HANDLEBAR 3 14 LIGHT BULB REPLACEMENT 7 43 LOADING GUIDELINES 6 4 LOADING LIMIT 6 3 LOCATION 3 2 LOCATION OF LABELS 10 8 LOCATION OF PARTS 3 2 M MAINTENANCE SCHEDULE 7 2 MODIFICATIO...

Страница 139: ...STAND IGNITION INTERLOCK SYSTEM 7 38 SPARK PLUG 7 13 SPECIAL SITUATIONS REQUIRE SPECIAL CARE 1 4 STARTING OFF AND SHIFTING 5 4 STARTING THE ENGINE 5 2 STORAGE PROCEDURE 9 2 SUSPENSION ADJUSTMENT 3 21...

Страница 140: ......

Страница 141: ......

Страница 142: ......

Отзывы: