Installation and Instructions
12
Installation Instructions
Determine the location of the fireplace as
described in the fireplace installation manual. Then
plan the location of the duct termination and the route
of the duct run between the fireplace and the
duct termination.
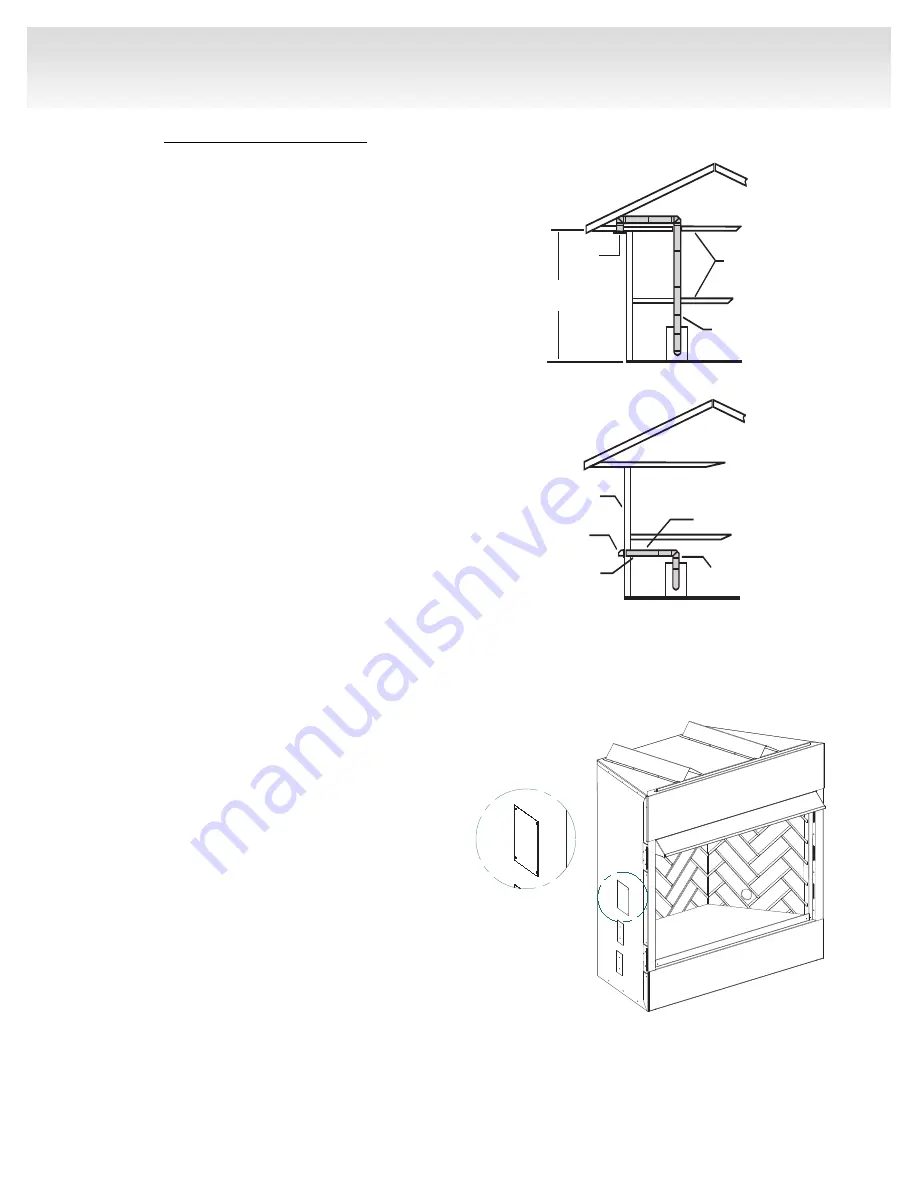
Duct run must be limited to a maximum distance
of 40' (12.2m) from the fireplace pipe collar to duct
termination. This will provide the least restriction to air
flow. No more than four (4) 90º elbows can be used.
Duct run may be horizontal, vertical, inclined or any
combination of these. (Fig. 10) You are now ready to
install the Outside Air Kit.
1. Remove the screws retaining the outside air
coverplate, if provided. (Located on the left side of
front open units, on backside of multi-sided units.)
Discard coverplate. (Fig. 11)
2. Secure the inlet collar assembly to the outer casing
with four screws (screws not provided).
3. Slide the duct over the collar and attach the duct to
the collar using the plastic tie straps or three (3)
screws (screws not provided). Continue attaching
the ducting together using three (3) screws at each
joint until you have installed sufficient duct to arrive
at your duct termination locations.
4. At the termination end, install the duct termination.
This should be installed from the outside of the
home. Cut a hole in the desired location
approximately 4" in diameter, caulk around the
hole, and slide the termination through the opening
from outside the home. The termination/rain cap
should be caulked around its perimeter to assure
a tight seal. The rain cap opening should be
positioned downward.
The Outside Air Kit is now installed and ready
for use.
A
DETAIL A
Fig. 11
Ceiling
Duct
Duct
Termination
40ʼ Max
Duct Run
Soffit Termination
Exterior Wall Termination
Exterior Wall
40ʼ Max. Duct Run
Duct
Duct Termination
Rain Cap
Fig. 10
Soffit Termination
40' Max
Duct Run
Exterior Wall Termination
Exterior Wall
Rain Cap
40' Max. Duct Run
Duct
Duct Termination


