


Open
Beam
Protection
kit
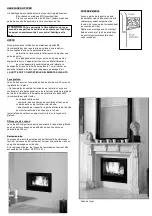
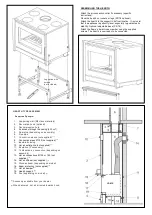
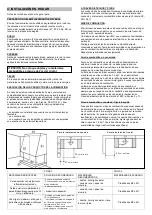
FIREPLACE CLADDING
Any personalised cladding around the fireplace must:
Be of M0 material (non-combustible)
Provide a free section of at least 600 cm² at the bottom
to allow free circulation of air.
5. USE
HOOD
We recommend the use of M0 class materials (non-
combustible)
as well as the use of insulation. The design of a
customised hood should:
- allow free access to the interior or include an inspection
door,
- be independent of the hearth, which must not be used
to support the hood. The appliance must be able to
expand freely.
- for appliances with a side-door opening, the brick strip or the
hood have to be placed at least 1 cm beyond the front of the
fireplace to allow air to circulate.
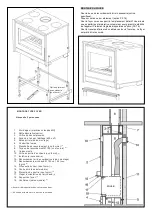
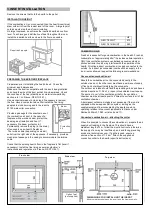
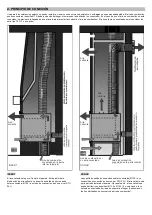
THE HOOD MUST INCLUDE THE FOLLOWING
COMPONENTS
False ceiling
The hood must have a false ceiling fixed at least 30 cm below
the ceiling
of the room.
- This false ceiling channels the hot air outward, prevents it from
remaining in the upper part of the hood and protects the ceiling
in the room. Make the false ceiling using materials M0 class
materials (non-combustible) and then insulate it.
- The manufactured casing must:
- have effective ventilation openings,
communicating with the outside of the hood.
- be airtight with respect to the lower part of the hood
to stop
hot air seeping upwards.
Insulate the face of the box against the wall, the pipe and
the ceiling.
Hot air diffusers
One or more distribution vents with a non-closable free
section of 600 cm² must included in the upper part of the
hood, flush with the false ceiling.
Inspection door
The pipes that are connected to the flue must be visible along
their entire length, either directly or via an inspection door or grille
installed in the hood.
The connection pipes must be accessible (in France; NF-DTU
24.1) for cleaning purposes.
FUEL
Wood
This high-performance appliance requires good quality fuel.
Only burn air-dried logs (2 to 3 years, stored in a sheltered and
well-ventilated place) with a maximum humidity of 15 to 20%.
Preferably hardwoods (birch, hornbeam, beech, etc.).
Avoid softwoods (lime, chestnut, willow, poplar).
It is strictly forbidden to permanently use resinous wood (pine,
fir...) as well as the use of waste from processed wood (railway
sleepers, woodworking waste, etc.) and household scraps
(vegetables or plastics).
Never use small pieces of wood, boxes, woodchips or vine
shoots that could lead to sudden overheating.
DRAUGHT
The hot draught in the chimney flue must never be greater than
20 Pa. Ask your dealer to measure the draught during the
installation of the flue. If the combustion air is not connected, any
use of controlled mechanical ventilation (CMV) may influence the
draught, even reversing it. For this reason, the extractor must be
running during measurement of the draught.
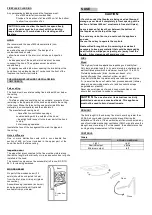
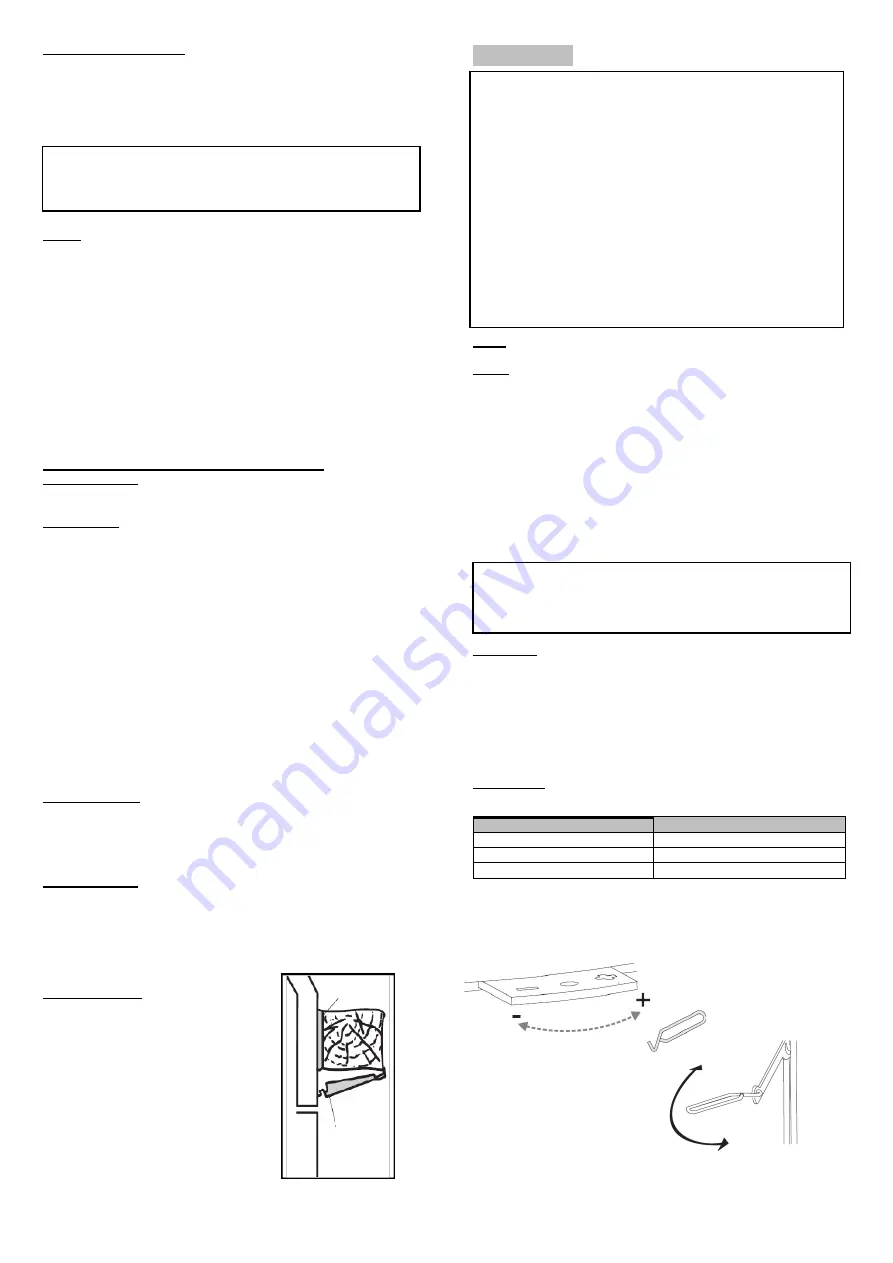
CONTROLS
Orders
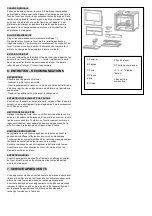
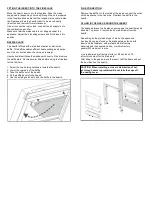
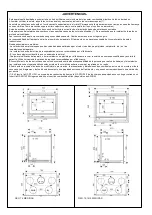
WOODEN BEAM
No part of the wooden beam (if it
exists) should be subjected to heat
from the inlet, pipe or rising air (glass
convection).
Assemble using insulation (rock wool)
and a beam protection kit (optional)
available from your dealer.
Close
CAUTION:
The use of coal or its derivatives is strictly
prohibited, even on an occasional basis. This appliance
must not be used to burn domestic waste.
CAUTION. In order to allow the hearth to expand freely,
none of its parts must be in contact with the cladding.
Keep a distance of 5 mm between the cladding and the
fireplace.
CAUTION:
- If a niche under the fireplace is being used as firewood
storage, never block it completely (a front opening with a
section of at least 600 cm² must remain free at all times).
Leave a space of at least 5 cm between the bottom of
the fireplace and the top of the logs.
To avoid any risk of burns, do not touch the appliance
and use
the cool hand key to operate the controls.
Heat emitted through the vitro ceramic glass makes it
necessary to keep any material that could be damaged by
heat (furniture, wallpaper, carpentry, etc.) away from the
hearth. A 2 m clearance will avoid any risk.
*
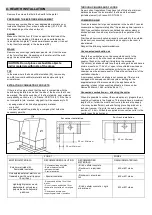
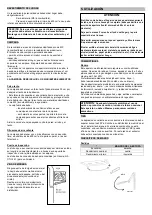
STOVE CONTROLS
Light
right
Nominal output
centre
Minimum output
left


