background image


Microphone  

7.


Install the microphone.  Hang the mic on the dashboard and 
push the connector into the slot. (This step may already be 
completed) 


8.


Install safety bar rails. Insert directly on both sides of seat 


9.


Install fire hose water tank.  Hang the tank on the back of 
the vehicle using provided hooks and then insert water gun 
into the slots provided. (top rear of rig) 


SYNCING THE REMOTE CONTROL: 

Содержание Kids Ride On Big Rig Rescue

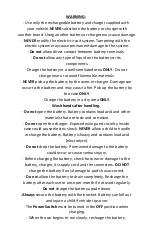
Страница 1: ...tions Please read this instruction manual carefully It is important to read and follow all the steps during assembly to ensure proper operation and safety of the child Please keep this manual for futu...

Страница 2: ...to the child or third party Do not pick up vehicle by steering wheel Do not pick up battery by wires or charger Keep all plastic bags out of the reach of young children Not recommended for children u...

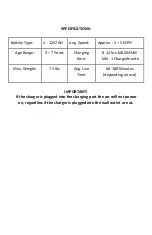
Страница 3: ...3 7 Years Charging time 8 12 hrs MAXIMUM Min 1 Charge month Max Weight 75 lbs Avg Use Time 60 180 Minutes depending on use IMPORTANT If the charger is plugged into the charging port the car will not p...

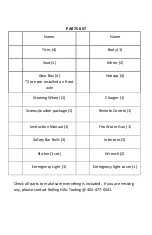
Страница 4: ...heel 1 Charger 1 Screws washer package 1 Remote Control 1 Instruction Manual 1 Fire Water Gun 1 Safety Bar Rails 2 Intercom 1 Sticker 1 set Wrench 2 Emergency Light 1 Emergency light cover 1 Check all...

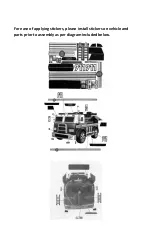
Страница 5: ...For ease of applying stickers please install stickers on vehicle and parts prior to assembly as per diagram included below...

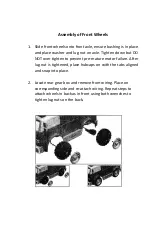
Страница 6: ...t DO NOT over tighten to prevent pre mature motor failure After lug nut is tightened place hubcaps on with the tabs aligned and snap into place 2 Locate rear gear box and remove from wiring Place on c...

Страница 7: ...with 2 4x10mm screws on front of the seat Steering Wheel Column 4 Connect the steering wheel plug to the corresponding plug from the steering wheel and push all the wires down Align steering wheel wit...

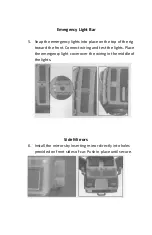
Страница 8: ...f the rig toward the front Connect wiring and test the lights Place the emergency light cover over the wiring in the middle of the lights Side Mirrors 6 Install the mirrors by inserting mirror directl...

Страница 9: ...the slot This step may already be completed 8 Install safety bar rails Insert directly on both sides of seat 9 Install fire hose water tank Hang the tank on the back of the vehicle using provided hook...

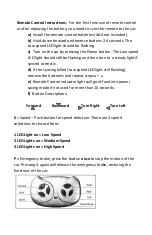
Страница 10: ...ght if synced correctly d If the syncing failed Low speed LED light still flashing remove the batteries and repeat steps a c e Remote Control indicator light will go off and into power saving mode if...

Страница 11: ...ADULT SHOULD CHARGE AND RECHARGE THE BATTERY BATTERY REPLACEMENT AND DISPOSAL Over time all batteries naturally lose their ability to hold a charge Depending on the amount of use and driving conditio...

Страница 12: ...pen the battery Battery contains lead acid and other materials that are toxic and corrosive Do not open the charger Exposed wiring and circuitry inside case could cause electric shock NEVER allow a ch...

Страница 13: ...eat such as stoves and heaters Plastic parts may melt Recharge the battery after each use Only an adult should handle the battery Recharge the battery at least once a month when not being used Do not...

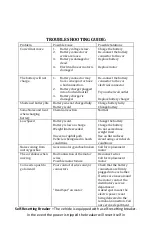
Страница 14: ...ed Battery is old Battery is low on charge Weight limit exceeded Uneven or uphill path Vehicle is being used in harsh conditions Change the battery Charge the battery Do not exceed max weight limit Us...

Страница 15: ...approximately one minute If you are unable to solve a problem please feel free to contact us Phone 402 477 0541 or Email customerservice rollinghillstrading com...

Отзывы: