background image

2-7

SC513B Chassis User's Manual

경고!

시스템에 부품들을 장착하거나 제거하기 위해서는 섀시 내부에 접근하기 전에 반드시 전원 
공급장치로부터 연결되어있는 모든 전원과 전기코드를 분리해주어야 합니다. 

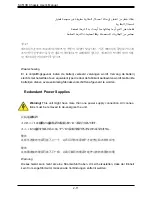
Waarschuwing

Voordat  u  toegang  neemt  tot  het  binnenwerk  van  de  behuizing  voor  het  installeren  of 

verwijderen van systeem onderdelen, dient u alle spanningsbronnen en alle stroomkabels  
aangesloten op de voeding(en) van de behuizing te verwijderen

Equipment Installation

Warning! 

Only trained and qualified personnel should be allowed to install, replace, 

or service this equipment.

機器の設置

トレーニングを受け認定された人だけがこの装置の設置、交換、またはサービスを許可されていま

す。

警告
只有经过培训且具有资格的人员才能进行此设备的安装、更换和维修。

警告
只有經過受訓且具資格人員才可安裝、更換與維修此設備。

Warnung 
Das Installieren, Ersetzen oder Bedienen dieser Ausrüstung sollte nur geschultem, 

qualifiziertem Personal gestattet werden.

¡Advertencia! 

Solamente el personal calificado debe instalar, reemplazar o utilizar este equipo.

دادما ةدحو نم ءابرهكنا كهس تنازإو تقاطنا رداصم عيمج نم واظننا مصف بجي

مبق تقاطنا

زاهجلا ثانىكم تنازإ وأ جيبثتن مكيههن تيهخادنا قطاننما نىإ لىصىنا

Содержание SC513B Series

Страница 1: ...USER S MANUAL Revision 1 0 SC513B Chassis SC513BTQC 350B SC513BTQC 350WB SC513BTQC 505WB...

Страница 2: ...t is operated in a commercial environment This equipment generates uses and can radiate radio frequency energy and if not installed and used in accordance with the manufacturer s instruction manual ma...

Страница 3: ...technicians only This document lists compatible parts available when this document was published Refer to the Supermicro web site for updates on supported parts and configurations Warnings Special att...

Страница 4: ...Optional 3 1 3 3 Where to get Replacement Components 3 2 Chapter 4 System Interface 4 1 Overview 4 1 4 2 Control Panel Buttons 4 2 4 3 Control Panel LEDs 4 2 4 4 Power Supply LEDs 4 4 Chapter 5 Chassi...

Страница 5: ...nsiderations 6 2 Ambient Operating Temperature 6 2 Reduced Airflow 6 2 Mechanical Loading 6 3 Circuit Overloading 6 3 Reliable Ground 6 3 Identifying the Sections of the Rack Rails 6 4 Locking Tabs 6...

Страница 6: ...vi SC513B Chassis User s Manual Notes...

Страница 7: ...ectiv ity Optimized for dual processor or single processor motherboards the SC513B features an advanced thermal design for highly efficient cooling and quiet operation with up to six 4cm counter rotat...

Страница 8: ...r B V Het Sterrenbeeld 28 5215 ML s Hertogenbosch The Netherlands Tel 31 0 73 6400390 Fax 31 0 73 6416525 Email sales supermicro nl General Information support supermicro nl Technical Support rma supe...

Страница 9: ...is complete For faster service RMA authorizations may be requested online http www supermicro com support rma Whenever possible repack the chassis in the original Supermicro carton using the original...

Страница 10: ...Notes 1 4 SC513B Chassis User s Manual...

Страница 11: ...sistance Only certified technicians should attempt to install or configure components Read this appendix in its entirety before installing or configuring components in the Supermicro chassis These war...

Страница 12: ...er equipo considere los riesgos de la corriente el ctrica y familiar cese con los procedimientos est ndar de prevenci n de accidentes Al final de cada advertencia encontrar el n mero que le ayudar a e...

Страница 13: ...ient u zich bewust te zijn van de bij een elektrische installatie betrokken risico s en dient u op de hoogte te zijn van de standaard procedures om ongelukken te voorkomen Gebruik de nummers aan het e...

Страница 14: ...de alimentaci n Attention Avant de brancher le syst me sur la source d alimentation consulter les directives d installation Circuit Breaker Waarschuwing Raadpleeg de installatie instructies voordat u...

Страница 15: ...del edificio Aseg rese de que el dispositivo de protecci n no sea superior a 250 V 20 A Attention Pour ce qui est de la protection contre les courts circuits surtension ce produit d pend de l installa...

Страница 16: ...entes de energ a y del cable el ctrico quitado de los m dulos de fuente de alimentaci n antes de tener acceso el interior del chasis para instalar o para quitar componentes de sistema Attention Le sys...

Страница 17: ...aangesloten op de voeding en van de behuizing te verwijderen Equipment Installation Warning Only trained and qualified personnel should be allowed to install replace or service this equipment Warnung...

Страница 18: ...neel Attention Il est vivement recommand de confier l installation le remplacement et la maintenance de ces quipements des personnels qualifi s et exp riment s Warning This unit is intended for instal...

Страница 19: ...a de estas reas mediante la utilizaci n de una herramienta especial cerradura con llave u otro medio de seguridad Attention Cet appareil doit tre install e dans des zones d acc s r serv s L acc s une...

Страница 20: ...type semblable ou quivalent recommand e par le fabricant Jeter les piles usag es conform ment aux instructions du fabricant Advertencia Existe peligro de explosi n si la bater a se reemplaza de maner...

Страница 21: ...evolen wordt Gebruikte batterijen dienen overeenkomstig fabrieksvoorschriften afgevoerd te worden Redundant Power Supplies Warning This unit might have more than one power supply connection All connec...

Страница 22: ...at stroomloos te maken Advertencia Puede que esta unidad tenga m s de una conexi n para fuentes de alimentaci n Para cortar por completo el suministro de energ a deben desconectarse todas las conexion...

Страница 23: ...tencia Cuando el sistema est en funcionamiento el voltaje del plano trasero es peligroso Tenga cuidado cuando lo revise Attention Lorsque le syst me est en fonctionnement des tensions lectriques circu...

Страница 24: ...o debe cumplir con las normas de electricidad locales y nacionales Backplane Waarschuwing Een gevaarlijke spanning of energie is aanwezig op de backplane wanneer het systeem in gebruik is Voorzichtigh...

Страница 25: ...elektriciteitsvoorschriften Warnung Die Entsorgung dieses Produkts sollte gem allen Bestimmungen und Gesetzen des Landes erfolgen Warning Ultimate disposal of this product should be handled according...

Страница 26: ...ut ou le recyclage de ce produit sont g n ralement soumis des lois et ou directives de respect de l environnement Renseignez vous aupr s de l organisme comp tent Hot Swap Fan Warning Warning Hazardous...

Страница 27: ...rnilladores y todos los objetos lejos de las aberturas del ventilador Attention Pieces mobiles dangereuses Se tenir a l ecart des lames du ventilateur Il est possible que les ventilateurs soient toujo...

Страница 28: ...CSA gekennzeichnet an Ger ten oder Produkten die nicht mit Supermicro gekennzeichnet sind AC AC UL CSA UL CSE Supermicro Supermicro UL CSA UL CSA Supermicro UL CSA UL CSA Warning When installing the p...

Страница 29: ...code pour tous les autres appareils lectriques sauf les produits d sign s par Supermicro seulement AC AC UL CSA UL CSA Supermicro UL CSA UL CSA Supermicro Advertencia Cuando instale el producto utilic...

Страница 30: ...schaffen Aansluitmethode deze moet altijd voldoen aan de lokale voorschriften en veiligheidsnormen inclusief de juiste kabeldikte en stekker Het gebruik van niet geschikte Kabels en of Adapters kan ee...

Страница 31: ...al two fixed 2 5 drives Fans The chassis includes three or four heavy duty fans with open slots for two or three additional fans if required System fans for the SC513B chassis are powered from the ser...

Страница 32: ...stem To ensure the highest level of professional service and technical support we strongly recommend purchas ing exclusively from our Supermicro Authorized Distributors System Integrators Resellers A...

Страница 33: ...monitor the overall status of the system as well as the activity and health of specific components Power is controlled by an on off push button on the control panel This chapter covers these features...

Страница 34: ...illuminated and any corrective action you may need to take UID The UID is used to turn on the Unit ID LED 4 2 Control Panel Buttons There are two push buttons located on the front of the chassis Thes...

Страница 35: ...r supply units This LED should normally be illuminated when the system is operating HDD Indicates hard disk drive activity SAS SATA drive and or DVD ROM drive activity when flashing NIC1 Indicates net...

Страница 36: ...upply is on Solid Amber When illuminated indicates the power supply is plugged in and turned off or the system is off but in an abnormal state Blinking Amber When blinking this system power supply tem...

Страница 37: ...n Chapter 2 System Safety and the warning precautions listed in the setup instructions 5 2 Removing Power from the System Before performing most setup or maintenance tasks use the following procedure...

Страница 38: ...drives are recommended The hard drives in your chassis may look slightly different than the ones shown in this manual Installing a 2 5 Hot Swappable Drives 1 Remove the drive tray from the front of t...

Страница 39: ...Chapter 5 Chassis Setup and Maintenance 5 3 3 Install the HDD into the drive tray 4 Insert and lock the drive tray Figure 5 1 Installing the Hot Swappable Drive SC513BTQC 350B...

Страница 40: ...nting enclosure and secure the drive s to the bracket 2 Secure the bracket to the optional HDD mounting enclosure 3 Secure the HDD enclosure to the chassis floor 4 Connect HDD cabling Figure 5 3 Secur...

Страница 41: ...system as described in section 5 2 2 Remove the six screws that are securing the top cover to the chassis 3 Slide the cover back toward the rear of the chassis 4 Lift the cover upwards and off the cha...

Страница 42: ...hree screws located on the end of the power supply bay and one screw at the front of the power supply and under side of the chassis as illustrated below Set the screws aside for later use 3 Gently sli...

Страница 43: ...ailed fan s cable from the connector on the motherboard 4 Lift the fan housing and the two fans inside it up and out of the chassis Gently pull upward to remove a failed fan from the housing 5 Place t...

Страница 44: ...ve the fan dummy insert from the housing 5 Place the new optional fan s into the vacant space in the housing Make sure that the arrows on the sides of the fan indicating air direction point in the sam...

Страница 45: ...ude a standard I O shield contact the motherboard vendor for a compatible shield Installing the I O Shield 1 Review the documentation that came with your motherboard Become familiar with component pla...

Страница 46: ...ps head screws included in the SC513B accessories packaging Some motherboards require additional screws for heatsinks general components and or non standard methods to secure them Optional standoffs a...

Страница 47: ...rough the bottom the chassis b Secure the screw with the hexagon nut rounded side up 4 Lay the motherboard on the chassis aligning the permanent and optional standoffs 5 Secure the motherboard to the...

Страница 48: ...includes a standard bracket 2 Power down the system as described in section 5 2 and open the chassis cover 3 Remove the riser card bracket from the chassis 5 Insert the expansion card s into the riser...

Страница 49: ...are no objects to obstruct airflow in and out of the server Do not operate the server without drives or drive carriers in the drive bays Use only recommended server parts Make sure no wires or foreign...

Страница 50: ...e system into the rack Please read this section in its entirety before you begin the installation procedure outlined in the sections that follow Decide on a suitable location for the rack unit that wi...

Страница 51: ...t server components on the bottom of the rack first and then work up Use a regulating uninterruptible power supply UPS to protect the server from power surges voltage spikes and to keep your system op...

Страница 52: ...d be grounded Particular attention should be given to power supply connections other than the direct connections to the branch circuit i e the use of power strips etc To prevent bodily injury when mou...

Страница 53: ...includes two rack rail assemblies in the rack mounting kit Each as sembly consists of two sections an inner fixed chassis rail that secures directly to the server chassis and an outer fixed rack rail...

Страница 54: ...be accomplished with a standard head screwdriver Installing the Inner Rails 1 Place the inner rail on the side of the chassis aligning the hooks of the chassis with the inner rail holes 2 Slide the e...

Страница 55: ...il with the slides The ends of each bracket must angle in the same direction 2 Adjust both the short and long brackets to the proper distance so that the rail fits snugly into the rack 3 Secure the lo...

Страница 56: ...may be necessary to depress the locking tabs when inserting When the server has been pushed completely into the rack the locking tabs will click into the locked posi tion 4 Optional Insert and tighten...

Страница 57: ...positioned to balance the weight between front and back If a bezel is includ ed on your server remove it 3 Attach the two front brackets to each side of the chassis then the two rear brackets position...

Страница 58: ...ed components and configurations For more compatible cables refer to the manufacturer of the motherboard you are using and our Web site at www supermicro com A 2 Cables Included with SC513B Chassis SC...

Страница 59: ...with the SC513B chassis Alternate SAS SATA Cables Some compatible motherboards have different connectors If your motherboard has only one SAS connector that the SAS SATA cables must share use one of...

Страница 60: ...cm 20 pin CBL 0059 7 9 20 cm 8 pin CBL 0062 7 9 20 cm 4 pin CBL 0060 7 9 20 cm Front Panel to the Motherboard The SC513B chassis includes a cable to connect the chassis front panel to the motherboard...

Страница 61: ...SC513B Chassis User s Manual A 4 Notes...

Страница 62: ...Part PWS 351 1H AC Input 100 240 V 4 2 1 8 Amps 50 60 Hz DC Output 5V 18 Amps DC Output 12V 350 W 29A at 100 240Vac DC Output 3 3V 15 Amps DC Output 5V standby 3 Amps 500 W MFR Part PWS 505P 1H AC Inp...

Страница 63: ...SC513B Chassis User s Manual B 2 Notes...

Отзывы: