background image

Chapter 4: AMI BIOS

4-7

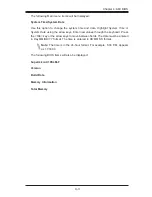
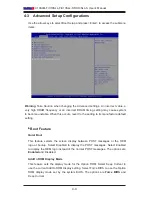
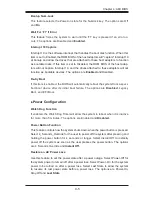
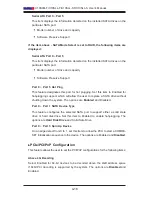
Hyper-threading

Select Enabled to support Intel Hyper-threading Technology to enhance CPU per-
formance. The options are 

Enabled

 and Disabled.

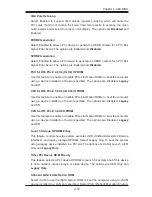
Active Processor Cores

This feature determines how many CPU cores will be activated for each CPU. When 
all is selected, all cores in the CPU will be activated. (Please refer to Intel's web 
site for more information.) The options are 

All, 

1, 2, and 3.

Limit CPUID Maximum

Select Enabled to set the maximum CPU ID value and to boot the legacy operat-
ing systems that cannot support processors with extended CPUID functions. The 
options are Enabled and 

Disabled 

(for the Windows OS).

Execute-Disable Bit (Available if supported by the OS & the CPU)

Set to Enabled to enable the Execute Disable Bit which will allow the processor 
to designate areas in the system memory where an application code can execute 

and where it cannot, thus preventing a worm or a virus from flooding illegal codes 

to overwhelm the processor or damage the system during an attack. The default is 

Enabled

. (Refer to Intel and Microsoft Web Sites for more information.)

Intel® Virtualization Technology (Available when supported by the CPU)

Select Enabled to use the Intel Virtualization Technology to allow one platform to 
run multiple operating systems and applications in independent partitions, creat-
ing multiple "virtual" systems in one physical computer. The options are 

Enabled


and Disabled. 

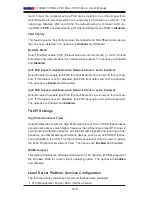
Hardware Prefetcher (Available when supported by the CPU)

If set to Enabled, the hardware prefetcher will prefetch streams of data and instruc-
tions from the main memory to the L2 cache to improve CPU performance. The 
options are Disabled and 

Enabled

.

Adjacent Cache Line Prefetch (Available when supported by the CPU)

Select Enabled for the CPU to prefetch both cache lines for 128 bytes as comprised. 
Select Disabled for the CPU to prefetch both cache lines for 64 bytes. The options 
are Disabled and 

Enabled

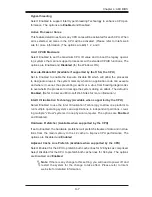
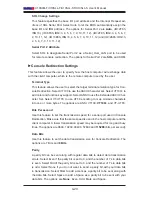
Note

: If there is any change to this setting, you will need to power off and 

restart the system for the change to take effect. Please refer to Intel’s 
web site for detailed information. 

Содержание X10SLL-F

Страница 1: ...X10SLM F X10SLL F X10SLL SF X10SLL S USER S MANUAL Revision 1 1b ...

Страница 2: ...imits for a class B digital device pursuant to Part 15 of the FCC Rules These limits are designed to provide reasonable protection against harmful interference in a residential installation This equipment generates uses and can radiate radio frequency energy and if not installed and used in accordance with the instruc tions may cause harmful interference to radio communications However there is no...

Страница 3: ...t is intended to be installed and serviced by professional technicians Manual Organization Chapter 1 describes the features specifications and performance of the mother board and provides detailed information on the Intel C224 C222 Express chipset Chapter 2 provides hardware installation instructions Read this chapter when in stalling the processor memory modules and other hardware components into...

Страница 4: ...to yourself Warning Critical information to prevent damage to the components or injury to your self Important Important information given to ensure proper system installa tion or to relay safety precautions Note Additional Information given to differentiate various models or pro vides information for correct system setup X10SLM F X10SLL F X10SLL SF X10SLL S User s Manual ...

Страница 5: ...ddress Super Micro Computer B V Het Sterrenbeeld 28 5215 ML s Hertogenbosch The Netherlands Tel 31 0 73 6400390 Fax 31 0 73 6416525 Email sales supermicro nl General Information support supermicro nl Technical Support rma supermicro nl Customer Support Web Site www supermicro nl Asia Pacific Address Super Micro Computer Inc 3F No 150 Jian 1st Rd Zhonghe Dist New Taipei City 235 Taiwan R O C Tel 88...

Страница 6: ...hapter 2 Installation 2 1 Standardized Warning Statements 2 1 Battery Handling 2 1 Product Disposal 2 3 2 2 Static Sensitive Devices 2 4 Precautions 2 4 Unpacking 2 4 2 3 Processor and Heatsink Installation 2 5 Installing the LGA1150 Processor 2 5 Installing an Active CPU Heatsink with Fan 2 8 Removing the Heatsink 2 10 2 4 Installing DDR3 Memory 2 11 DIMM Installation 2 11 Removing Memory Modules...

Страница 7: ...nnecting Cables 2 25 ATX Main PWR CPU PWR Connectors JPW1 JPW2 2 25 Fan Headers Fan 1 Fan 4 Fan A 2 26 Chassis Intrusion JL1 2 26 Internal Buzzer 2 27 Power LED Speaker 2 27 DOM PWR Connector JSD1 2 28 Wake Up LAN 2 28 T SGPIO 1 2 Headers 2 29 TPM Header Port 80 Header 2 29 Power SMB I2 C Connector 2 30 IPMB 2 30 2 8 Jumper Settings 2 31 Explanation of Jumpers 2 31 GLAN Enable Disable 2 31 Watch D...

Страница 8: ...Main Setup 4 2 4 3 Advanced Setup Configurations 4 4 4 4 Event Logs 4 23 4 5 Boot Settings 4 27 4 6 Security Settings 4 29 4 7 Save Exit 4 30 Appendix A BIOS Error Beep Codes A 1 BIOS Error Beep Codes A 1 Appendix B Software Installation Instructions B 1 Installing Software Programs B 1 B 2 Installing SuperDoctor5 B 2 Appendix C UEFI BIOS Recovery Instructions C 1 An Overview to the UEFI BIOS C 1 ...

Страница 9: ...motherboard If anything listed here is damaged or missing contact your retailer The following items are included in the retail box One 1 Supermicro Motherboard Two 2 SATA cables One 1 I O shield One 1 Quick Reference Guide Note For your system to work properly please follow the links below to download all necessary drivers utilities and the user s manual for your motherboard Supermicro product man...

Страница 10: ...0SLM F Motherboard Image Note All graphics shown in this manual were based upon the latest PCB Revision available at the time of publishing of the manual The motherboard you ve received may or may not look exactly the same as the graphics shown in this manual ...

Страница 11: ...erboard Image Note All graphics shown in this manual were based upon the latest PCB Revision available at the time of publishing of the manual The motherboard you ve received may or may not look exactly the same as the graphics shown in this manual ...

Страница 12: ...LL SF S Motherboard Layout Note All graphics shown in this manual were based upon the latest PCB Revision available at the time of publishing of the manual The motherboard you ve received may or may not look exactly the same as the graphics shown in this manual ...

Страница 13: ... JVR1 JI2C1 JI2C2 JOH1 JP8 JL1 JP2 JP1 JP7 USB 3 0 0 USB 3 0 1 USB 3 0 2 3 VGA LAN2 LAN1 USB4 5 USB6 7 IPMI_LAN COM2 COM1 P1 DIMMB1 P1 DIMMB2 P1 DIMMA2 P1 DIMMA1 PCH SLOT4 PCI E 2 0 X4 IN X8 CPU SLOT5 PCI E 3 0 X8 CPU SLOT6 PCI E 3 0 X8 IN X16 JF1 I SATA4 I SATA3 I SATA5 I SATA2 I SATA1 I SATA0 USB8 9 JRK1 T SGPIO2 JPB1 X10SLM F X10SLL F SF S Rev 1 02 BMC FW FP Control PCH BMC CTRL CPU SP1 LED4 IP...

Страница 14: ...E LAN Ports 1xi210AT 1xi217LM Dual GbE LAN Ports 1xi210AT 1xi217LM Dual GbE LAN Ports 1xi210AT 1xi217LM COM One COM Port One COM Header One COM Port One COM Header None SATA 4 SATA 6 0Gbs 2 SATA 3 0Gbs 2 SATA 6 0Gb 4 SATA 3 0Gbs 2 SATA 6 0Gbs 2 SATA 3 0Gbs RAID RAID 0 1 5 10 See pages 2 37 and 2 38 for details USB Support 4 USB 3 0 Ports 6 USB 2 0 Ports 2 USB 3 0 Port 6 USB 2 0 Ports 4 USB 2 0 Por...

Страница 15: ...JPW2 JSD1 LED3 LED2 JD1 LED5 LED1 JPI2C1 BT1 JPW1 JTPM1 FANA FAN3 FAN1 FAN2 FAN4 JPL1 JPL2 JPME2 JWD1 JPG1 JBR1 JPME1 J19 J18 J7 JVR1 JI2C1 JI2C2 JOH1 JP8 JL1 JP2 JP1 JP7 USB 3 0 0 USB 3 0 1 USB 3 0 2 3 VGA LAN2 LAN1 USB4 5 USB6 7 IPMI_LAN COM2 COM1 P1 DIMMB1 P1 DIMMB2 P1 DIMMA2 P1 DIMMA1 PCH SLOT4 PCI E 2 0 X4 IN X8 CPU SLOT5 PCI E 3 0 X8 CPU SLOT6 PCI E 3 0 X8 IN X16 JF1 I SATA4 I SATA3 I SATA5 ...

Страница 16: ...ader JL1 Chassis Intrusion Header JIPMB1 4 pin External BMC I2 C Header for an IPMI Card JPI2 C1 Power System Management Bus Power SMB JPW1 24 pin ATX Main Power Connector Required JPW2 12V 4 pin CPU power Connector Required JSD1 SATA DOM Device_On_Module Power Connector JSTBY1 Wake On LAN Enable Header JTPM1 Trusted Platform Module Port 80 Connector LAN1 LAN2 Gigabit RJ45 Ports LAN1 2 IPMI LAN fo...

Страница 17: ... LED Description Color State Status LED1 BMC Heartbeat LED Green Blinking BMC Normal LED4 System Standby Power LED Orange Solid on Power On Warning 1 To avoid damaging your motherboard and components please use a power supply that supports a 24 pin and a 4 pin power connectors Be sure to con nect both the 24 pin and 4 pin power connectors to your motherboard for adequate power support 2 To provide...

Страница 18: ... 4 Not Available on X10SLL SF S Network Connections Intel i210 AT i217LM Gigabit Ethernet Controllers for LAN1 LAN2 I O Devices SATA Connections SATA Connections X10SLM F SATA 3 0 6Gb s Four 4 I SATA 0 1 3 4 via Intel C224 Exp with Intel Rapid Storage Technology support SATA 2 0 3Gb s Two 2 I SATA via Intel C224 Exp SATA Connections X10SLL F SF S SATA 3 0 6Gb s Two 2 I SATA 0 1 via Intel C222 Exp ...

Страница 19: ... 3 3V Stdby 5V Stdby VBAT Memory VCORE for CPU CPU 3 phase switching voltage regulator CPU System overheat LED and control CPU Thermal Trip support Thermal Monitor 2 TM2 support Fan Control Fan status monitoring with firmware 4 pin fan speed con trol via IPMI interface Low noise fan speed control System Management PECI Platform Environment Configuration Interface 2 0 support for F models System re...

Страница 20: ... Select Default 2 8 DMI x4 G2 5 6 7 8 PCH C222 C224 6 0 Gb S USB 2 0 LPC 1 0 SATA PCI E X4 G2 3 0 Gb S 5 4 3 2 SATA TPM HEADER USB 3 0 PCI E x4 x8 BIOS HEADER SPI LAN2 Clarkville i217LM PCI E X1 G2 RJ45 LAN1 Springville i210AT PCI E X1 G2 RJ45 AST2400 1400 BMC 3 2 1 RMII NCSI COM1 Connector COM2 Header VGA CONN BMC Boot Flash DDR3 SPI LAN3 RGRMII Debug Card FRONT PANEL SYSTEM POWER CTRL FAN SPEED ...

Страница 21: ...DMI for chip to chip true isochronous communication In addition the X10SLM F_X10SLL F SF S also features a TCO timer which allows the system to recover from a software hardware lock and perform tasks including Function Disable and Intruder Detect Intel C224 C222 Express Chipset Features Direct Media Interface up 4 GB s transfer Full Duplex Intel Matrix Storage Technology and Intel Rapid Storage Te...

Страница 22: ...a voltage becomes unstable a warning is given or an error message is sent to the screen The user can adjust the voltage thresholds to define the sensitivity of the voltage monitor Fan Status Monitor with Firmware Control PC health monitoring in the BIOS can check the RPM status of the cooling fans The onboard CPU and chassis fans are controlled by Thermal Management via IPMI Firmware Environmental...

Страница 23: ... structures while providing a processor architecture independent implementation that is compatible with Windows 7 Windows 8 and Windows 2008 Operating Systems 1 6 Power Supply As with all computer products a stable power source is necessary for proper and reliable operation It is even more important for processors that have high CPU clock rates This motherboard accommodates 24 pin ATX power suppli...

Страница 24: ...ser s Manual areas where noisy power transmission is present you may choose to install a line filter to shield the computer from noise It is recommended that you also install a power surge protector to help avoid problems caused by power surges ...

Страница 25: ...ssis Battery Handling Warnung Bei Einsetzen einer falschen Batterie besteht Explosionsgefahr Ersetzen Sie die Batterie nur durch den gleichen oder vom Hersteller empfohlenen Batterietyp Entsorgen Sie die benutzten Batterien nach den Anweisungen des Herstellers Warning There is a danger of explosion if the battery is replaced incorrectly Replace the battery only with the same or equivalent type rec...

Страница 26: ...nte אזהרה סכנת קיימת פיצוץ תקינה לא בדרך והוחלפה במידה הסוללה של להחליף יש בסוג הסוללה את מ התואם חברת מומל יצרן צת הסוללות סילוק המשומשות לבצע יש היצרן הוראות לפי خطر هناك من اسحبذال حالة في انفجار البطارية صحيحة غير بطريقة فعليل البطارية اسحبذال فقط النىع بنفس يعادلها ما أو مما أوصث المصنعة الشرمة به البطاريات من جخلص ل وفقا المسحعملة الصانعة الشرمة حعليمات 경고 배터리가 올바르게 교체되지 않으면 폭발의 위험이 있습니다 기존 ...

Страница 27: ...Entsorgung dieses Produkts sollte gemäß allen Bestimmungen und Gesetzen des Landes erfolgen Advertencia Al deshacerse por completo de este producto debe seguir todas las leyes y regla mentos nacionales Attention La mise au rebut ou le recyclage de ce produit sont généralement soumis à des lois et ou directives de respect de l environnement Renseignez vous auprès de l organisme compétent המוצר סילו...

Страница 28: ...ng their pins Put the motherboard and peripherals back into their antistatic bags when not in use For grounding purposes make sure your computer chassis provides excellent conductivity between the power supply the case the mounting fasteners and the motherboard Use only the correct type of onboard CMOS battery Do not install the onboard battery upside down to avoid possible explosion Unpacking The...

Страница 29: ...buy a CPU separately make sure that you use an Intel certified multi directional heatsink only Make sure to install the system board into the chassis before you install the CPU heatsink When receiving a server board without a processor pre installed make sure that the plastic CPU socket cap is in place and none of the socket pins are bent otherwise contact your retailer immediately Refer to the Su...

Страница 30: ...index finger to hold the CPU at the North center edge and the South center edge of the CPU 4 Align the CPU key that is the semi circle cutouts against the socket keys Once it is aligned carefully lower the CPU straight down into the socket Do not drop the CPU on the socket Do not move the CPU horizontally or verti cally South Center Edge North Center Edge ...

Страница 31: ...mage your CPU Instead open the load plate again and double check that the CPU is aligned properly CPU properly installed Load lever locked into place 5 Do not rub the CPU against the surface or against any pins of the socket to avoid damaging the CPU or the socket 6 With the CPU inside the socket inspect the four corners of the CPU to make sure that the CPU is properly installed 7 Use your thumb t...

Страница 32: ...t interfered with other compo nents 3 Inspect the CPU Fan wires to make sure that the wires are routed through the bottom of the heatsink 4 Remove the thin layer of the protec tive film from the heatsink Warning CPU overheat may occur if the protective film is not removed from the heatsink 5 Apply the proper amount of thermal grease on the CPU Note If your heatsink came with a thermal pad please i...

Страница 33: ...es until you hear a click Also make sure to orient each fastener so that the narrow end of the groove is pointing outward 8 Repeat Step 7 to insert all four heatsink fasteners into the mounting holes 9 Once all four fasteners are securely inserted into the mounting holes and the heat sink is properly installed on the motherboard connect the heatsink fan wires to the CPU Fan connector ...

Страница 34: ... done to the CPU or other components Active Heatsink Removal 1 Unplug the power cord from the power supply 2 Disconnect the heatsink fan wires from the CPU fan header 3 Use your finger tips to gently press on the fastener cap and turn it counterclockwise to make a 1 4 900 turn and pull the fastener upward to loosen it 4 Repeat Step 3 to loosen all fasteners from the mounting holes 5 With all faste...

Страница 35: ...TION Exercise extreme care when installing or removing DIMM modules to prevent any possible damage DIMM Installation 1 Insert the desired number of DIMMs into the memory slots starting with DIMMB2 Channel B Slot 2 blue slot See the next page for the location For the system to work properly please use the memory modules of the same type and speed in the same motherboard Release Tabs Notches 2 Push ...

Страница 36: ... when populating the X10SLM F_X10SLL F SF S DDR3 Unbuffered ECC UDIMM Memory DIMM Slots per Channel DIMMs Populat ed per Channel DIMM Type POR Speeds Ranks per DIMM any combination 2 1 Unbuffered DDR3 1333 1600 Single Rank Dual Rank 2 2 Unbuffered DDR3 1333 1600 Single Rank Dual Rank Notes Be sure to use memory modules of the same type same speed same frequency on the same motherboard Mixing of me...

Страница 37: ...http support microsoft com kb 888137 Possible System Memory Allocation Availability System Device Size Physical Memory Remaining Available 4 GB Total System Memory Firmware Hub flash memory System BIOS 1 MB 3 99 Local APIC 4 KB 3 99 Area Reserved for the chipset 2 MB 3 99 I O APIC 4 Kbytes 4 KB 3 99 PCI Enumeration Area 1 256 MB 3 76 PCI Express 256 MB 256 MB 3 51 PCI Enumeration Area 2 if needed ...

Страница 38: ...nd its components please do not use a force greater than 8 lb inch on each mounting screw during motherboard installation 2 Some components are very close to the mounting holes Please take precautionary measures to avoid damaging these components when installing the motherboard to the chassis 2 5 Motherboard Installation All motherboards have standard mounting holes to fit different types of chass...

Страница 39: ...chassis as needed 5 Install the motherboard into the chassis carefully to avoid damaging other motherboard components 6 Using the Phillips screwdriver insert a Phillips head 6 screw into a mounting hole on the motherboard and its matching mounting hole on the chassis 7 Repeat Step 5 to insert 6 screws into all mounting holes 8 Make sure that the motherboard is securely placed in the chassis Note I...

Страница 40: ...CPU SLOT5 PCI E 3 0 X8 CPU SLOT6 PCI E 3 0 X8 IN X16 JF1 I SATA4 I SATA3 I SATA5 I SATA2 I SATA1 I SATA0 USB8 9 JRK1 T SGPIO2 JPB1 X10SLM F X10SLL F SF S Rev 1 02 BMC FW FP Control PCH BMC CTRL CPU SP1 LED4 IPMI Code BAR Code MAC Code JBT1 BIOS 2 6 Connectors IO Ports The I O ports are color coded in conformance with the industry standards See the figure below for the colors and locations of the v...

Страница 41: ... SGPIO2 JPB1 X10SLM F X10SLL F SF S Rev 1 02 BMC FW FP Control PCH BMC CTRL CPU SP1 LED4 IPMI Code BAR Code MAC Code JBT1 BIOS Video Connection A Video VGA port is located next to LAN2 on the I O backplane Refer to the board layout below for the location Serial Ports Two COM connections COM1 COM2 are located on the X10SLM F X10SLL F motherboard COM1 is located on the Backplane I O panel COM2 is lo...

Страница 42: ...ack panel of the X10SLM F and X10SLL F while two USB 2 0 ports USB 4 5 are located on the X10SLL S SF In addition three USB 3 0 headers four USB 3 0 connections 0 1 2 3 are located on the X10SLM F two USB 3 0 headers USB 0 1 are located on the X10SLL F A USB 2 0 header with two USB 2 0 connections USB 8 9 are also located on X10SLM X10SLL to provide front chassis access using USB cables not includ...

Страница 43: ...PIO2 JPB1 X10SLM F X10SLL F SF S Rev 1 02 BMC FW FP Control PCH BMC CTRL CPU SP1 LED4 IPMI Code BAR Code MAC Code JBT1 BIOS A C Ethernet Ports Two Gigabit Ethernet ports LAN1 LAN2 are located next to the VGA Connector on the I O Backpanel to provide network connections An IPMI dedicated LAN port is also lo cated on the F model boards These ports accept RJ45 type cables Note Please refer to the LED...

Страница 44: ...2 JPB1 X10SLM F X10SLL F SF S Rev 1 02 BMC FW FP Control PCH BMC CTRL CPU SP1 LED4 IPMI Code BAR Code MAC Code JBT1 BIOS Front Control Panel JF1 contains header pins for various buttons and indicators that are normally located on a control panel at the front of the chassis These connectors are designed spe cifically for use with Supermicro chassis See the figure below for the descriptions of the f...

Страница 45: ...P1 DIMMA2 P1 DIMMA1 PCH SLOT4 PCI E 2 0 X4 IN X8 CPU SLOT5 PCI E 3 0 X8 CPU SLOT6 PCI E 3 0 X8 IN X16 JF1 I SATA4 I SATA3 I SATA5 I SATA2 I SATA1 I SATA0 USB8 9 JRK1 T SGPIO2 JPB1 X10SLM F X10SLL F SF S Rev 1 02 BMC FW FP Control PCH BMC CTRL CPU SP1 LED4 IPMI Code BAR Code MAC Code JBT1 BIOS Front Control Panel Pin Definitions A NMI B PWR LED A B Power LED The Power LED connection is located on p...

Страница 46: ...on Pins 9 and 10 Attach the NIC LED cables to the LED indicators mentioned above to display network activity Refer to the layout below for the locations of NIC LED indicators LAN1 2 LED Pin Definitions JF1 Pin Definition 9 3 3V Stby 10 NIC 2 Activity LED 11 3 3V Stby 12 NIC 1 Activity LED C FAN2 JP9 SW1 T SGPIO1 JSTBY1 JIPMB1 JPW2 JSD1 LED3 LED2 JD1 LED5 LED1 JPI2C1 BT1 JPW1 JTPM1 FANA FAN3 FAN1 F...

Страница 47: ...e table on the right for pin definitions OH Fan Fail PWR Fail LED Status Red LED State Definition Off Normal On Overheat Flashing Fan Fail A OH Fan Faill B PWR Fail LED FAN2 JP9 SW1 T SGPIO1 JSTBY1 JIPMB1 JPW2 JSD1 LED3 LED2 JD1 LED5 LED1 JPI2C1 BT1 JPW1 JTPM1 FANA FAN3 FAN1 FAN2 FAN4 JPL1 JPL2 JPME2 JWD1 JPG1 JBR1 JPME1 J19 J18 J7 JVR1 JI2C1 JI2C2 JOH1 JP8 JL1 JP2 JP1 JP7 USB 3 0 0 USB 3 0 1 USB ...

Страница 48: ...finition 1 Signal 2 Ground Reset Button The Reset Button connection is located on pins 3 and 4 of JF1 Attach it to a hardware reset switch on the computer case Refer to the table on the right for pin definitions Reset Button Pin Definitions JF1 Pin Definition 3 Reset 4 Ground A Reset Button B PWR Button FAN2 JP9 SW1 T SGPIO1 JSTBY1 JIPMB1 JPW2 JSD1 LED3 LED2 JD1 LED5 LED1 JPI2C1 BT1 JPW1 JTPM1 FAN...

Страница 49: ...aders and connectors Be sure to use the correct cable for each header or connector For information on Backpanel USB and Front Panel USB ports refer to Page 2 21 A 24 Pin ATX Main PWR Required B 4 Pin PWR Recom mended ATX Power 24 pin Connector Pin Definitions JPW1 Pin Definition Pin Definition 13 3 3V 1 3 3V 14 12V 2 3 3V 15 Ground 3 Ground 16 PS_ON 4 5V 17 Ground 5 Ground 18 Ground 6 5V 19 Ground...

Страница 50: ... A F Chassis Intrusion Fan Header Pin Definitions Pin Definition 1 Ground Black 2 2 5A 12V Red 3 Tachometer 4 PWM_Control Fan Headers Fan 1 Fan 4 Fan A The X10SLM F_X10SLL F SF S has five fan headers Fan 1 Fan 4 Fan A These fans are 4 pin fan headers Although pins 1 3 of the fan headers are backward compatible with the traditional 3 pin fans we recommend that 4 pin fans be used to take advantage o...

Страница 51: ... Code JBT1 BIOS Internal Buzzer The Internal Buzzer SP1 can be used to provide audible indications for various beep codes See the table on the right for pin definitions A Internal Buzzer B Speaker Header Internal Buzzer Pin Definition Pin Definitions Pin 1 Pos Beep In Pin 2 Neg Alarm Speaker A Power LED Speaker On JD1 header pins 1 3 are used for power LED indication and pins 4 7 are for the speak...

Страница 52: ...I SATA5 I SATA2 I SATA1 I SATA0 USB8 9 JRK1 T SGPIO2 JPB1 X10SLM F X10SLL F SF S Rev 1 02 BMC FW FP Control PCH BMC CTRL CPU SP1 LED4 IPMI Code BAR Code MAC Code JBT1 BIOS A DOM PWR B Wake On LAN A B DOM PWR Connector JSD1 The Disk On Module DOM power connector located at JSD1 provides 5V Gen1 Gen power to a solid state DOM storage device connected to one of the SATA ports See the table on the rig...

Страница 53: ...T SGPIO 1 B T SGPIO 2 C JTPM1 A B T SGPIO 1 2 Headers Two Serial Link General Purpose Input Output headers T SGPIO 1 2 are located on the motherboard to en hance system performance See the table on the right for pin definitions Note NC No Connection T SGPIO Pin Definitions Pin Definition Pin Definition 1 NC 2 NC 3 Ground 4 Data 5 Load 6 Ground 7 Clock 8 NC TPM Header Port 80 Header A Trusted Platf...

Страница 54: ...A3 I SATA5 I SATA2 I SATA1 I SATA0 USB8 9 JRK1 T SGPIO2 JPB1 X10SLM F X10SLL F SF S Rev 1 02 BMC FW FP Control PCH BMC CTRL CPU SP1 LED4 IPMI Code BAR Code MAC Code JBT1 BIOS B A PWR SMB B IPMB A Power SMB I2 C Connector Power System Management Bus I2 C Connector JPI2 C1 monitors power supply fan and system temperatures See the table on the right for pin defini tions PWR SMB Pin Definitions Pin De...

Страница 55: ...W FP Control PCH BMC CTRL CPU SP1 LED4 IPMI Code BAR Code MAC Code JBT1 BIOS 2 8 Jumper Settings Explanation of Jumpers To modify the operation of the motherboard jumpers can be used to choose between optional settings Jumpers create shorts be tween two pins to change the function of the connector Pin 1 is identified with a square solder pad on the printed circuit board Note On two pin jumpers Clo...

Страница 56: ...Code BAR Code MAC Code JBT1 BIOS A Watch Dog B JI2 C1 C JI2 C2 PCI Slot_SMB Enable Jumper Settings Jumper Setting Definition On Enabled Off Default Disabled PCI Slot SMB Enable I2 C1 I2 C2 Use Jumpers I2 C1 I2 C2 to enable PCI SMB System Management Bus support to improve system management for the PCI slots See the table on the right for jumper settings C A B Watch Dog Enable Disable Watch Dog JWD1...

Страница 57: ...A1 I SATA0 USB8 9 JRK1 T SGPIO2 JPB1 X10SLM F X10SLL F SF S Rev 1 02 BMC FW FP Control PCH BMC CTRL CPU SP1 LED4 IPMI Code BAR Code MAC Code JBT1 BIOS A VGA Enable B BIOS Recovery Enable A B VGA Enable Jumper JPG1 allows the user to enable the onboard VGA connector The default setting is pins 1 2 to enable the con nection See the table on the right for jumper settings VGA Enable Jumper Settings Ju...

Страница 58: ...E Recovery B Manufacturer Mode Select A B Management Engine ME Recovery Use Jumper JPME1 to select ME Firm ware Recovery mode which will limit resource allocation for essential system operation only in order to maintain nor mal power operation and management In the single operation mode online upgrade will be available via Recovery mode See the table on the right for jumper settings ME Recovery Ju...

Страница 59: ... Each Ethernet LAN port has two LEDs The yellow LED indi cates activity while the Link LED may be green amber or off to indicate the speed of the connections See the tables at right for more information 2 9 Onboard Indicators Activity LED B Link LED GLAN Ports 1 2 Link Indicator LED Settings LED Color Definition Off No Connection 10 Mbps Amber 1 Gbps Green 100 Mbps GLAN 1 2 Activity Indicator LED ...

Страница 60: ...SF S Rev 1 02 BMC FW FP Control PCH BMC CTRL CPU SP1 LED4 IPMI Code BAR Code MAC Code JBT1 BIOS Onboard PWR LED Indicator LED Status Status Definition Off System Off On System on or System off and PWR Cable Connected Onboard Power LED An Onboard Power LED is located at LED4 on the motherboard When LED4 is on the AC power cable is connected Make sure to disconnect the power cable before removing or...

Страница 61: ... Code JBT1 BIOS SATA Connections For the X10SLM F Four Serial ATA SATA 3 0 connectors I SATA 0 3 and two SATA 2 0 I SATA 4 5 are located on the X10SLM F motherboard These SATA ports are supported by the Intel C224 PCH chip These SATA ports support RAID 0 1 10 and 5 Serial Link connections provide faster data transmission than legacy Parallel ATA See the table below for pin definitions SATA 2 0 3 0...

Страница 62: ...0SLL series motherboard In addition four SATA 2 0 I SATA 2 5 are located on the X10SLL F and two SATA 2 0 I SATA 2 3 are located on the X10SLL SF X10SLL S motherboard These SATA ports are supported by the Intel C222 PCH chip These SATA ports support RAID 0 1 10 and 5 Serial Link connections provide faster data transmission than legacy Parallel ATA See the tables below for pin definitions SATA 2 0 ...

Страница 63: ...onents 2 Make sure that there are no short circuits between the motherboard and chassis 3 Disconnect all ribbon wire cables from the motherboard including those for the keyboard and mouse Also be sure to remove all add on cards 4 Install a CPU and heatsink be sure that it is fully seated and then connect the chassis speaker and the power LED to the motherboard Check all jumper settings as well No ...

Страница 64: ...urer Also it is recommended that you use the memory modules of the same type and speed for all DIMMs in the system Do not use memory modules of different sizes different speeds and different types on the same motherboard 3 Check for bad DIMM modules or slots by swapping modules between slots to see if you can locate the faulty ones 4 Check the switch of 115V 230V power supply Losing the System s S...

Страница 65: ... be downloaded from our website at http www supermi cro com support bios Note Not all BIOS can be flashed Some cannot be flashed it depends on the boot block code of the BIOS 3 If you ve followed the instructions above to troubleshoot your system and still cannot resolve the problem then contact Supermicro s technical support and provide them with the following information Motherboard model and PC...

Страница 66: ...file from your bootable device or USB pen thumb drive Use the following format F ami bat BIOS ROM filename xxx Enter Note Always use the file named ami bat to update the BIOS and insert a space between ami bat and the filename The BIOS ROM filename will bear the motherboard name i e X10SLM F_X10SLL F SF S and build version as the extension For example X10SLM F_X10SLL F SF S 115 When completed your...

Страница 67: ...mper location please check Chapter 1 Question What is the heatsink part number for my X10SLM F_X10SLL F SF S motherboard Answer For the 1U passive heatsink ask for SNK P0046P back plate is included For the 2U active heatsink use SNK P0046A4 Question Why can t I recover the BIOS even when I ve followed the instructions in the user s manual for the motherboard Answer Please disable the IPMI jumper a...

Страница 68: ...amages incurred in shipping or from failure due to the alteration misuse abuse or improper maintenance of products During the warranty period contact your distributor first for any product problems Proper Battery Disposal Warning Please handle used batteries carefully Do not damage the battery in any way a damaged battery may release hazardous materials into the environment Do not discard a used b...

Страница 69: ...ll the options that can be configured Grayed out options cannot be configured Options in blue can be configured by the user The right frame displays the key legend Above the key legend is an area reserved for a text message When an option is selected in the left frame it is highlighted in white Often a text message will accompany it Note the AMI BIOS has default text messages built in Supermicro r...

Страница 70: ...ning Do not upgrade the BIOS unless your system has a BIOS related issue Flashing the wrong BIOS can cause irreparable damage to the system In no event shall Supermicro be liable for direct indirect special incidental or consequential dam ages arising from a BIOS update If you have to update the BIOS do not shut down or reset the system while the BIOS is updating This is to avoid possible boot fai...

Страница 71: ... arrow keys Enter new values through the keyboard Press the Tab key or the arrow keys to move between fields The date must be entered in Day MM DD YY format The time is entered in HH MM SS format Note The time is in the 24 hour format For example 5 30 P M appears as 17 30 00 The following BIOS items will also be displayed Supermicro X10SLM F Version Build Date Memory Information Total Memory ...

Страница 72: ...the setting to its manufacture default setting Boot Feature Quiet Boot This feature selects the screen display between POST messages or the OEM logo at bootup Select Disabled to display the POST messages Select Enabled to display the OEM logo instead of the normal POST messages The options are Enabled and Disabled AddOn ROM Display Mode This feature sets the display mode for the Option ROM Select ...

Страница 73: ... system from a speci fied boot device after its initial boot failure The options are Disabled Legacy Boot and EFI Boot Power Configuration Watch Dog Function If enabled the Watch Dog Timer will allow the system to reboot when it is inactive for more than 5 minutes The options are Enabled and Disabled Power Button Function This feature controls how the system shuts down when the power button is pre...

Страница 74: ...ature Microcode Patch Maximum CPU Speed Minimum CPU Speed CPU Speed Processor Cores Intel HT Hyper Threading Technology Intel VT x Virtualization Technology Intel SMX Safer Mode Extensions Technology 64 bit EIST Enhanceed Intel SpeedstepTechnology Technology CPU C3 State CPU C6 State CPU C7 State L1 Data Cache L1 Code Cache L2 Cache L3 Cache ...

Страница 75: ...lm the processor or damage the system during an attack The default is Enabled Refer to Intel and Microsoft Web Sites for more information Intel Virtualization Technology Available when supported by the CPU Select Enabled to use the Intel Virtualization Technology to allow one platform to run multiple operating systems and applications in independent partitions creat ing multiple virtual systems in...

Страница 76: ...rbo Mode is set to Enabled This item allows the user to determine how long CPU1 should operate at the power limit set by the user for the item above Use the number keys on your keyboard to enter the value Enter 0 to use the manufacture default setting CPU Power Limit2 Available when Turbo Mode is set to Enabled Use this feature to set the power limit for CPU2 Use the number keys on your keyboard t...

Страница 77: ...bus speed when four CPU cores are active Press or on your keyboard to change this value Enter 0 to use the manufacture default setting Energy Performance Use this feature to select an appropriate fan setting to achieve the maximum system performance with maximum cooling or maximum energy efficiency with maximum power saving The fan speeds are controlled by the firmware management via IPMI 2 0 The ...

Страница 78: ...Enabled Select Enabled to allow the BIOS to report the CPU C7 State ACPI C3 to the operating system CPU C7 State is a processor specific low C State The options are Enabled and Disabled C7 Latency Available when CPU C States is set to Enabled Select Short to set a short delay time period during which the BIOS reports CPU C7 State ACPI C3 to the operating system Select Long to set a long delay time...

Страница 79: ... VT d Capability VT d Select Enabled to enable Intel s Virtualization Technology support for Direct I O VT d by reporting the I O device assignments to VMM Virtual Memory Management through the DMAR ACPI Tables This feature offers fully protected I O resource sharing across the Intel platforms providing the user with greater reliability secu rity and availability in networking and data sharing The...

Страница 80: ...serial link devices installed on PCI Exp slots during prolonged off peak time If this item is set to Enabled PCI E ASMP will be programmed after OpROM If this item is set to Disabled the PCI E ASPM will be programmed before OpROM The options are Enabled and Disabled PEG0 ASPM PEG1 ASPM This feature configures the ASPM Active State Power Management settings for the graphics devices installed on PCI...

Страница 81: ...vely if these devices are enabled The op tions are Enabled and Dynamic 1 GB 1 25 GB 1 5 GB 1 75 GB 2 GB 2 25 GB 2 5 GB 2 75 GB 3 GB and 3 25 GB Note TSEG is a block of memory that is only accessible by the processor while operating in SMM mode Memory Scrambler This feature enables or disables memory scrambler support for memory error correction The settings are Enabled and Disabled PCH IO Configur...

Страница 82: ... not have XHCI Ex tensible Host Controller Interface hand off support The XHCI ownership change should be claimed by the XHCI driver The settings are Enabled and Disabled EHCI Hand Off This item is for Operating Systems that does not support Enhanced Host Con troller Interface EHCI hand off When enabled EHCI ownership change will be claimed by the EHCI driver The settings are Enabled and Disabled ...

Страница 83: ...em displays the information detected on the installed SATA drives on the particular SATA port Model number of drive and capacity Software Preserve Support Port 0 Port 5 Hot Plug This feature designates the port specified for hot plugging Set this item to En abled for hot plugging support which will allow the user to replace a SATA disk drive without shutting down the system The options are Enabled...

Страница 84: ...t which will allow the user to replace a SATA drive without shutting down the system The options are Enabled and Disabled Port 0 Port 1 SATA Device Type This feature configures the selected SATA port to support either a solid state drive or hard disk drive Set this item to Enabled to enable hot plugging The options are Hard Disk Drive and Solid Sate Drive Port 0 Port 5 Spin Up Device On an edge de...

Страница 85: ...se this feature to enable or disable PCIe slot Option ROMs to boot the computer using a device installed on the slot specified The options are Disabled Legacy and EFI CPU SLOT5 PCI E 3 0 X8 OPROM Use this feature to enable or disable PCIe slot Option ROMs to boot the computer using a device installed on the slot specified The options are Disabled Legacy and EFI Launch Storage OPROM Policy This fea...

Страница 86: ...tions are Enabled and Disabled Ipv6 PXE Support Available when Network Stack is set to Enabled Select Enabled to enable Ipv6 PXE Preboot Execution Environment for boot sup port If this feature is set to Disabled Ipv6 PXE boot option will not be supported The options are Enabled and Disabled ACPI Settings High Precision Event Timer Select Enabled to activate the High Performance Event Timer HPET th...

Страница 87: ...sabled Change Port 1 Settings This feature specifies the base I O port address and the Interrupt Request ad dress of Serial Port 1 Select Auto to let the BIOS automatically assign the base I O and IRQ address The options for Serial Port 1 are Auto IO 3F8h IRQ 4 IO 3F8h IRQ 3 4 5 6 7 9 10 11 12 IO 2F8h IRQ 3 4 5 6 7 9 10 11 12 IO 3E8h IRQ 3 4 5 6 7 9 10 11 12 and IO 2E8h IRQ 3 4 5 6 7 9 10 11 12 Se...

Страница 88: ...ction key support Select ANSI to use the Extended ASCII Char acter Set Select VT UTF8 to use UTF8 encoding to map Unicode characters into one or more bytes The options are ANSI VT100 VT100 and VT UTF8 Bits Per second Use this feature to set the transmission speed for a serial port used in Console Redirection Make sure that the same speed is used in the host computer and the client computer A lower...

Страница 89: ... are Disabled and Enabled Resolution 100x31 Select Enabled for extended terminal resolution support The options are Dis abled and Enabled Legacy OS Redirection Resolution Use this feature to select the number of rows and columns used in Console Redirection for legacy OS support The options are 80x24 and 80x25 Putty KeyPad This feature selects Function Keys and KeyPad settings for Putty which is a ...

Страница 90: ... to add color and function key support Select ANSI to use the extended ASCII character set Select VT UTF8 to use UTF8 encoding to map Unicode characters into one or more bytes The options are ANSI VT100 VT100 and VT UTF8 Bits Per Second This item sets the transmission speed for a serial port used in Console Redirec tion Make sure that the same speed is used in the host computer and the client comp...

Страница 91: ... Log If No is selected data stored in the event log will not be erased Select Yes Next Reset data in the event log will be erased upon next system reboot Select Yes Every Reset data in the event log will be erased upon every system reboot The options are No Yes Next reset and Yes Every reset When Log is Full Select Erase Immediately for all messages to be automatically erased from the event log wh...

Страница 92: ... Count Increment MECI counter counts the number of oc curences a duplicate event must happen before the MECI counter is incremented This is a numeric value The default value is 1 METW The Multiple Event Time Window METW defines number of minutes must pass between duplicate log events before MECI is incremented This is in minutes from 0 to 99 The default value is 60 View SMBIOS Event Log This secti...

Страница 93: ... to enable or disable all features of System Event Logging The options are Enabled and Disabled When this feature is set to Enabled the following can be configured Erase SEL This option erases all logged SEL events The options are No Yes On Next reset and Yes On Every reset When SEL Full This option automatically clears the System Event Log memory of all messages when it is full The options are Do...

Страница 94: ... search for a DHCP Dynamic Host Configuration Protocol server in the network that is at tached to and request the next available IP address for this computer The options are DHCP and Static The following items are assigned IP addresses automatically if DHCP is selected or can be configured manually if Static is selected Station IP Address This item displays the Station IP address for this computer...

Страница 95: ... Press ENTER on each entry from top to bottom to select devices 1st Boot Device 2nd Boot Device 3rd Boot Device 4th Boot Device 5th Boot Device 6th Boot Device Network Device BBS Priorities UEFI Boot Drive BBS Priorities This feature allows the user to specify which devices are boot devices and appear as boot devices to the system The settings are any detected boot device and Disabled ...

Страница 96: ...elete a previously defined boot device from which the systems boots during startup The settings are any pre defined boot device Delete Driver Option This feature allows the user to delete a previously defined boot device from which the systems boots during startup The settings are any pre defined boot device ...

Страница 97: ...s defined ONLY this controls access to the BIOS setup ONLY If the User s password is defined ONLY this password will need to be entered upon each system boot and will also have Administrator rights in the setup Passwords must be at least 3 and up to 20 characters long Administrator Password Press Enter to create a new or change an existing Administrator password ...

Страница 98: ...ress Enter Save Changes and Reset When you have completed the system configuration changes select this option to leave the BIOS Setup Utility and reboot the computer so the new system con figuration parameters can take effect Select Save Changes and Exit from the Exit menu and press Enter Save Options Save Changes When you have completed the system configuration changes select this option to save ...

Страница 99: ...er Defaults from the Exit menu and press En ter This enables the user to save any changes to the BIOS setup for future use Restore User Defaults To set this feature select Restore User Defaults from the Exit menu and press En ter Use this feature to retrieve user defined settings that were saved previously Boot Override Listed on this section are other boot options for the system i e Built in EFI ...

Страница 100: ...4 32 X10SLM F X10SLL F X10SLL SF X10SLL S User s Manual Notes ...

Страница 101: ...low the system to continue to bootup If a fatal error oc curs you should consult with your system manufacturer for possible repairs These fatal errors are usually communicated through a series of audible beeps The numbers on the fatal error list correspond to the number of beeps for the corresponding error A 1 BIOS Error Beep Codes BIOS Error Beep Codes Beep Code LED Error Message Description 1 be...

Страница 102: ...A 2 X10SLM F X10SLL F X10SLL SF X10SLL S User s Manual Notes ...

Страница 103: ... you may down load individual drivers and utilities After creating a CD DVD with the ISO files insert the disk into the CD DVD drive on your system and the display shown below should appear Note 1 Click the icons showing a hand writing on paper to view the readme files for each item Click the computer icons to the right of these items to install each item from top to the bottom one at a time After...

Страница 104: ... in local and remote management versions and can be used with Nagios to maximize your system monitoring needs With SuperDoctor 5 Man agement Server SSM Server you can remotely control power on off and reset chassis intrusion for multiple systems with SuperDoctor 5 or IPMI SD5 Manage ment Server monitors HTTP FTP and SMTP services to optimize the efficiency of your operation Note The default User N...

Страница 105: ... control to a computer system at bootup C 2 How to Recover the UEFI BIOS Image the Main BIOS Block A UEF BIOS flash chip consists of a recovery BIOS block comprised of two boot blocks and a main BIOS block a main BIOS image The boot block contains critical BIOS codes including memory detection and recovery codes for the user to flash a new BIOS image if the original main BIOS image is corrupted Wh...

Страница 106: ...e CD DVD Note If you cannot locate the Super ROM file in your driver disk visit our website at www supermicro com to download the BIOS image into a USB flash device and rename it Super ROM for BIOS recovery use 2 Insert the USB device that contains the new BIOS image Super ROM into your USB drive and power on the system 3 While powering on the system keep pressing Ctrl and Home simultane ously on ...

Страница 107: ...very is complete press any key to reboot the system 7 Using a different system extract the BIOS package into a bootable USB flash drive 8 When a DOS prompt appears enter AMI BAT BIOSname at the prompt Note Do not interrupt this process until BIOS flashing is completed ...

Страница 108: ...AC pow er cable from the power supply to clear CMOS and then plug the AC power cable in the power supply again to power on the system 10 Press Del continuously to enter the BIOS Setup utility 11 Press F3 to load default settings 12 After loading default settings press F4 to save the settings and exit the BIOS Setup utility ...

Страница 109: ...S crisis recovery flash that will update the main BIOS block An on call BIOS boot block corruption may occur due to a software tool issue see image below or an unexpected power outage during BIOS updates BIOS Boot Block Corruption Occurrence When a BIOS boot block is corrupted due to an unexpected power outage or a software tool malfunctioning during BIOS updates you can still reboot the system by...

Страница 110: ... by Using Jumper JBR1 1 Power down the system 2 Close pins 2 3 on Jumper JBR1 and power on the system 3 Follow the BIOS recovery SOP listed in the previous chapter Appendix C 4 After completing the steps above power down the system 5 Close pins 1 2 on Jumper JBR1 and power on the system ...

Страница 111: ... expected to result in significant injury or loss of life or catastrophic property damage Accordingly Supermicro disclaims any and all liability and should buyer use or sell such products for use in such ultra hazardous ap plications it does so entirely at its own risk Furthermore buyer agrees to fully indemnify defend and hold Supermicro harmless for and against any and all claims demands actions...

Отзывы: