


Questions? Call or Text +1-801-658-0015 •
7
The Micro Welder Experts
Attach Touchscreen to Microscope Arm
Assembly
Once the Microscope Arm Assembly has been firmly se
-
cured, the Touchscreen can be attached.
• Remove the Touchscreen from the foam in box 1.
• Line up the mount bracket on the back of the Touch-
screen with the slot in the clip mechanism on top of
the arm and lower it into the slot until the clip clicks
into place. It can be helpful to pull the clip back while
sliding down. See Figure 7.1.
•
Remove the screen protector film from the front of
the Touchscreen.
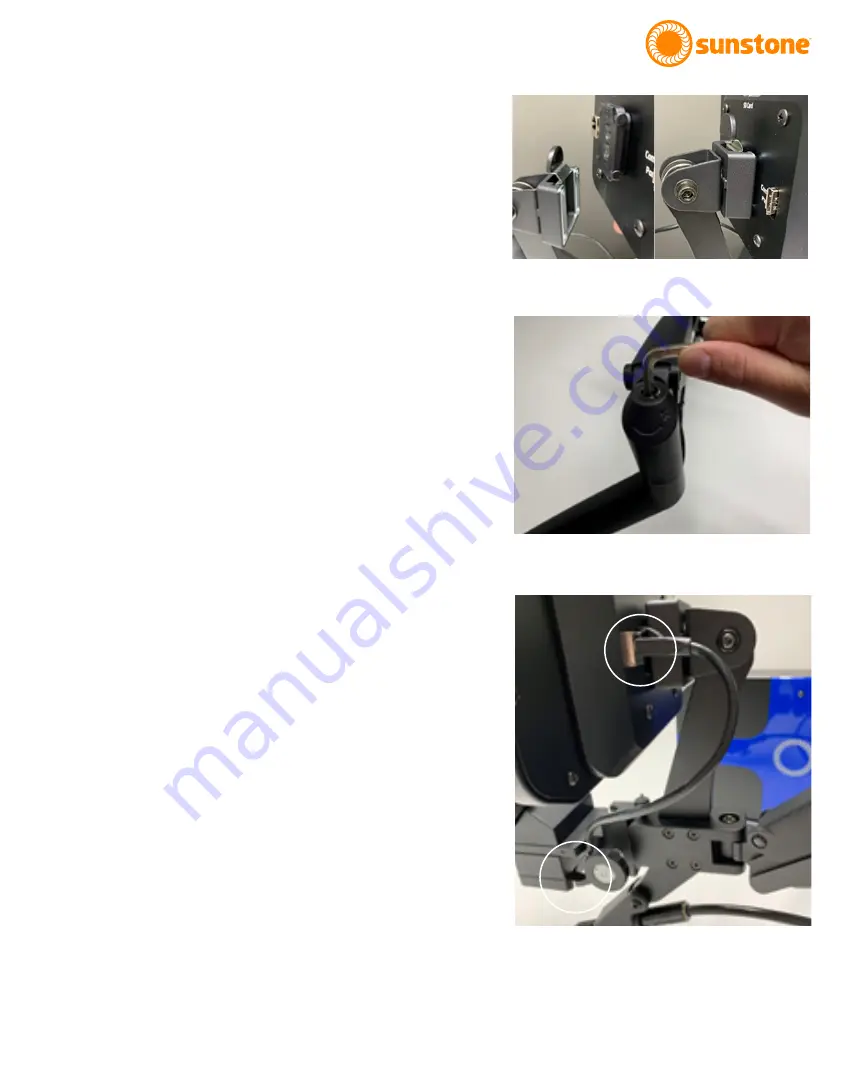
Arm Tension Adjustment
The spring tension is factory pre-set, but should changes be
desired, the tension can be adjusted by turning a hex screw
located on the arm joint, as shown in Figure 7.2. Use the
included 6mm Allen wrench to make adjustments.
• Turn the hex screw counterclockwise (in the direc-
tion of the “+” symbol on the arm) if the arm does
not hold the microscope up.
• Turn the hex screw clockwise (in the direction of the
“-“ symbol) if the arm does not allow the microscope
to be lowered easily.
Microscope Setup
• Install the rubber eyepiece covers onto the micro-
scope lenses.
• Plug the included Shutter Cable into the RJ45 port
on the microscope (the bottom of the microscope
head). See Figure 7.3.
• Plug the other end of the Shutter Cable into the
shutter port on the back of the Touchscreen.
Note: Connecting other RJ45 compatible devices to the
Sunstone shutter RJ45 port may damage the welder and/or
the other devices.
Figure 7.1. Attach the Touchscreen to the Microscope
Arm Assembly. Remove the screen protector film.
Figure 7.2. Adjust the tension of the Arm Assembly for
more loose or more tight movement.
Figure 7.3 After installing the rubber eyepiece covers,
use the Shutter Cable to connect the Touchscreen to
the bottom of the microscope head.


