J3 Carbon Back 127048
11
Rev.C
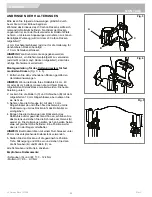
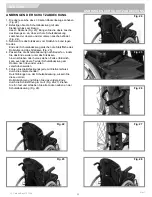
SPACER KIT INSTALLATION INSTRUCTIONS:
(Fig. 6, 7).
NOTE:
only needed for 34cm, 40cm & 44cm widths.
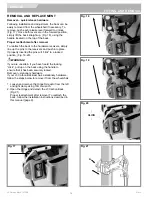
1. Remove the two (2) screws (B) that hold the Mounting
Bracket to the Back Cane clamp assembly, (Fig.6).
NOTE:
when you remove these screws, the barrel nuts will
be loose. Be ready to catch them, so they do not fall to the
floor.
2. Place the Spacer (D) between the Bracket and the
clamp assembly.
3. Replace the Barrel Nuts if necessary and align holes to
match up with the screws. Attach using the longer (M6 x
25) screws included in the kit.
INSTALLATION INSTRUCTIONS FOR THE
QUICK RELEASE MOUNTING SYSTEM
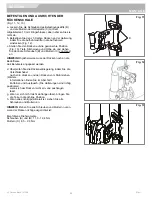
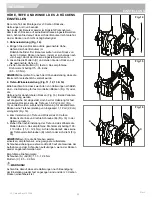
(Fig. 8, 9, 10,).
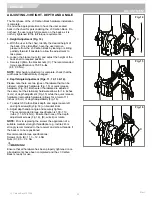
1. Remove the existing wheelchair back according to the
wheelchair manufacturer’s instructions.
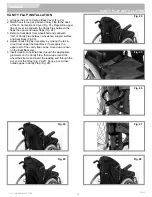
2. Visually determine the desired location of the receivers
on the wheelchair’s back canes. The mounting
hardware should be at approximately equal heights on
each back post (Fig. 8) and parallel to the seat frame,
(Fig.9). Higher locations on the back canes are generally
better.
3. Attach the hardware receivers. (Fig. 10)
Using the 10mm box end wrench loosen and remove
screw (A), Open hinge to allow placement around the
wheelchair Back Cane Tube.
NOTE:
for Back Cane tube diameters smaller than 25mm
use the appropriate sized spacer.
• Attach and align receiver to the wheelchair back canes.
• Hand tighten clamp screws (A).
NOTE:
Receivers may require additional lateral
adjustment to ensure proper alignment.
INSTALLATION
ENGLISH
PA
RALLEL
Fig. 9
Fig. 8
Fig. 7
D
B
Fig. 10
A
Fig. 6
B
A
C
Содержание J3 Carbon
Страница 88: ...J3 Carbon Back 127048 Rev C 88 Sunrise 6 Sunrise Medical Velcro Velcro 60 C Sunrise Medical 60 C...
Страница 94: ...J3 Carbon Back 127048 Rev C 94 17 18 19 20 J3 Carbon 1 A 10mm 2 J3 Carbon 21 9 17 18 19 20 21 A...
Страница 95: ...J3 Carbon Back 127048 95 Rev C 1 J3 Carbon 22 2 J3 Carbon 23 24 3 25 4 5 26 27 28 24 25 26 27 28 22 23...
Страница 147: ......


