V+ V+
CW- CW-
WW- WW-
V+ V+
CW- CW-
WW- WW-
V+ V+
CW- CW-
WW- WW-
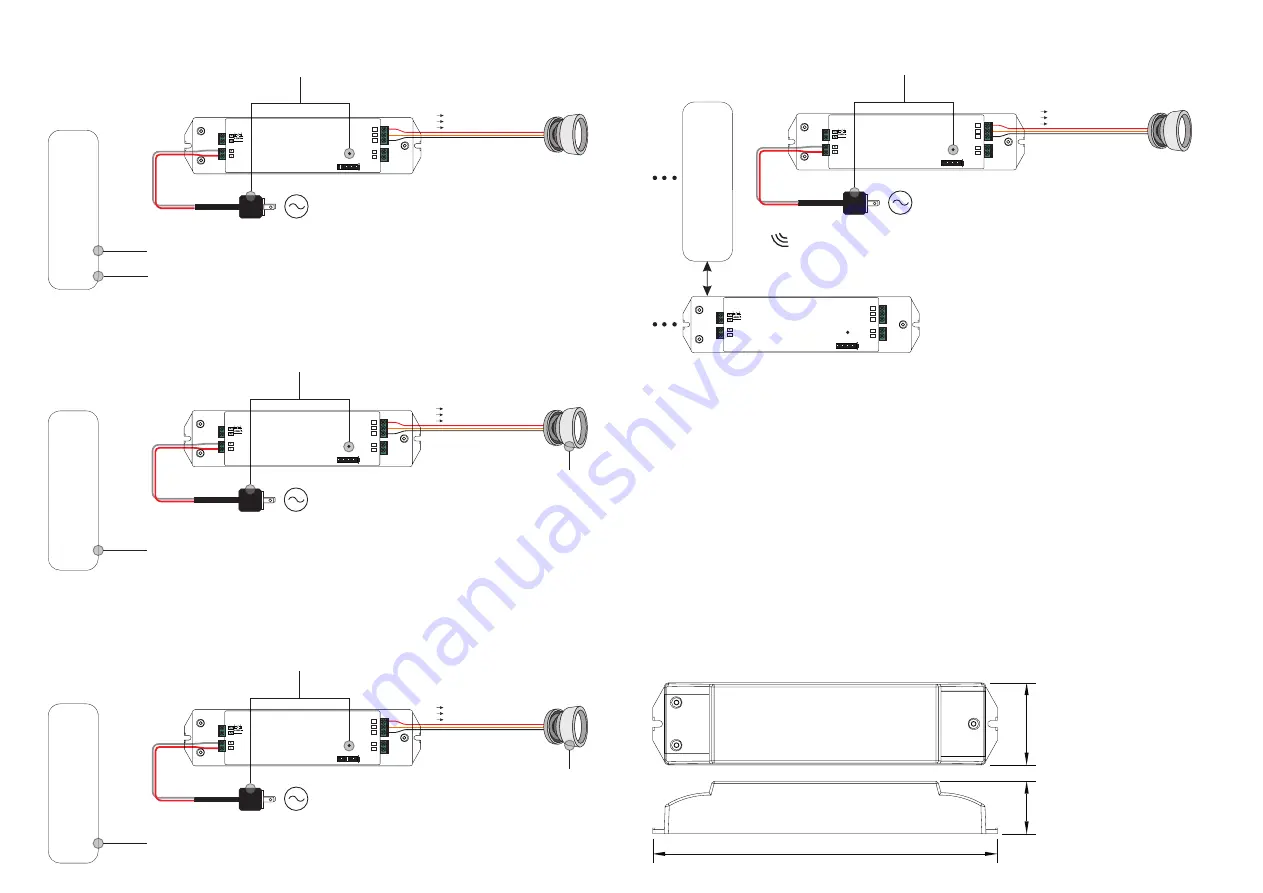
8. Find and Bind Mode
Step 1
: Short press “Prog.” button 3 times (Or re-power on the device (initiator node) 3 times) to start Find and
Bind mode (connected light flashes slowly) to find and bind target node, 180 seconds timeout, repeat the operation.
9. Learning to a Zigbee Green Power Switch
Step 1
: Short press “Prog.” button 4 times (Or re-power on the device 4 times) to start Learning to GP switch
mode (connected light flashes twice), 180 seconds timeout, repeat the operation.
10. Delete Learning to a Zigbee Green Power Switch
Step 2:
Set the paired green power remote into
Learning mode, please refer to its manual
.
Step 1
: Short press “Prog.” button 3 times (Or re-power on the device 3 times) to start delete Learning to GP
switch mode (connected light flashes slowly), 180 seconds timeout, repeat the operation.
11. Setup a Zigbee Network & Add Other Devices to the Network (No Coordinator Required)
Step 2
: Set another device or remote or touch panel
into network pairing mode and pair to the network,
refer to their manuals
.
Step 3
: Pair more devices and remotes to the network
as you would like, refer to their manuals.
Step 4
: Bind the added devices and remotes through
Touchlink so that the devices can be controlled by the
remotes, refer to their manuals.
Step 1
: Short press “Prog.” button 4 times (Or re-power on the device 4 times) to enable the device to setup a
zigbee network (connected light flashes twice) to discover and add other devices, 180 seconds timeout, repeat
the operation.
Zigbee
Remote
Step 2
: Set the remote or touch panel (target node) into find and bind mode, and enable it
to find and bind initiator, please refer to corresponding remote or touch panel manual
.
Step 3
: There shall be indication on the remote or touch panel that it bind the device
successfully and can control it then
.
Zigbee
Green
Power
Switch
Step 3
: Connected light will
flash twice to indicate
successful learning. Then the
switch can control the device.
Step 2:
Set the green power
switch into Learning mode,
please refer to its manual
.
Note: Each device can learn to
max. 20 zigbee green power switches.
Zigbee
Green
Power
Switch
Step 3
: Connected light will
flash 4 times to indicate
successful deleting.
12. ZigBee Clusters the device supports are as follows:
13. OTA
The device supports firmware updating through OTA, and will acquire new firmware from zigbee controller or
hub every 10 minutes automatically.
Note: 1) Each added device can link and be controlled by max. 30 added remotes.
2) Each added remote can link and control max. 30 added devices.
Input Clusters
• 0x0000: Basic • 0x0003: Identify • 0x0004: Groups • 0x0005: Scenes • 0x0006: On/off
• 0x0008: Level Control • 0x0300: Color Control • 0x0b05: Diagnostics
Output Clusters
• 0x0019: OTA
Zigbee
Remote
< 10cm TouchLink
50.0
210.0
32.0
Product Dimension
AC Power
50/60Hz
AC Power
50/60Hz
AC Power
50/60Hz
AC Power
50/60Hz
V+ V+
CW- CW-
WW- WW-
LED+
WW-
CW-
ZigBee LED Driver
S
E
LV
Prog key
A
C I
N
P
U
T
NC
NC
1 2 3 4 5 6 7 8
Push Switch Input
LED+
WW-
CW-
ZigBee LED Driver
S
E
LV
Prog key
A
C I
N
P
U
T
NC
NC
1 2 3 4 5 6 7 8
Push Switch Input
LED+
WW-
CW-
ZigBee LED Driver
S
E
LV
Prog key
A
C I
N
P
U
T
NC
NC
1 2 3 4 5 6 7 8
Push Switch Input
LED+
WW-
CW-
ZigBee LED Driver
S
E
LV
Prog key
A
C I
N
P
U
T
NC
NC
1 2 3 4 5 6 7 8
Push Switch Input
LED+
WW-
CW-
ZigBee LED Driver
S
E
LV
Prog key
A
C I
N
P
U
T
NC
NC
1 2 3 4 5 6 7 8
Push Switch Input


