7
For your safety
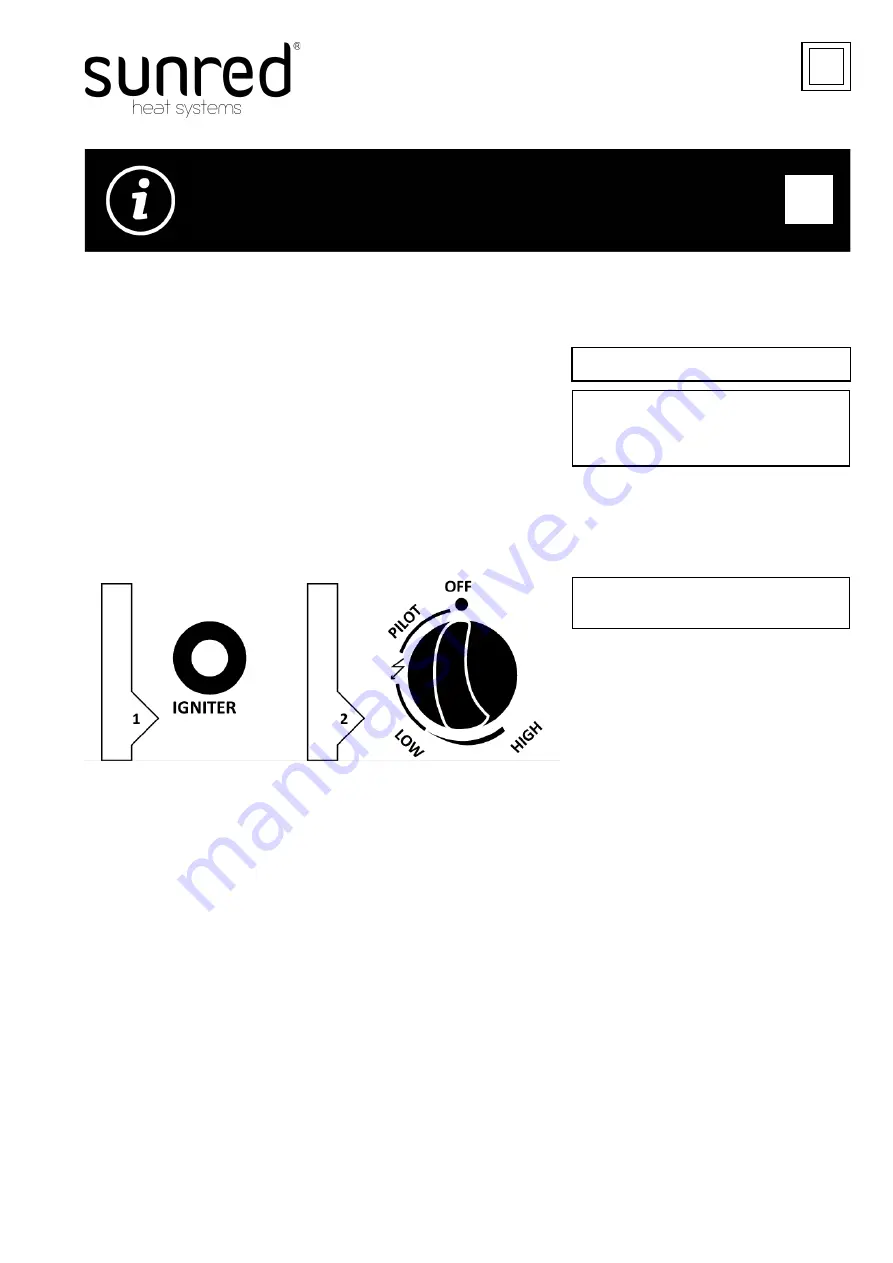
How to turn on the heater
1. Turn on the valve on the gas supply cylinder completely.
2. Press and turn the variable control knob to PILOT position (counter
-
clockwise
90 degrees).
3. Press down the variable control knob and hold for 60 seconds. While holding
down the variable control knob, press the igniter button several times until the
pilot flame lights. Release the variable control knob after the pilot flame lights.
4. After the pilot flame lights, turn the variable control knob to maximum
position and leave it there for 5 minutes or more before turning the knob to
desired temperature position.
Note:
If a new tank has just been connected, please allow at least one minute for the air I the gas pipeline to purge out through the hole.
When lighting the pilot flame make sure the variable control knob is continuously pressed down while pressing the igniter button.
Variable control knob can be released after the pilot flame lights.
If the pilot flame does not light or it goes out, repeat step 3.
Note:
If the pilot light ignites but does not stay lit, turn heater control knob to OFF position, fully close propane gas valve, wait 5 minutes,
then repeat steps
2
–
3.
Now, using a lighter, ignite the pilot light through the ignition hole on the emitter screen. Once the pilot light
is lit, depress control knob for 30 seconds.
How to turn the heater off
1). Turn the variable control knob to PILOT position.
2). Press and turn the variable control knob to OFF position.
Storage
1). Always close the gas valve of the gas cylinder after use or in case of a disturbance.
2). Remove the pressure regulator and the hose.
3). Check the tightness of the gas valve and if you suspect a damage, have it changed by your gas dealer.
4). Never store liquid gas cylinder in a sub
-
terrain, or at places without adequate air ventilation.
Off: The heater is off
High: Maximum temperature position
Low: Minimum temperature position
1). Igniter
2). Variable control knob
EN
Control panel may differ slightly
3
Содержание LH15B
Страница 10: ...10 COMPONENT OVERVIEW EN A Flame screen guard B Burner assembly C Cylinder Housing D Base E Wheel ...
Страница 11: ...11 COMPONENT OVERVIEW EN ...
Страница 13: ...13 ASSEMBLY EN ...


