6
We value your experience using Sunny Health and Fitness products. For assistance with parts or
troubleshooting, please contact us at [email protected] or 1-877-90SUNNY
(877-907-8669).
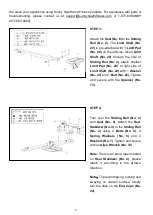
STEP 3:
Attach the
Seat (No. 6)
to the
Sliding
Rail (No. 2)
. The
Limit Shaft (No.
29)
is pre-attached with 1
Limit Pad
(No. 28)
on the left side. Insert
Limit
Shaft (No. 29)
through the hole of
Sliding Rail (No. 2)
, attach another
Limit Pad (No. 28)
to right side of
Limit Shaft (No. 29)
with 1
Washer
(No. 27)
and 1
Bolt (No. 26)
. Tighten
and secure with the
Spanner (No.
73)
.
STEP 4:
Turn over the
Sliding Rail (No. 2)
with
Seat (No. 6)
. Attach the
Rear
Stabilizer (No. 4)
to the
Sliding Rail
(No. 2)
using 4
Bolts (No. 9)
, 4
Spring Washers (No. 8)
and 4
Washers (No. 7)
. Tighten and secure
with an
Allen Wrench (No. 72)
.
Note:
There is an arrow label marked
on
Rear Stabilizer (No. 4)
, please
attach it according to the arrow’s
direction.
Note
:
To prevent tipping, rocking and
swaying on uneven surface, simply
turn the dials on the
End Caps (No.
24)
.
Содержание SF-RW520050
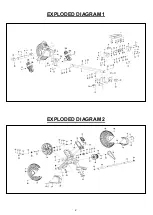
Страница 3: ...2 EXPLODED DIAGRAM 1 EXPLODED DIAGRAM 2...
Страница 4: ...3 HARDWARE PACKAGE...
Страница 13: ......


