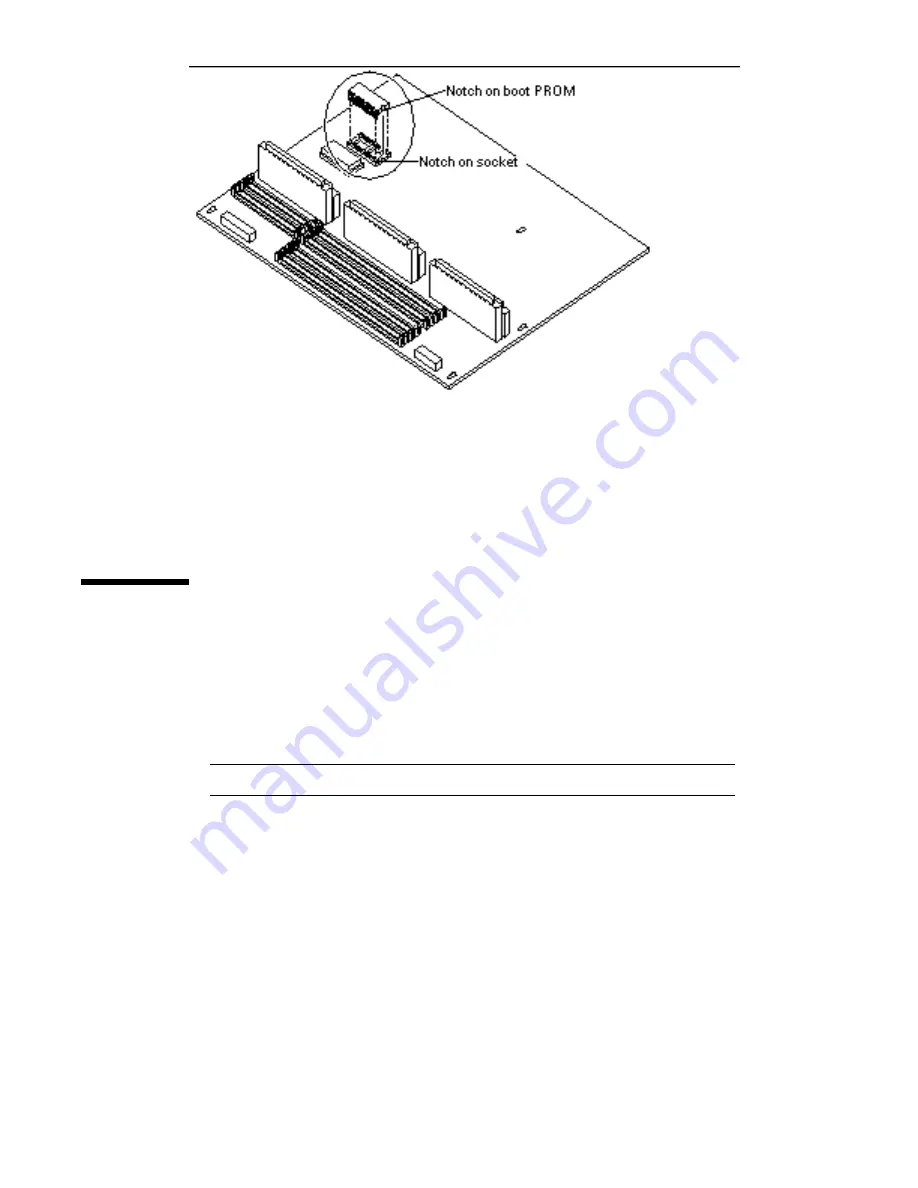
Figure 6–6
Proper Orientation of Open Boot PROM
15. Place the open boot PROM on the antistatic surface.
Installing the Open Boot PROM
1. Unpack the replacement open boot PROM.
2. Hold the PROM by both edges and match the notch on the open boot PROM
with the notch on the socket.
See Figure 6–6.
Note -
Do not touch the pins.
3. Align the pins and insert the open boot PROM in the socket.
Match the pin 1 indicator on the open boot PROM with the indicator on the
socket.
78
SPARCstation 10 Service Manual
♦
Revision A, July 1993
Содержание 1.0
Страница 2: ...USA 650 960 1300 fax 650 969 9131 ...
Страница 3: ...SPARCstation 10 Service Manual Part No 800 6358 11 Revision A July 1993 ...
Страница 16: ...xv SPARCstation 10 Service Manual Revision A July 1993 ...
Страница 21: ...Figure 1 6 Exploded View of the SPARCstation 10 System MLB System Overview 5 ...
Страница 26: ...Figure 2 1 Default Boot Mode Flowchart 10 SPARCstation 10 Service Manual Revision A July 1993 ...
Страница 54: ...38 SPARCstation 10 Service Manual Revision A July 1993 ...
Страница 88: ...72 SPARCstation 10 Service Manual Revision A July 1993 ...
Страница 104: ...88 SPARCstation 10 Service Manual Revision A July 1993 ...
Страница 112: ...96 SPARCstation 10 Service Manual Revision A July 1993 ...
Страница 120: ...104 SPARCstation 10 Service Manual Revision A July 1993 ...
Страница 190: ...174 SPARCstation 10 Service Manual Revision A July 1993 ...
Страница 198: ...182 SPARCstation 10 Service Manual Revision A July 1993 ...
Страница 202: ...186 SPARCstation 10 Service Manual Revision A July 1993 ...
Страница 214: ...198 SPARCstation 10 Service Manual Revision A July 1993 ...
Страница 220: ...Glossary 204 SPARCstation 10 Service Manual Revision A July 1993 ...
Страница 221: ...Index Index 205 ...


