background image


INSTALLATION INSTRUCTIONS 

Before Using your Appliance


Remove the exterior and interior packing. 
 

CAUTION: After unpacking you MUST allow your appliance to stand upright for at least 2 hours to 

allow the lubricant and refrigerant to drain back into the compressor and stabilize. Failure 
to do so may adversely affect performance and the lifetime of the unit.  


Clean the interior surface with lukewarm water using a soft cloth. 


Install the handle on the door. (See page 8.) 


Installation of your Appliance


  The appliances are designed for either built-in or free-standing installation.


DO NOT store or 

install the appliance outdoors.


CAUTION: This appliance is designed for storing and cooling beverages and drinks. Do not store 

perishable food, medicine or other medical products. 


  Place your Beverage Merchandiser on a floor that is strong enough to support it when it is fully 

loaded. To level the unit, adjust the front leveling legs. 

  For freestanding installation, 5 inches (127 mm) of space between the back and sides of the unit 

are suggested, which allows the proper air circulation to cool the compressor and condenser for 
energy saving. Even for built-in installation, it is a must to keep 2 to 3 mm of space (about 1/10") 
on each side and at the top, and 2 inches (51 mm) at the back, to ensure proper service access 
and ventilation. And the air vent at the front of the appliance must never be covered or blocked in 
any way. 
 

NOTE:

 It is recommended that you do not install the appliance near an oven, radiator or other 

heating source. Direct sunlight may affect the acrylic coating and heat sources may increase 
electrical consumption. Don’t install in a location where the temperature will fall below 60°F 
(16°C). For best performance, do not install the appliance behind a cabinet door or block the 
base grille. 


  Avoid locating the unit in moist areas.  
  Plug the Beverage Merchandiser into an exclusive, properly grounded wall outlet. Do not under 

any circumstances cut or remove the third (ground) prong from the power cord. Any questions 
concerning power and/or grounding should be directed toward a certified electrician or an 
authorized service center. 


Содержание FF616TD

Страница 1: ...EASE READ AND FOLLOW ALL SAFETY RULES AND OPERATING INSTRUCTIONS Felix Storch Inc An ISO 9001 2015 registered company 770 Garrison Avenue Bronx NY 10474 www summitappliance com Write Serial No on lowe...

Страница 2: ...your Appliance 8 Installing the Stainless Steel Handle 8 Operating your Appliance 9 11 Control Panel 9 10 Sabbath Mode 10 Temperature Memory Function 10 Temperature Alarm Door Alarm 10 Door Lock 10 De...

Страница 3: ...outlet do not remove grounding prong do not use an adapter and do not use an extension cord Replace all panels before operating It is recommended that a separate circuit serving only your appliance be...

Страница 4: ...s wind rain water spray or drips The appliance should not be located next to ovens grills or other sources of high heat The appliance must be installed with all electrical water and drain connections...

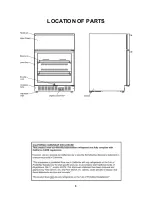
Страница 5: ...5 LOCATION OF PARTS...

Страница 6: ...7 mm of space between the back and sides of the unit are suggested which allows the proper air circulation to cool the compressor and condenser for energy saving Even for built in installation it is a...

Страница 7: ...tage rating that matches the rating label on the appliance This provides the best performance and also prevents overloading house wiring circuits that could cause a fire hazard from overheating Never...

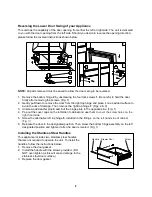
Страница 8: ...nge 7 Figs 2 3 3 Unscrew and transfer pins 4 and 3 of the hinge plate to the opposite side Fig 1 4 Pop out the cover caps on the left side of cabinet and use them to cover the screw holes on the right...

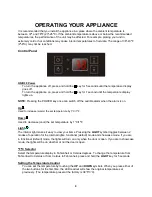
Страница 9: ...Used to increase warm the set temperature by 1 C 1 F Down Used to decrease cool the set temperature by 1 C 1 F Light The interior light makes it easy to view your items Pressing the LIGHT symbol toggl...

Страница 10: ...s if the storage temperature is not cold enough The temperature display flashes at the same time The cause of the temperature being too high may be Warm items were placed inside Too much warm ambient...

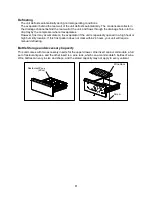
Страница 11: ...on the evaporator if the unit is repeatedly opened in a high heat or high humidity location If this frost pattern does not clear within 24 hours your unit will require manual defrosting Bottle Storag...

Страница 12: ...of time you need to take the proper steps to protect the contents Vacation Time Short vacations Leave the appliance operating during vacations of less than three weeks Long vacations If the appliance...

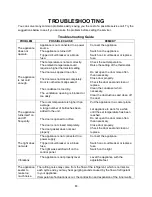
Страница 13: ...nser when necessary Clear the obstructions and clean off the dust The appliance turns itself on and off frequently The room temperature is higher than average A large number of bottles has been added...

Страница 14: ...door switch failure Call for service The alarm sounds and the temperature display flashes Has the appliance door been open for longer than 60 seconds If not then the temperature has risen higher or fa...

Страница 15: ...15 NOTES...
Страница 16: ...lation installation not in accordance with electrical or plumbing codes or use of products not approved by warrantor 4 Replacement parts or repair labor costs for units operated outside the United Sta...

Отзывы: