.
-
0
/
1
6WHS
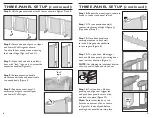
Repeat the mounting procedure in
Step 6 to connect end panel to wall.
6WHS
Turn expansion handle(s)
counter-clockwise until tight (Figure J).
(Opposite of Step 8.)
6WHS
Once both panels are
securely mounted to each wall,
turn the 4 hinge knobs clockwise
to secure gate (Figure K).
6WHS
To open door, slide trigger
back and lift door panel up to swing door
open in either direction (Figure L).
127(
Cut shipping tie located at bottom
of door panel to open and close door.
6WHS
To close door, lift door
panel up and align over trigger tab
and push door panel down to click
and lock into place (Figure M).
1RWH
Be sure that the door clip
(located on bottom of door, shown
in Figure N) is also aligned before
pushing door panel down into place.
7 + 5 ( ( 3$ 1 ( / 6 ( 7 8 3 F R Q W L QX H G
GRRU
FOLS
+
,
)
*
'
(
6WHS
Attach one end of gate to Upper
and Lower Wall Hinges as shown.
You should hear a snap when mounting
the Lower Hinge (Figures F and G).
6WHS
Open the hook and loop fabric
door with “lock” logo on it to access the
expansion handles (Figure H).
6WHS
Rotate expansion handle
clockwise until loose and panel is able
to expand freely (Figure I).
6WHS
Repeat on other panel if
necessary until gate reaches Upper
and Lower Wall Hinges.
7 + 5 ( ( 3$ 1 ( / 6 ( 7 8 3 F R Q W L QX H G
6WHS
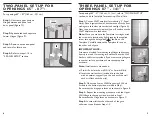
Unfold gate panels and attach 2 feet as shown in Figures D and E.
“lock”
logo


