


Installation and Update: Step 2: Installing Camera Driver
15
SMX-12A2x Series Gigabit Ethernet Camera User Guide
8
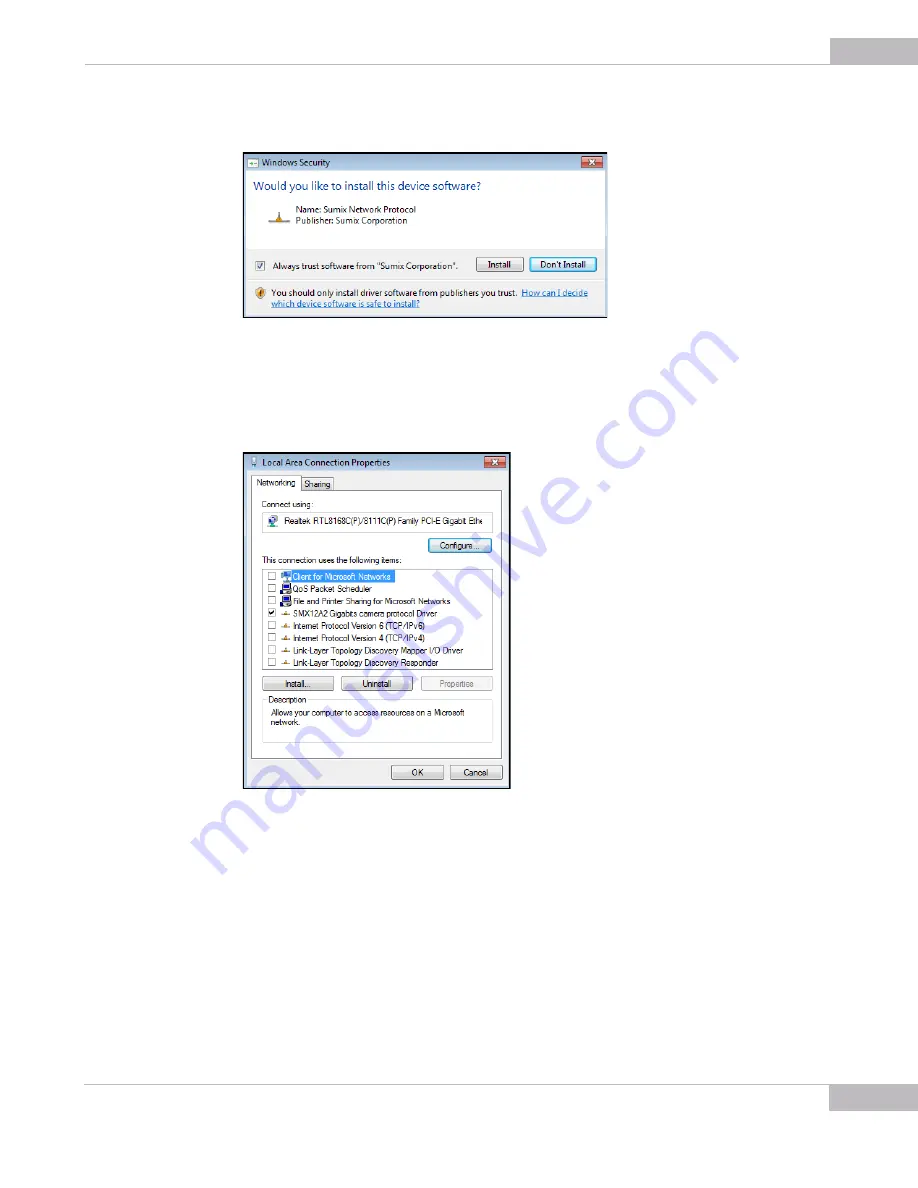
In the
Windows Security
box, press
Install
.
Figure 2-15
Windows Security box
The
SMX12A2 Gigabits camera protocol Driver
will appear among the
Local Area
Connection
items. Make sure that only the
SMX12A2 Gigabits camera protocol
Driver
is selected and checked, then close the
Local Area Connection
dialog box.
Figure 2-16
Camera driver installed
The camera is installed and ready to be used.
Содержание SMX-12A2C
Страница 1: ...User Guide Megapixel Gigabit Ethernet CMOS SMX 12A2X Series Gigabit Ethernet Cameras...
Страница 16: ...Installation and Update Step 2 Installing Camera Driver 16 SMX 12A2x Series Gigabit Ethernet Camera User Guide...
Страница 22: ...Getting Started Starting the Application 22 SMX 12A2x Series Gigabit Ethernet Camera User Guide...
Страница 34: ...Tuning Guidelines Statistic Settings 34 SMX 12A2x Series Gigabit Ethernet Camera User Guide...
Страница 44: ...Capturing Saving Options 44 SMX 12A2x Series Gigabit Ethernet Camera User Guide...