2 OF 12
PART NUMBER
H001SFJ600
ISSUE
00
DATE
18 Jul 2013
SUBARU OF AMERICA
1. Using a 10 mm socket/ratchet, disconnect the negative battery terminal.
NOTE: DO NOT PROCEED TO THE NEXT STEP FOR ONE (1) MINUTE TO
ALLOW TIME FOR THE AIRBAG POWER SUPPLY TO DISCHARGE.
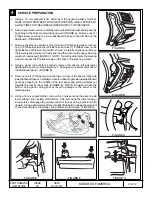
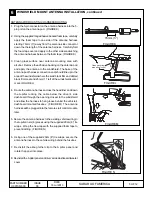
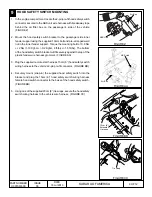
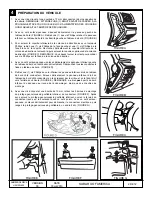
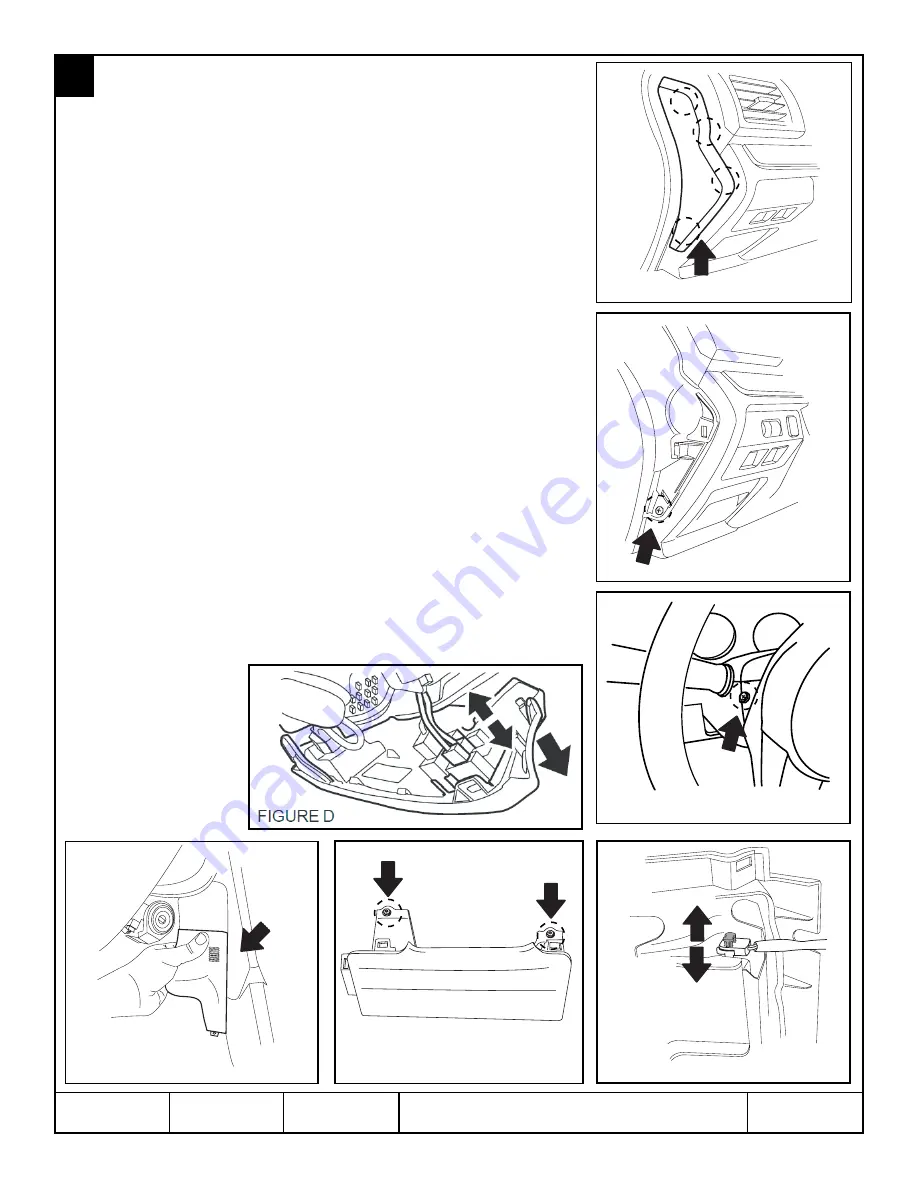
2. Using a panel removal tool, carefully remove the left side dashboard panel by
beginning at the bottom and working upward (FIGURE A). Remove one (1)
Phillips screw securing the lower dashboard panel on the left side of the
dashboard. (FIGURE B)
3. Remove the steering column shroud. Using a Phillips screwdriver, remove
one (1) Phillips screw on the left side face and one (1) Phillips screw on the
right side face of the steering column shroud. Carefully unsnap and remove
the lower steering column shroud panel and then remove the upper steering
column shroud panel (FIGURE C). NOTE: You will need to rotate the steering
wheel to access the Phillips screws on the face of the steering column.
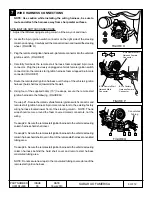
4. Using a panel removal tool, carefully remove the driver’s left side lower
dashboard panel by pulling straight out. Unplug all connectors attached to
the dashboard panel. (FIGURE D)
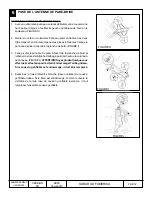
5. Remove one (1) Phillips screw on the lower corner of the driver’s right side
lower dashboard panel. Carefully remove the driver’s right side lower dashboard
panel by grasping in the middle of the trim panel and pulling straight out
towards the rear of the vehicle (FIGURE E). NOTE: Do
not
pull from the
bottom of the panel, doing so may result in damage to the panel or the
retaining clips.
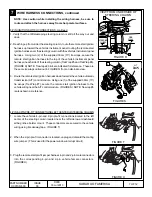
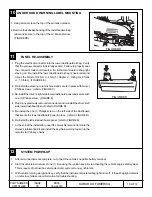
6. Using a 10 mm socket/ratchet, remove the 2 nuts securing the driver’s side
lower airbag / knee bolster (FIGURE F). After removing the lower airbag /
knee bolster, disengage the yellow connector lock by using a pick tool to lift
upward. Using a panel removal tool, carefully lift upward to unplug the electrical
connector and place the airbag / knee bolster in a safe area. (FIGURE G)
4
VEHICLE PREPARATION
FIGURE A
FIGURE B
FIGURE C
FIGURE E
FIGURE F
FIGURE G

