background image


 PREPARING THE CAMERA 


There is nothing to change on your Nikon D7100 for the use with SUBAL ND7100. 


Knowledge and familiarization with the functions of your camera is essential to avoid mistakes when 

installing and using the camera. We recommend you study your camera manual thoroughly before 

installing the camera.


Attach the camera support saddle to the camera base with the locking lever pointing to the camera 
backside. Tighten the camera screw by using a coin or a screw driver without excessive force.


IMPORTANT!


REMOVE THE PLASTIC PROTECTOR OF THE CAMERA’s MONITOR! 

Please remove also the eyecup from the camera !


PREPARING THE LENS


To  change  the  focal  length  on  zoom  lenses,  or  for  manual  focusing  with  fixed  focal  length  lenses, 
special lens gears are required which need to be fitted to the lens barrels. 
 

Mounting the gear rings  
 
Zooming gear ring


Depending on the type of the lens, the zooming gear ring is fitted onto the lens either from the front or 
from the rear. 
Set the zooming barrel of the lens to the mid point of the zoom range. After noting where the zoom 
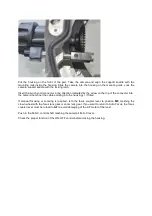
drive  gear  of  the  housing  is  located,  position  the  zooming  gear  ring  on  the  lens  in  such  a  way  that 
when the lens is mounted on the camera the centre of the toothed section of the zoom gear aligns 
with the zoom drive gear in the housing. Check that the gears can mesh over the full zoom range of 
the lens. A final check should be made after the camera is inserted into the housing. 
 
If the zooming gear ring provides marking dots fit the zooming gear ring on the lens in such a way that 
the markings correspond with the range of the zoom scale. 
 
Tighten the Nylon screws (if provided) to fit the zooming gear firmly but take care that the free-moving 
of the zooming ring of the lens is maintained.


Focus gear rings


The different construction of lenses requires different mounting systems of focus gear rings. Therefore 
installation  procedures  vary.  Please  follow  the  mounting  instructions  enclosed  with  the  focus  gear 
ring.


Содержание ND7100

Страница 1: ...OWNERS MANUAL SUBAL ND7100 UNDERWATER HOUSING for Nikon D7100 ...

Страница 2: ...e underwater photographer for the first time An extensive range of high quality lens ports allows the fitting of a number of interesting lenses which is a great advantage over all other amphibious cameras available today This will facilitate the most varied photographic tasks To get the best results to take full advantage of the system and for the protection of your camera we recommend you take ca...

Страница 3: ... or perhaps after a service i a greasing of the shafts etc always test dive first without the camera fitted Please take note of these points of advice O rings should be absolutely clean and be greased thinly We recommend the use of waterproof Silicone grease eg SUBAL Silicone grease Too much grease results in the accumulation of small dirt particles which are invisible The sealing surfaces must be...

Страница 4: ...cone grease This reduces friction and abrasion and allows the O ring to settle into place easily Do not use too much grease Undetected dirt particles could accumulate and would lead to water entry Take a little bit of grease on two fingers and pull the O ring between these fingers until it is greased all around Wipe off excess The O ring should just have a sheen Never use hard or sharp metal tools...

Страница 5: ...ming gear ring is fitted onto the lens either from the front or from the rear Set the zooming barrel of the lens to the mid point of the zoom range After noting where the zoom drive gear of the housing is located position the zooming gear ring on the lens in such a way that when the lens is mounted on the camera the centre of the toothed section of the zoom gear aligns with the zoom drive gear in ...

Страница 6: ...e connector over the edge of the housing pointing outwards Turn the power ON OFF switch on camera and housing to ON position Turn the focus coupler lever down to AF position This moves the crown wheel inside the housing outwards and makes loading the camera into the housing easier and is necessary in any case if a zoom or focus gear is used on the lens Push the in out control outwards approx 3 mm ...

Страница 7: ...the top of the connector into the camera hot shoe the cable pointing into the housing if fitted If manual focusing or zooming is required turn the focus coupler lever to position MF meshing the crown wheel with the focus lens gear or zoom lens gear If you want to return to Auto Focus the focus coupler lever must be turned to AF to avoid damaging of the AF motor of the lens Push in the M S C contro...

Страница 8: ...evers firmly in the rotating center head of the screw and turn them inwards a quarter of a turn until they click into place locking them Important hint The locking levers must be well greased periodically inside on the sealing surface area Check once again if the gap seems equally spaced all around OPENING THE HOUSING It is recommended to rinse the housing with fresh water and dry before opening W...

Страница 9: ......

Страница 10: ...toring sharpness a Adjust the focus by pressing the shutter release lever slightly until AF activates keep it half pressed while you compose the picture and shoot b Adjust the focus by pressing down the shutter release lever slightly until AF activates Now press the AF lock lever the shutter release lever now can be left and keep it pressed until you have chosen the wanted frame and have shot your...

Страница 11: ...re attached to the housing by a bayonet mount Insert the port after checking as described above into the housings bayonet with the white dot or the SUBAL logo pointing towards the front main dial control knob While pushing in turn the port 90 clockwise until it stops If properly installed the white dot or the SUBAL logo is aligned with the middle of the housing Most important After installing chec...

Страница 12: ...re mainly used with wide angle lenses to keep the same angle of coverage under water as on land When using domeports for wide angle lenses please note the following Dome glasses act in water like lenses creating an apparent image of the actual subject which is smaller and closer than in reality The lens must be focused on this virtual image The required adjustment of the lens is in the region of 0...

Страница 13: ...rays please see accessories When inserting the flash unit plug please take care The socket must be free of dirt sand and moisture The plug O ring too has to be checked carefully for cleanliness and should be lightly greased Note the position of the index nose and groove and push the plug into the socket without using force to avoid damage to the contact pins The plug should be pushed in a few mill...

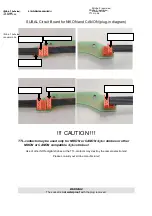
Страница 14: ... Use of other NON digital strobes at the TTL contacts may destroy the camera electronics Please consult your strobe manufacturer WARNING The socket is not waterproof with the plug removed Strobe 1 left side TTL mode to hotshoe connector Strobe 1 left side manual mode Strobe 1 left side manual mode Strobe 2 right side manual mode Strobe 2 right side TTL mode to hotshoe connector ...

Страница 15: ...The red blanking plug must be screwed into the socket s if the housing is used without flash unit s ...

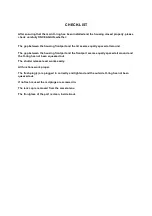
Страница 16: ... between the housing frontpart and the frontport seems equally spaced all around and the O ring has not been squeezed out The shutter release lever works easily All functions work proper The flash plug s are plugged in correctly and tightend and the outside O ring has not been queezed out If no flash is used the red plugs are screwed in The lens cap is removed from the camera lens The frontglass o...

Страница 17: ... are exchanged or repaired at the option of the manufacturer No further claim is possible Prerequisite for right to claim is impeccable care and use of the unit No guarantee claim will be accepted without the prior consultation and authorisation of the manufacturer and must be returned freight paid The guarantee is void after intervention repair or modification by non authorised persons In order t...

Страница 18: ...BEDIENUNGSANLEITUNG SUBAL ND7100 für Nikon D7100 ...

Страница 19: ... ermöglicht Ihnen außerdem den Einsatz einer großen Palette von interessanten Objektiven ein wesentlicher Vorzug gegenüber allen heute verfügbaren Amphibienkameras Die Bewältigung der unterschiedlichsten fotografischen Aufgaben wird Ihnen damit erleichtert Um beste Resultate zu erzielen alle Vorzüge des Systems auszunutzen und zur Sicherheit Ihrer Kamera empfehlen wir Ihnen die sorgfältige Beachtu...

Страница 20: ...Liste durch Einige Meter unter der Wasseroberfläche kippen Sie das Gehäuse mit der Frontscheibe nach unten und überzeugen Sie sich dass alles dicht ist Dann können Sie beruhigt abtauchen Wurde das Gehäuse länger nicht verwendet oder ein Eingriff vorgenommen z B Wellen fetten etc empfehlen wir immer zuerst einen Testtauchgang ohne eingesetzte Kamera zu machen Nach jedem Tauchgang im Salzwasser ist ...

Страница 21: ...u unsichtbaren Staub und Schmutzansammlungen im Fett führen welche Wassereinbruch verursachen könnten Nehmen Sie etwas Fett zwischen 2 Finger und ziehen Sie den O Ring durch bis er allseits dünn benetzt ist und leicht glänzt Verwenden Sie zum Einsetzen oder Entfernen des O Ringes niemals harte oder scharfe Metallgegenstände Sie könnten damit die Dichtfläche des Gehäuses und oder den O Ring beschäd...

Страница 22: ...sergehäuse ist die genaue Kenntnis der Funktionen Ihrer Kamera Wir raten Ihnen die Bedienungsanleitung Ihrer Kamera genauestens zu studieren Montage des Kameraschlittens Befestigen Sie den Kameraschlitten an der Unterseite der Kamera Münze so dass der Verschlussriegel zur Kamerarückseite zeigt WICHTIG ENTFERNEN SIE DEN PLASTIKSCHUTZ AM MONITOR Und die Augenmuschel der Kamera ...

Страница 23: ...ehbereich der Zoomskala übereinstimmen Ziehen Sie die Gewindestifte wenn vorhanden leicht an sodass der Zoomzahnring zwar festsitzt die Leichtgängigkeit des Objektiv Zoomringes aber nicht beeinträchtigt wird Fokussierzahnring Die unterschiedlichen Bauformen der Objektive erfordern auch unterschiedliche Befestigungssysteme der Fokussierzahnringe Beachten Sie dazu die den Fokussierzahnringen beilieg...

Страница 24: ...das Gehäuse wieder auf die Frontfläche des Ports Kontrollieren Sie ob der Haupt O Ring sauber und leicht gefettet ist und korrekt in der Nut liegt ob die Dichtfläche des Gehäusedeckels sauber ist und keine Beschädigungen aufweist Überprüfen Sie ob der Kameraanschluss Hotshoe korrekt angeschlossen ist das Kabel ordentlich verstaut ist und nicht zwischen die Gehäuseteile geklemmt werden könnte Drehe...

Страница 25: ...ND7100 Gehäuses und der Hauptschalter der Kamera auf On stehen Drücken Sie den Hebel für das Entkoppeln der manuellen Fokussierung nach unten Dadurch wird das Fokus Kronrad nach außen gezogen Dies erleichtert den Einbau und ist jedenfalls erforderlich wenn sich am Objektiv ein Zoom oder Fokuszahnrad befindet Drücken sie den Klauenschalthebel für die Umschaltung in out vom Gehäuseinneren nach außen...

Страница 26: ...s beim Drehknopf für die manuelle Fokussierung in Position MF wird ein eventuell am Objektiv befestigtes Fokuszahnrad oder Zoomzahnrad in Eingriff mit dem Fokus Kronrad gebracht Achtung Befindet sich am Objektiv ein Zahnring für manuelles Fokussieren nur möglich bei Verwendung eines Objektives mit fester Brennweite die Kamera aber in Autofokus Betrieb so muss das Kronrad ausgekuppelt bleiben oder ...

Страница 27: ...zen Sie den Port nachdem Sie den O Ring wie oben angeführt kontrolliert haben so in die Bajonettfassung des Gehäuses ein dass der weiße Indexpunkt oder das SUBAL Logo horizontal in Richtung zum Auslösehebel zeigt Drücken Sie den Front Port gerade und vollständig in die Fassung des Gehäuses und drehen Sie den Port um 90 im Uhrzeigersinn bis zum Anschlag Der weiße Indexpunkt oder das SUBAL Logo befi...

Страница 28: ... vorsichtig zu reinigen um Kratzer zu vermeiden Möglichst mit Süßwasser gut abspülen abtropfen lassen und mit einem weichen Tuch vorsichtig nachtrocknen Eingetrocknete Wasserflecken sind sehr schwierig zu entfernen Feine Kratzer an der Außenseite werden vom Wasser ausgefüllt und bleiben beinahe unsichtbar Bei stärkerer Beschädigung ist der Austausch der Frontscheibe unerlässlich Die Innenseite der...

Страница 29: ...scheibe auch wenn das reale Objekt einen Meter oder mehr entfernt ist Das Kameraobjektiv muss auf dieses scheinbare Bild scharfgestellt werden Viele Objektive insbesondere Zoomobjektive haben eine Naheinstellgrenze die es nicht erlaubt auf dieses scheinbare Bild scharf zu stellen Damit scharfgestellt werden kann muss eine Korrektur Nah Linse verwendet werden Diese Linse wird auf das Objektiv Filte...

Страница 30: ...ung a Sie stellen die Schärfe durch leichtes Niederdrücken des Auslösers auf den gewünschten Punkt ein und halten den Auslöser halb gedrückt während Sie den Bildausschnitt wählen und lösen dann aus b Sie stellen die Schärfe durch leichtes Niederdrücken des Auslösers auf den gewünschten Punkt ein Drücken Sie nun die AF Lock Taste der Auslöser kann gelöst werden und halten Sie diese gedrückt bis Sie...

Страница 31: ... Entriegelungshebel Lens Release etwa Drehung nach vorne im Uhrzeigersinn Drücken Sie den Hebel nieder und halten Sie ihn in Position während Sie das Objektiv im Uhrzeigersinn drehen um es zu lösen und zu entfernen Lassen Sie den Entriegelungshebel los schwenken Sie ihn wieder in die vertikale Position setzen Sie das neue Objektiv ein und montieren Sie den erforderlichen Frontport ...

Страница 32: ... shooting Für die Verwendung von Fremdblitzgeräten z B NIKONOS SEA SEA etc sind Adapter verfügbar die die Befestigung der entsprechenden Arme mittels Schienen am Gehäuse ermöglichen Beim Anstecken des Blitzgerätesteckers System Nikonos V beachten Sie bitte folgendes Die Buchse muss frei von Schmutz Sand etc und Feuchtigkeit sein Der Stecker O Ring muss ebenfalls sorgfältig auf Sauberkeit kontrolli...

Страница 33: ...rschlussstopfen in die Blitzbuchsen eingeschraubt werden SUBAL Leiterplatte für NIKON und CANON Steckdiagramm ACHTUNG TTL Kontakte dürfen nur für digitale NIKON oder CANON Blitzgeräte oder andere mit NIKON oder CANON Kameras kompatiblen digitalen Blitzgeräten benutzt werden Die Anwendung von NICHT digitalen Blitzgeräten an den TTL Kontakten kann die Kamera Elektronik beschädigen Bitte kontaktieren...

Страница 34: ......
Страница 35: ...edienung des Gerätes Unsachgemäße Behandlung mechanische Beschädigung Wassereinbruch durch Anwendungsfehler etc sowie die Verwendung von Fremd O Ringen schließen jede Garantieleistung aus Das Gerät ist uns nach vorhergehender Rückfrage und Schilderung des Mangels frachtfrei einzusenden Nach werksfremden Eingriffen Reparaturen erlischt jeder Garantieanspruch Wir empfehlen neu angelieferte Geräte im...

Страница 36: ... Spalt zwischen Gehäuse und Frontport gleichmäßig breit erscheint und der O Ring nicht herausgequetscht wurde Der Auslöserhebel leichtgängig arbeitet Alle Funktionen einwandfrei arbeiten Der Blitzgeräte Stecker korrekt festgezogen ist und der äußere O Ring nicht herausgequetscht wurde Sich kein Objektivdeckel am Objektiv befindet Das Frontglas des Ports sauber ist ...

Отзывы: