Striem
3100 Brinkerhoff
Kansas City, KS 66115
Tel: 913-222-1500
Fax: 913-291-0457
www.
striemco.com
Made in the U.S.A
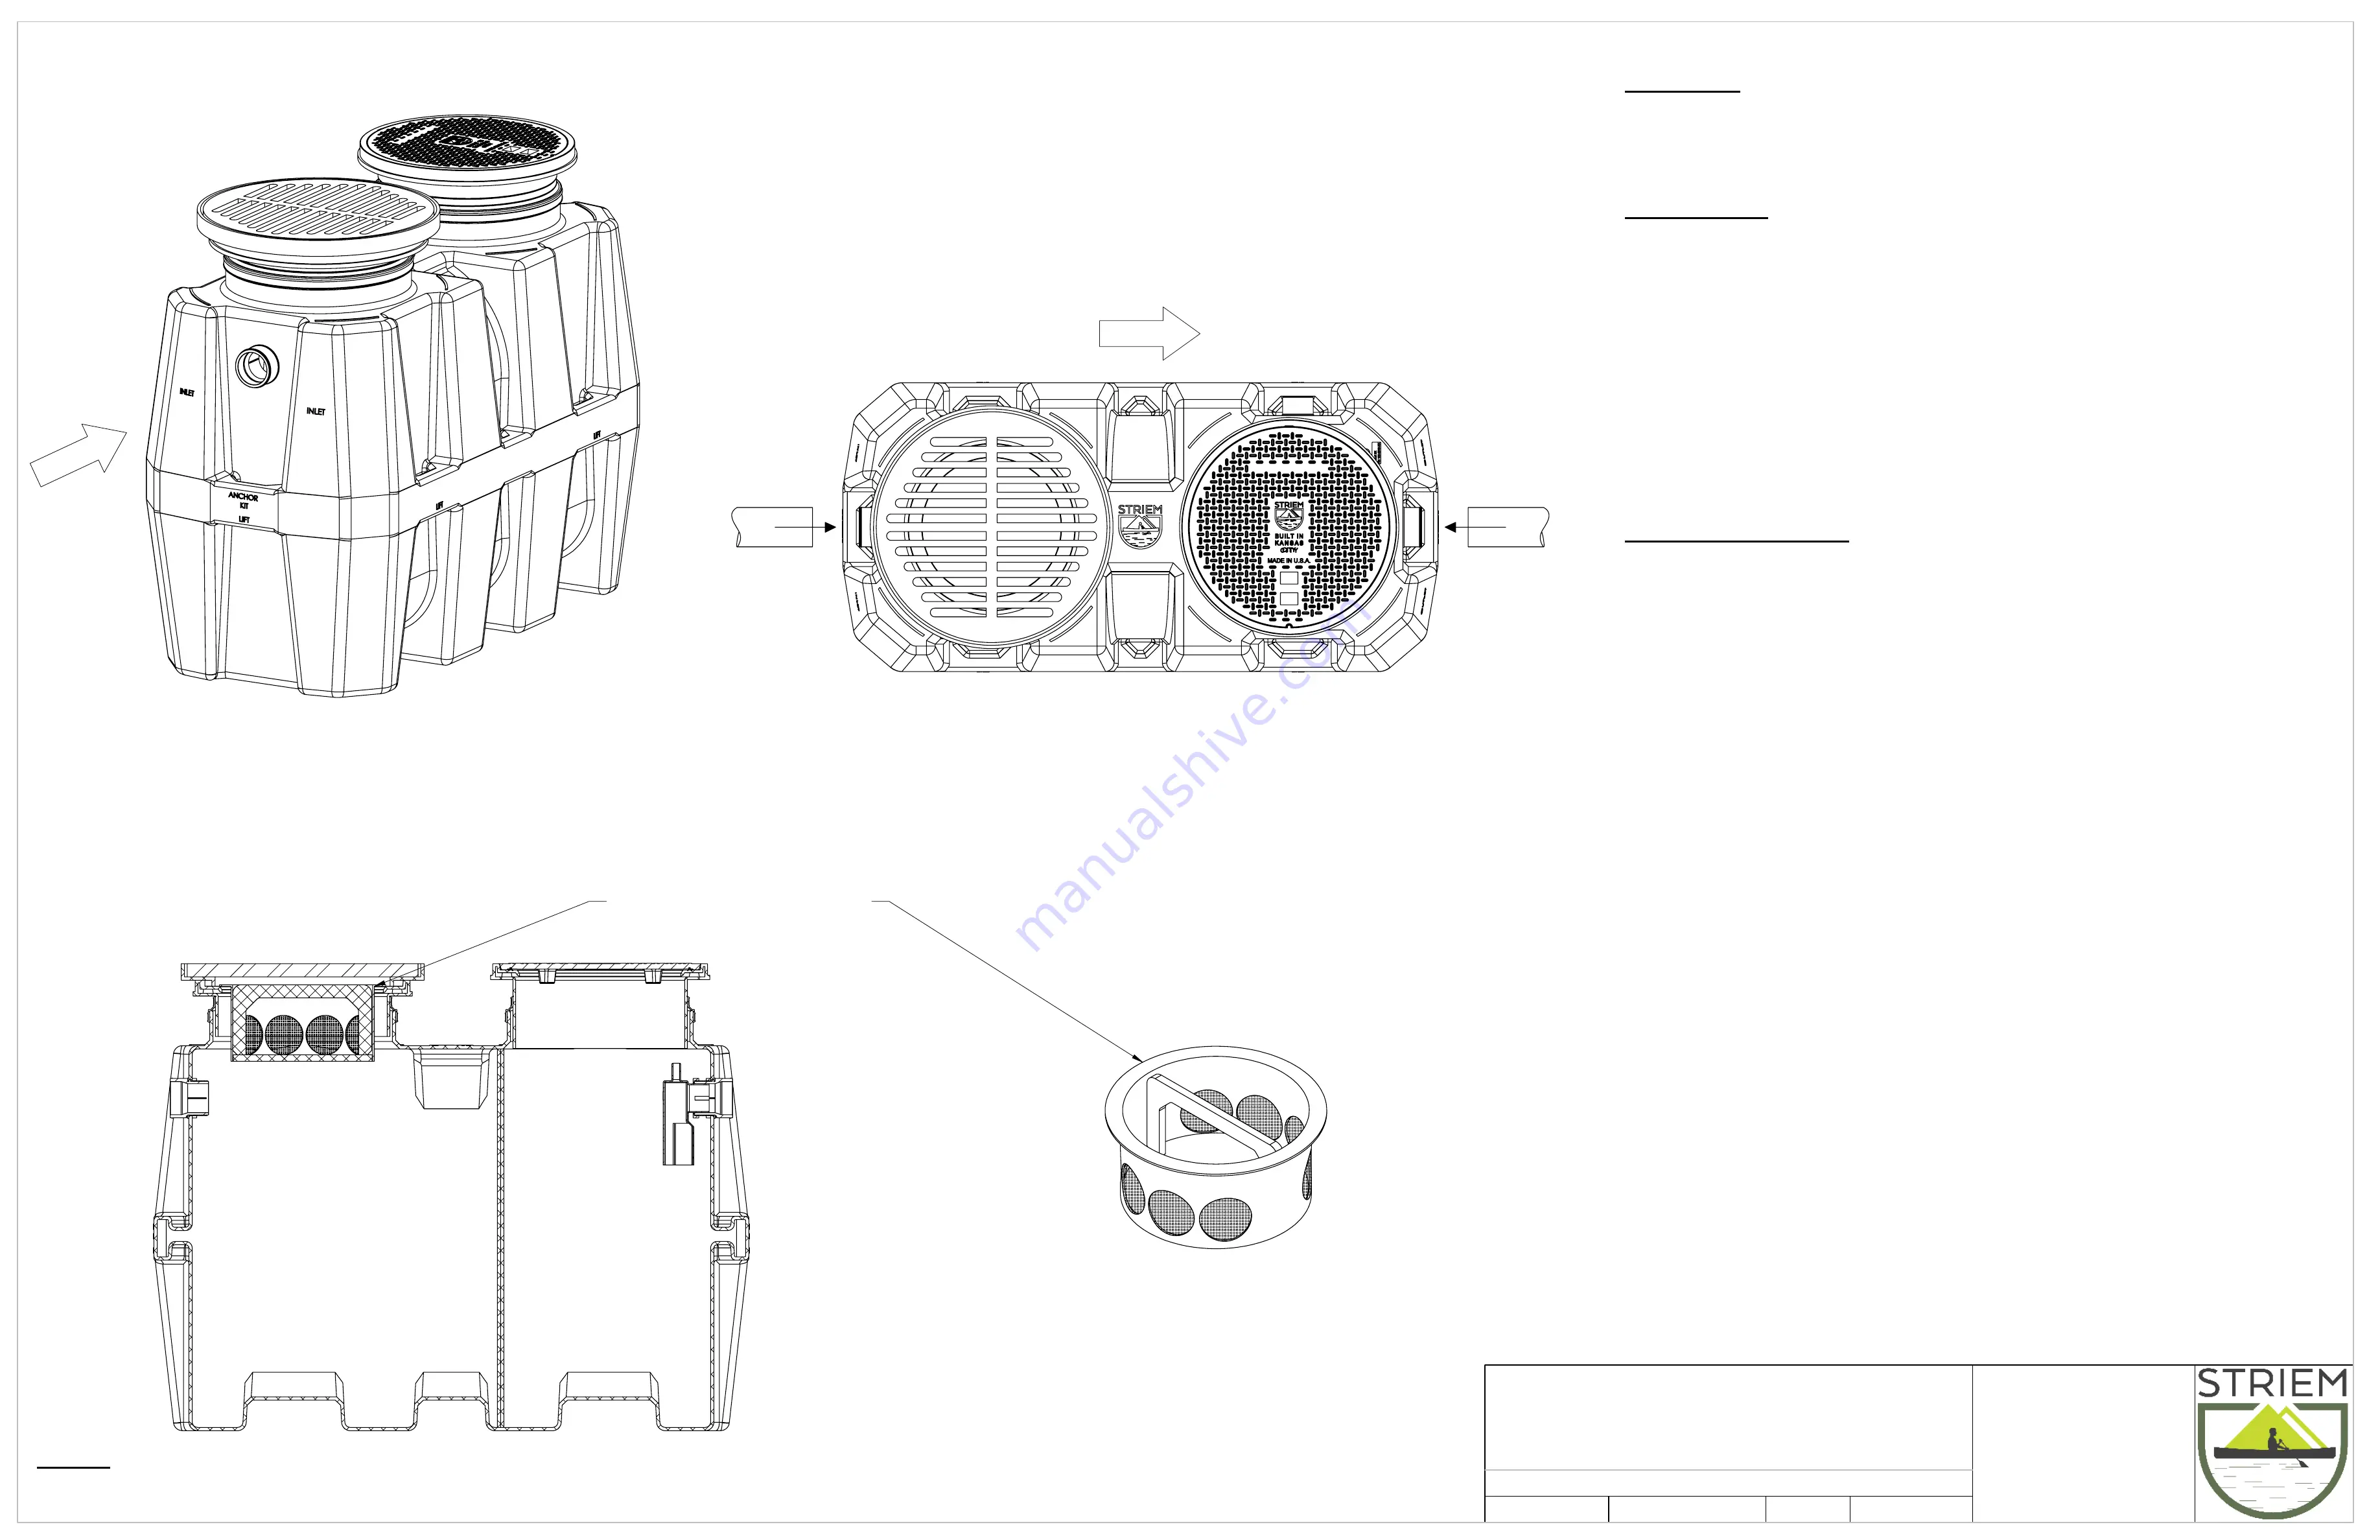
FLOW
Set unit on level solid surface as close as
possible to fixtures being served. If unit is
to be installed below grade refer to below
grade installation instructions. (sheet #3)
Isometric View
FLOW
Connect inlet and outlet drainage lines to unit.
Mechanically couple pipes to unit.
Do not solvent weld
.
Top View
E
E
OPERATION
Striem SI-UPC-1016 sand interceptors are designed to settle heavy sand and sediment
that may enter the waste system. Wastewater passes through the inlet grate, or inlet
connection, then enters the settling chamber where heavy debris settles before the
wastewater exits through the outlet.
MAINTENANCE
Remove covers.
1.
If unit has optional sediment basket, empty contents into receptacle.
2.
Clean main body of the interceptor. Make sure to remove all accumulated water,
3.
debris, and sediment.
Clean sidewalls of any accumulated debris. Do not allow any material
4.
to enter into the plumbing system.
Replace optional sediment basket.
5.
Replace covers. Inspect gasket on underside for wear and tear.
6.
Run fixture(s) with water to fill interceptor.
7.
Properly dispose of collected material.
8.
PUMPING FREQUENCY:
Based upon all the variables, every solids interceptor will have to have its own maintenance
schedule. A solids interceptor may have to be cleaned weekly, monthly, or annualy after
initial installation in order to determine optimum maintenance schedule.
GENERAL INSTALLATION INSTRUCTIONS
(SI-UPC-1016 SHOWN)
Optional Removable Sediment Basket
(BCB-7)
SAND INTERCEPTOR INSTALLATION,
OPERATION AND MAINTENANCE GUIDE
ECO:
02/18/19
MJ
REV:
DATE:
DWG BY:
DESCRIPTION:
PROPRIETARY AND CONFIDENTIAL
THE INFORMATION CONTAINED IN THIS DRAWING IS THE SOLE PROPERTY OF
STRIEM, LLC.
ANY REPRODUCTION IN PART OR AS A WHOLE WITHOUT THE WRITTEN PERMISSION OF
STRIEM, LLC.
IS
PROHIBITED.
NOTES:
Striem Sand Interceptor tanks are not to be installed in any other manner except as shown. Consult local
codes for separate trapping requirements, cleanout locations and additional installation instructions.
SHEET NUMBER:
2 of 4


