background image

9

29

30

31

32

33

34

35

LOCKED

UNLOCKED

5

23

16

36

4

36

Содержание Summit 8r

Страница 1: ...8r Owner s Guide ...

Страница 2: ...d wearing your helmet Proper maintenance of your StreetStrider is your responsibility as it helps reduce the risk of injury This manual contains many IMPORTANT CAUTION and WARNING statements concerning the consequences of failure to maintain or inspect your StreetStrider When inspecting your StreetStrider be certain to tighten all nuts and bolts properly Under tightening can result in loosening pa...

Страница 3: ...ng the Rear Rack Folding the StreetStrider SAFETY MECHANICAL INFORMATION Safety Equipment Mechanical Safety Check 4 8 12 13 14 16 17 18 20 22 23 24 25 26 28 30 REGISTRATION To activate your limited warranty you will need to register your StreetStrider online Register at www streetstrider com register my streetstrider Please record your StreetStrider 8r serial number found on the frame around the b...

Страница 4: ...ld joint with silver male cap screws and silver female barrel nuts 6 mm hex screws upper and lower middle washers 5 mm barrel nuts M8 x P1 25 x L30 x H13 x W6 M8 x P1 25 x L20 x H13 x W6 OD12 xID8 x T1 M8 x P1 25 x L16 x H12 x W5 barrel OD 10 mm 2 1 3 3 Tighten Tighten Tighten 6 Stride pole upper 8 Strider pole lower 9 Strider ski 10 Foot platform 4 mm screw under tape 10 mm lock nut washer M6 x P...

Страница 5: ... OD16 x ID10 x T1 M10 x P1 5 x L10 x W17 nylon lock 2 2 2 Snug but allow joint movement 17 Pivot joint 3 8 mm hex screw M8 x P1 0 x L15 x H12 x W8 18 mm flange 2 Tighten 18 Hand grip 19 Twist grip shifter 20 Brake lever 21 Front wheel 22 Drum brake hub 19 mm axle bolt head M12 x P1 25 x L100 x W19 2 Snug but allow wheel rotation 23 Steering linkage 12 mm flats 24 Crank arm 8 mm hex screw Tighten 2...

Страница 6: ...ighten 37 Spherical rod ends stud stud nut inboard adjuster outboard adjuster 12 mm stud 13 mm nut 12 mm nut LH thread 12 mm nut RH thread M8 x P1 25 x L10 x W13 nylon lock M8 x P1 25 x L5 x W12 LH left hand M8 x P1 25 x L5 x W12 RH right hand 4 4 2 2 Tighten Tighten Tighten Tighten 38 King pin bolt in front beam clevis 6 mm hex screw washer 17 mm nut M10 x P1 5 x L75 x H15 x W6 OD16 x ID10 x T1 M...

Страница 7: ... 47 Crank bolt w One key release ring 8 mm hex 2 mm hex or spanner M8 x P1 0 x L15 x H12 x W8 2 1 Tighten Tighten loc tite 48 Rear brake w mounting nut cable housing adjuster cable clamp brake pads 5 mm hex 5 mm hex 4 mm hex 49 Rear drop out 50 Rear hub axle nut 15 mm 2 Tighten 51 Cassette pulley gear alignment window for 8 speed 52 Shift cable fixing nut 10 mm 1 Tighten M OD of threads mm L lengt...

Страница 8: ...8 18 19 20 6 3 14 2 8 15 5 23 4 22 21 9 10 17 1 PARTS IDENTIFICATION PARTS IMAGE REFERENCE 13 11 28 25 24 26 12 27 ...

Страница 9: ...9 29 30 31 32 33 34 35 LOCKED UNLOCKED 5 23 16 36 4 36 ...

Страница 10: ...10 INBOARD PARTS IMAGE REFERENCE cont 45 38 37 39 37 41 44 43 40 42 OUTBOARD 37 ...

Страница 11: ...11 47 46 48 52 49 50 51 ...

Страница 12: ...of assembly screws the bottle cage and instructions for the operation of the rear internal gear hub The tool kit contains a 19 mm socket wrench 12 x 15 mm and 12 x 17 mm open end wrenches and 2 3 4 5 6 and 8 mm hex wrenches OPENING THE BOX The StreetStrider comes in a large box Fig 3 1A with graphics on either side to show which side is up Open the box with a sharp edge to cut the top flap Notice ...

Страница 13: ... and packing material as they must be used to repack the StreetStrider for any returns Remove the packing material and ties to free the wheels from the frame Fig 3 2B and lay out the contents of the small box including the tools Fig 3 2C The right and left sides of the StreetStrider refer to sides when one is striding A B C Figure 3 2 Unpacking the StreetStrider ...

Страница 14: ... 3 3C then tighten until snug with the 6 mm and 17 mm wrenches IMPORTANT Make sure the brake cables are routed over the front beam and under the linkage rods see Fig 3 5B IMPORTANT Make sure that the steering arm of the knuckle extends forward and that the king pin bolt is not too tight to prevent the knuckle from swiveling on the king pin bolt A B C Figure 3 3 Attaching the two front wheels IMPOR...

Страница 15: ... back side of the bracket Fig 3 4B push the rod end stud into the hole to contact the nut and screw the stud in tight using the 12 mm open end wrench Fig 3 4C IMPORTANT Make sure the rod end stud on the aluminum steering linkage is pushed into the FRONT SIDE of the head tube bracket hole with the nut contacting the stud on the rear side of the head tube bracket hole Repeat the procedure to attach ...

Страница 16: ...ar rack and the bottle cage Insert the barrel nuts into the left side of both bolt holes Raise the head tube into the full upright position Fig 3 6B C Insert the short cap screw in the front middle bolt hole Fig 3 6C and the long cap screw in the rear top bolt hole of the joint Using the 5 mm hex wrench for the female side left side and the 6 mm hex wrench for the male side right side securely tig...

Страница 17: ...ions are mirror images Fig 3 8B Strider poles can be readjusted to try different positions when riding the StreetStrider When the strider poles are aligned the hand brake lever and twist grip shifter positions can also be adjusted to suit the rider The brake lever clamp requires a 5 mm hex wrench and the right side twist grip shifter requires a 3 mm hex wrench for adjustment Fig 3 8C Once the brak...

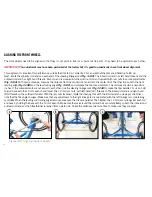
Страница 18: ...er cable Fig 3 9A Unscrew the hub nuts on each side of the wheel so there is a 1 cm section of axle thread showing Fig 3 9B that will be slid into the frame dropout slot Open the rear brake with the quick release lever so the tire can slide between the brake pads Fig 3 9C A A B B C C Figure 3 9 Installing the rear wheel Figure 3 10 Installing the rear wheel cont ...

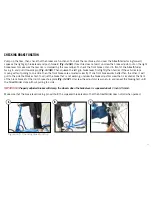
Страница 19: ...eel rearward to make the chain taut and center the wheel then tighten the hub nuts using the 15 mm open end wrench Fig 3 10C Install the shifter cable by inserting a 2 mm hex wrench into the hole on the rear edge shifter cassette pulley at the 9 o clock position Fig 3 11A Rotate the cassette pulley counter clockwise by moving the inserted 2 mm hex wrench to the 6 o clock position Fig 3 11B Insert ...

Страница 20: ...es are together Fig 3 12C see also Fig 3 16 Adjusting the Rear Hub Shifting ROTATING THE CRANK ARMS In order to fold the StreetStrider for packing and transporting both crank arms are rotated in the same forward position To set the crank arms to the correct position for striding the left crank arm has to be rotated 180 degrees relative to the right crank arm With the 8 mm hex wrench unscrew the on...

Страница 21: ...s present on the square spindle to facilitate crank arm installation and removal when folding the StreetStrider For the needed leverage use an 8 mm hex wrench or socket wrench with 8 mm hex bit with at least a 6 inch long handle A B C D Figure 3 13 Rotating the crank arms ...

Страница 22: ...railing edge Fig 3 14C and compare the two measurements The distance should be near 26 inches If the measurements are not equal to each other use the steering linkage rods Fig 3 14A to make the tires parallel To do so hold the rod base with the 14 mm wrench and loosen the 12 mm jam nuts with left hand LH threads on the inboard rod end and right hand RH threads on the outboard rod end With the jam ...

Страница 23: ...le stops moving without pulling to one side then the front brakes are adjusted correctly If one front brake works better than the other it will pull to the side that brakes first To adjust the brake that is not working unscrew the brake adjustor screw that is located at the front of the black bracket of the drum brake shoe plate Fig 3 15C Unscrew the adjustor screw one turn and repeat the braking ...

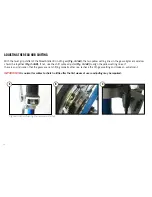
Страница 24: ...her Fig 3 16B If not use the shift cable adjustor Fig 3 16C to align the yellow setting lines If there is any indication that the gears are not shifting properly after use recheck the 4th gear setting and make an adjustment IMPORTANT It is normal for cables to stretch a little after the first weeks of use so adjusting may be required A B C Figure 3 16 Adjusting the rear hub shifter ...

Страница 25: ... Fig 3 17B C The 4 mm hex screws secure the rack to the threaded middle boss on the frame where the seat stays connect and to the threaded holes in the rear dropouts Start to tighten the screws with your fingers to avoid cross threading When all screws are started tighten them with the hex wrench To install the bottle cage that comes with the StreetStrider on the front top section of the head tube...

Страница 26: ...the spindle rotate the right crank arm to the same position as the left crank arm both facing down Fig 3 19A and install it back onto the spindle by screwing in the crank bolt but do not tighten Fig 3 19B Now both strider skis and poles are parallel Rotate both crank arms facing forward and the head tube can be folded down To loosen the fold joint use the 6 mm hex wrench on the lower silver cap sc...

Страница 27: ...olded head tube and the main frame will make the folded StreetStrider more rigid for easy placement onto a rack or into a vehicle Unfolding the StreetStrider is now the reverse of the folding process IMPORTANT When the left crank arm is returned to its striding position make sure that the crank arm bolt is tightened to specifications as shown in Fig 3 13 Rotating the Crank Arms A B A B Figure 3 19...

Страница 28: ... s always a good idea to wear protective eyewear tinted when the sun is bright clear when it s not as any kind of outdoor riding can involve airborne dirt dust and bugs Most bicycle shops carry protective eyewear some with interchangeable lens systems CAUTION To avoid injury aside from eye protection always wear suitable protective clothing including footware Reflectors an integral part of your St...

Страница 29: ...er vehicles sharing the road is dramatically reduced and your tires don t grip nearly as well This makes it harder to control speed and easier to lose control To make sure you can slow down and stop safely in wet conditions ride more slowly and apply your brakes earlier and more gradually than you would under normal dry conditions WARNING Wet weather impairs traction braking and visibility both fo...

Страница 30: ... sport StreetStriding involves the risk of serious injury death and damage By choosing to use a StreetStrider you assume the responsibility for the risk not the people who sold you the StreetStrider nor the people who made it nor the people who distribute it nor the people who manage or maintain the roads or trails on which you ride So you need to know and practice the rules of safe and responsibl...

Страница 31: ...31 RETURN POLICY FOR MORE INFORMATION REGARDING THE STREETSTRIDER RETURN POLICY PLEASE VISIT WWW STREETSTRIDER COM RETURN POLICY 2014 StreetStrider International All Rights Reserved ...

Страница 32: ......

Отзывы: