background image

9

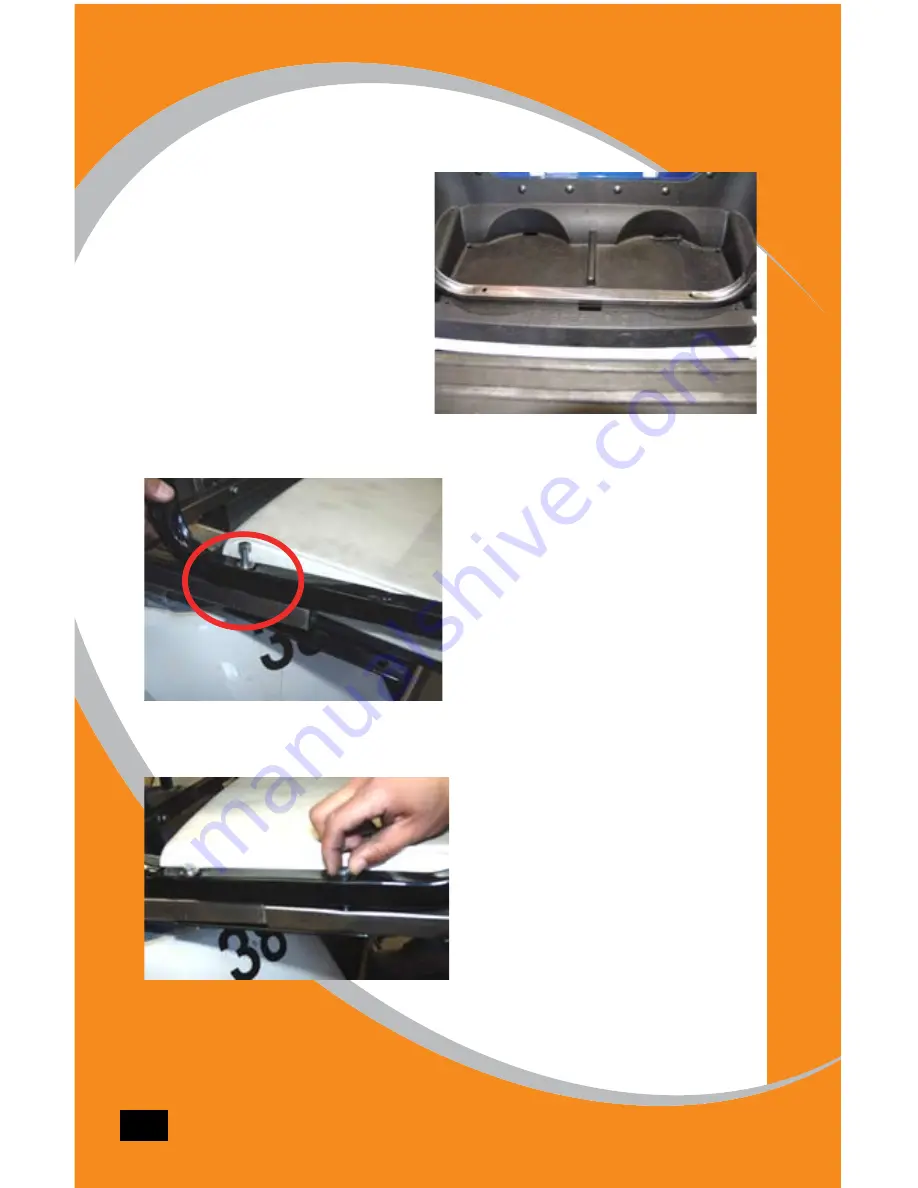
STEP10:

Put the main frame support and 

line it up to the pilot holes. Then 

drill through the top of the bagwell 

with a 5/16” drill bit. Then slide 

the two 5/16” x 2” bolts with 5/16” 

flat washers through the main 

frame support, bagwell and step 

frame tabs. Then finger tighten the 

5/16”bolts with 5/16” flat wash-

ers under the bagwell to hold the 

main frame support into place.

STEP11:

Slide one 5/16” x 2 1/2” bolt with 

one 5/16” washers through the 

armrest holes then place the bolt 

through the frame and the seat 

plate on the bottom then install 

the 5/16” flat washers and 5/16” 

nylock nuts and finger tighten. 

Repeat procedure for other side. 

Note: Make sure the tabs on the 

top of the  armrests face inward

STEP12: 

Then slip the top of the footrest 

support in between the seat tab 

and the arm rest. Slide one 5/16” 

x 2 1/2” bolt with one 5/16” 

washers through the armrest 

holes then place the bolt through 

the frame and the seat plate on 

the bottom then install the 5/16” 

flat washers and 5/16” nylock-

nuts and finger tighten. Repeat 

procedure for other side.

Содержание RX-6-26

Страница 1: ...FOR E Z GO RXV INSTALLATION INSTRUCTIONS RX 6 26 Model EZGO RXV Freedom VISIT US ON THE WEB TO CHECK OUT MORE GREAT PRODUCTS WWW STRECHPLASTICS COM Strech Plastics Manufacturers Distributors of the Highest Quality Golf Car Products ...

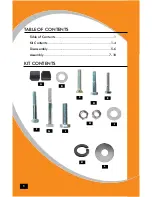
Страница 2: ...TABLE OF CONTENTS Table of Contents 1 Kit Contents 1 4 Disassembly 5 6 Assembly 7 18 KIT CONTENTS A B C D E 1 F G H I J K L ...

Страница 3: ...4 X 1 3 4 H H C S Zinc E 8 HW14 65 1 4 x 1 1 4 H H C S Bolt F 2 HW516 05 5 16 18 x 2 H H C S Grade 2 Zinc G 8 HW516 07 5 16 x 2 1 2 H H C S Bolt Grade 2 H 10 HW516 17 10 5 16 18 Nylon Lock Nut I 20 HW516 18 24 5 16 SAE Flat Washer J 4 HW14 105 1 4 20 X 1 Hex Bolt Zinc K 10 HW14 14 1 4 Split Lock Washer Zinc L 8 HW14 88 1 4 x 1 Fender Washer Zinc 2 ...

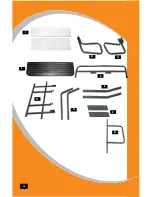
Страница 4: ...E F C G H I D J 3 A B ...

Страница 5: ...r Seat Brace E 2 RX 6 26 6 RXV Front Seat Back Supports F 2 RX 6 26 7 S 8 353 RXV Under Seat Brace Plates G 2 RX 6 26 7 RXV 4 Seat Step Brace H 1 RX 6 26 8 RXV4 Seat Step Frame I 1 HW 42B 4 Passenger Kit Seat Beige J 1 MS 6 09 4 Passenger Seat Kit Step Strech Plastics 4 SEAT KIT ALSO AVAILABLE IN THE FOLLOWING COLORS HW 42A Antelope HW 42B Beige HW 42C Camouflage HW 42I Ivory HW 42T Tan HW 42W Whi...

Страница 6: ...ve the bag holder basket STEP 3 Remove the 4 bolts to the top supports and remove the top sup ports STEP 4 Remove the front seat back and save the hardware STEP 5 Then remove the inspection cover and front seat for access 5 Disassembly ...

Страница 7: ...e side bolts for use during installation Assembly STEP 1 Place the step frame on a table with the mounting tabs facing up Place the plastic step assembly on top of the frame then while hold ing on to both pieces flip the assembly over Using eight 1 4 x 1 1 4 bolts and eight 1 4 x 1 fender washers secure the plastic foot rest to the step assembly ...

Страница 8: ...ack is in stalled Install plastic end caps into the top of the supports STEP 3 Take the OEM bolts re moved from the bumper and bolt the step frame into place STEP 5 Install the front seat back using OEM bolts 7 STEP 2 Take the OEM bolts re moved from the bumper and bolt the step frame into place with the side tabs facing up ...

Страница 9: ...back frame brace Re install the inspection cover STEP 7 Under the cart bagwell drill 2 pilot holes throught the bagwell with a 3 16 drill bit at the center of the tab holes in the footrest frame STEP8 Flip the rear seat bot tom over and install the under seat brace plate using four 1 4 x 1 bolts with 1 4 flat and lock ing washers Only finger tighten bolts STEP9 Slide the seat into place with the t...

Страница 10: ... washers through the armrest holes then place the bolt through the frame and the seat plate on the bottom then install the 5 16 flat washers and 5 16 nylock nuts and finger tighten Repeat procedure for other side Note Make sure the tabs on the top of the armrests face inward STEP12 Then slip the top of the footrest support in between the seat tab and the arm rest Slide one 5 16 x 2 1 2 bolt with o...

Страница 11: ... screws and fully tighten Then go around the entire frame and tighten all the bolts that were only finger tightened earlier in the instructions STEP15 Optional Long top Supports Then install the long top supports using the outer 2 holes on the armrest tabs with L shape on top facing toward the back of the cart If you would like an 80 LongTop and supports please contact a Strech Plastics Sales Rep ...

Страница 12: ...IGHEST QUALITY GOLF CAR PRODUCTS Specializing In Dashes Trays Steering Wheel Covers Lift Kits Windshields Dash Trays Lights Cowls Rear Seat Kits Wheels and Tires Steering Wheels Billet Accessories Wheel Covers Storage Covers Weather Enclosures Coolers and Brackets Ball and Club Washers Mirrors Ramps Storage Covers Sand and Seed Bottles And More 2008 Rev 04 21 08 ...

Отзывы: