1B
2
Installing the CPU Cooler Assembly
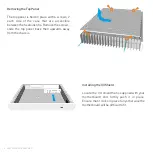
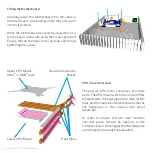
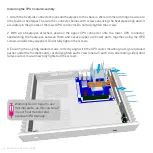
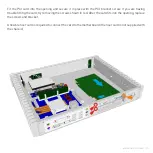
1. Attach the heatsink connector blocks and heatpipes to the chassis. We recommend fitting one side at a
time (pairs of heatpipes). Secure the connector blocks with screws ensuring the heatpipes align and sit
accurately in the grooves of the lower CPU connector. Do not fully tighten the screws.
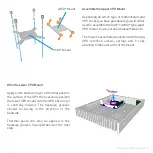
2. With all 4 heatpipes attached, position the upper CPU connector onto the lower CPU connector,
sandwiching the heatpipes between them and secure upper and lower parts together using the HEX
screws and allen key supplied. Do not fully tighten the screws.
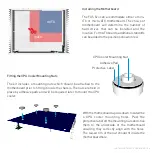
3. Ensuring the 4 spring loaded screws correctly align with the CPU cooler mounting nuts (you installed
earlier under the motherboard), carefully tighten each screw (one turn each side, alternating sides) until
fully secured. You can now fully tighten all the screws.
Warning! Do not forget to use
thermal paste, as this can result
in poor heat transfer and
eventual CPU damage.
P8 - INSTALLING THE CPU COOLER
1A
Содержание FC5WS Evo
Страница 1: ......
Страница 15: ...NOTES P15 ...
Страница 16: ...Melbournestraat 56 3047 BJ Rotterdam The Netherlands www streacom com V1 12 08 ...


