background image

1083-4-00/1

Storchenmühle Kinderausstattungen
GmbH & Co Textil- u. Hartwaren KG
95352 Marktleugast-Mannsflur

VERTRIEB:

sto1083-4-00/1  disk Storchenmühle  Babyschale, Rückseite Montageanleitung
erst.19.04.2000 ps  / geänd. am

Marke

S

to

rc

henmü

h

le

Содержание Maximum

Страница 1: ...isation doivent être impérativement remi ses au client Sous réserve d erreurs et de modifications F Montage en gebruiksaanwijzing Bevestigingssysteem voor kinderen Groep 0 13 kg Deze montagehandleiding gebruiksaanwijzing moet te allen tijde aan de klant worden afgegeven Drukfouten vergissingen en technische wijzigingen voorbehouden NL sto958 4 04 1 Maximum universal 13 kg Y 03301130 Gruppe 0 E1 St...

Страница 2: ...lded down The clips are engaged on the right and left in way of the long rear foot Anschnallen des Kindes Drücken Sie die Taste am Zentralversteller und ziehen Sie die Gurte heraus Strapping the child in Press the button on the central adjuster and pull the belts out D GB 2 1511 4 01 1 1 1510 4 01 1 sto961 4 04 1 disk Storchenmühle Babyschale Bild 1 2 Montageanleitung erst 18 02 2000 ps geänd am 0...

Страница 3: ...st the red button and place the belts to the side Legen Sie Ihr Kind in die Babyschale und schließen Sie das Schloß Place your child in the baby shell and close the lock GB 3 1512 4 00 1 4 1513 4 01 1 sto962 4 03 1 disk Storchenmühle Babyschale Bild 3 4 Montageanleitung erst 18 02 2000 ps geänd am 29 03 00 ps 15 01 04 ps 29 01 04 ps ...

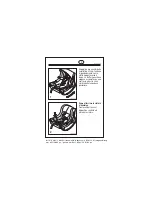
Страница 4: ...our finger between the child and the belt Einbau der Babyschale Stellen Sie die Babyschale auf die Rückbank Klappen Sie die Bügel nach unten so daß sie am hinteren Fuß links und rechts einrasten Fitment of the baby shell Place the baby shell on the back seat Fold the clip downwards so that it engages against the rear foot on the left and right GB 6 1515 4 00 1 5 1514 4 01 1 sto963 4 04 1 disk Stor...

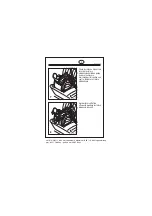
Страница 5: ...lace the lap belt in both guides Close the belt lock ensuring that there is an audible click Tighten the lap belt Öffnen Sie die Gurtklemme bis zum fühlbaren Anschlag und legen Sie den Diagonal gurt nach vorne Fully open the belt clamp and pull the diagonal belt over the front GB 7 1516 4 00 1 8 1517 4 00 1 sto964 4 03 1 disk Storchenmühle Babyschale Bild 7 8 Montageanleitung erst 18 02 2000 ps ge...

Страница 6: ...r Gurt ist richtig eingelegt wenn Sie durch das Sichtfenster an der Klemme weiß sehen Tighten the diagonal belt and close the clamp The belt is properly inserted if you can see white through the viewing window on the clamp GB 9 1518 4 00 1 10 1519 4 00 1 sto965 4 05 1 disk Storchenmühle Babyschale Bild 9 10 Montageanleitung erst 18 02 2000 ps geänd am 29 03 00 ps 06 04 00 ps 10 04 00 ps 19 04 00 p...

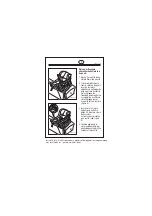
Страница 7: ... und schieben Sie den Diago nalgurt von unten in die Klemme unter das Blech Bild A 3 Legen Sie nun den Bek kengurt in die andere Füh rung ein Schließen Sie das Gurtschloß achten Sie dabei auf ein hörbares Einrasten siehe Bild B 4 Straffen Sie nun zuerst den Beckengurt dann den Diagonalgurt und schlie ßen Sie die Klemme D 1520 4 00 1 A Klick B 1521 4 00 1 sto1087 4 02 1 disk Storchenmühle Babyschal...

Страница 8: ...the seat shell and push the diago nal belt from below into the clamp underneath the plate fig A 3 Now place the lap belt in the other guide Push into the belt lock until a click is clearly heard see fig B 4 First tighten the lap belt followed by the diagonal belt and finally close the clamp GB 1520 4 00 1 A Klick B 1521 4 00 1 sto1207 4 01 1 disk Storchenmühle Maximum Alternative Montageanleitung ...

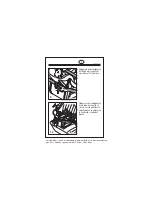
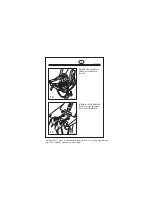
Страница 9: ...n Re threading the shoulder belts Pull the shoulder pads off the belts GB 12 1522 4 00 1 Sonnendach anknöpfen Button the sunroof 11 1530 4 00 1 7 x sto966 4 03 1 disk Storchenmühle Babyschale Bild 11 12 Montageanleitung erst 18 02 2000 ps geänd am 20 03 00 ps 15 01 04 ps 29 01 04 ps ...

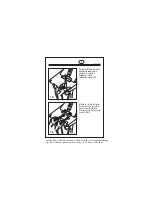
Страница 10: ...hrough from the back Ensure that the belts are not twisted GB 14 943 4 00 1 Ziehen Sie die Gurte durch die Öffnungen zurück Pull the belts back through the openings 13 1523 4 00 1 sto967 4 03 1 disk Storchenmühle Babyschale Bild 13 14 Montageanleitung erst 18 02 2000 ps geänd am 29 03 00 ps 15 01 04 ps 29 01 04 ps ...

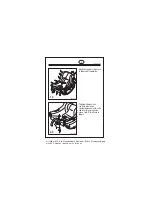
Страница 11: ... the cover back in place GB 16 944 4 00 1 Um die Gurte oben einfädeln zu können muß erst die Blende abgeclipst werden indem Sie von hinten dage gendrücken To thread the belts in from above the cover must be initially unclipped by pressing against it from the back 15 945 4 00 1 sto968 4 03 1 disk Storchenmühle Babyschale Bild 15 16 Montageanleitung erst 21 02 2000 ps geänd am 20 03 00 ps 29 03 00 p...

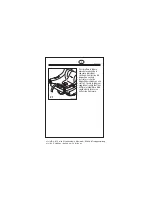
Страница 12: ...oulder pads and the belt lock pad from the belts GB 18 1525 4 00 1 Bezug abnehmen Knöpfen Sie das Sonnen dach ab Removing the cover Unbutton the sunroof 17 1524 4 00 1 sto969 4 03 1 disk Storchenmühle Babyschale Bild 17 18 Montageanleitung erst 21 02 2000 ps geänd am 29 03 00 ps 15 01 04 ps 29 01 04 ps ...

Страница 13: ...central adjuster by pushing the clips together and then pushing upwards Remove the cover GB 20 1527 4 00 1 Knöpfen Sie den Bezug von der Schale ab Unbutton the cover from the shell 19 1526 4 00 1 sto970 4 04 1 disk Storchenmühle Babyschale Bild 19 20 Montageanleitung erst 21 02 2000 ps geänd am 03 03 2000 29 03 00 ps 15 01 04 ps 29 01 04 ps ...

Страница 14: ...tschloß polster auf die Gurte und knöpfen Sie das Sonnendach wieder an The cover is fastened in the reverse sequence Start with the central adjuster ensure that the central adjuster engages Button the cover on the shell place the shoulder and belt pads on the belts and then button on the sunroof again 21 1528 4 00 1 sto1033 4 02 1 disk Storchenmühle Babyschale Bild 20 Montageanleitung erst 29 03 2...

Страница 15: ...ontalaufprall mit 50 km h getestet nach ECE 44 03 Nach einem Unfall muß die Baby schale ausgetauscht werden Die Babyschale muß im Werk überprüft werden Achtung Nicht zulässig auf Beifahrersitz mit Airbag Die Babyschale ist immer gemäß Einbauanleitung im Auto zu befestigen auch wenn sie nicht benutzt wird Ein nicht befestigter Sitz kann bereits bei einer Notbremsung andere Autoinsassen verletzen Di...

Страница 16: ...g schützen besonders die Metallteile um zu verhindern daß sich Ihr Kind daran verbrennt Sitz und Gurte können mit lauwarmem Wasser und Seife gereinigt werden Abgenommener Bezug kann nach Wasch anleitung laut Pflegeetikett gewaschen werden Die Babyschale darf nicht ohne Bezug verwendet werden Der Sitzbezug darf nie gegen einen nicht vom Hersteller empfoh lenen Bezug ausgetauscht werden da dieser Be...

Страница 17: ...h according to ECE 44 03 After an accident the baby shell must be replaced The baby shell must be inspected in the factory Note Not permissible on a passenger seat with airbag The baby shell must always be fitted in the car in accord ance with the installation instructions even when it is not in use In an emergency braking situation an unfas tened seat can cause injuries to the other occupants of ...

Страница 18: ...ion in particular the metal components The seat and belt can be cleaned with lukewarm water and soap The removed cover can be washed in accordance with the washing instructions on the care label The baby shell must not be used without the cover A cover that has not been recommended by the manufacturer must never be used to replace the original seat cover since this cover is an integral part of the...

Страница 19: ...nmühle Kinderausstattungen GmbH Co Textil u Hartwaren KG 95352 Marktleugast Mannsflur VERTRIEB sto1083 4 00 1 disk Storchenmühle Babyschale Rückseite Montageanleitung erst 19 04 2000 ps geänd am Marke S t o rchenmü h l e ...

Страница 20: ...j naar beneden geklapte beugels De beugels worden daarbij aan de lange achtervoet rechts en links gearrêteerd Pour attacher l enfant Presser la touche à l ajusteur central et sortir les sangles Aanleggen van de gordel aan het kind Druk de toets aan de centrale versteller en trek de gordels eruit F NL 2 1511 4 01 1 1 1510 4 01 1 sto1036 4 01 1 disk Storchenmühle Maximum Bild 1 2 f nl Montageanleitu...

Страница 21: ...ot door druk op de rode toets en leg de gordel zijdelings af Asseoir l enfant dans la co que et fermer la serrure Plaats het kind in de babyschaal en sluit het slot NL 3 1512 4 00 1 4 1513 4 01 1 sto1037 4 01 1 disk Storchenmühle Babyschale Bild 3 4 f nl Montageanleitung erst 29 03 2000 ps geänd am 29 01 04 ps ...

Страница 22: ...nd en de gordel slechts een vingerbreed ruimte bevindt Installation de la coque bébé Placer la coque sur la banquette arrière Rabattre les étriers vers le bas de façon à ce qu ils s encastrent dans les pieds arrière gauche et droit Inbouw van de babyschaal Plaats de babyschaal op de achterbank Klap de beugels naar beneden zodat zij aan de achtervoet links en rechts inklikken NL 6 1515 4 00 1 5 151...

Страница 23: ...heupgordel in de beide geleidingen in Sluit het gordelslot let daarbij op een hoorbaar inklikken Trek de heupgordel strak Ouvrir complètement le blo queur de ceinture et rabattre la sangle diagonale vers l avant Open de gordelklem tot een voelbaar aanslag en leg de diagonale gordel naar voren NL 7 1516 4 00 1 8 1517 4 00 1 sto1039 4 01 1 disk Storchenmühle Babyschale Bild 7 8 f nl Montageanleitung...

Страница 24: ...mer le bloqueur La sangle est correctement en place lorsque le voyant du bloqueur est au blanc Span de diagonale gordel en sluit de klem De gordel is correct ingelegd als u door het kijkvenster aan de klem wit ziet NL 9 1518 4 00 1 10 1519 4 00 1 sto1040 4 03 1 disk Storchenmühle Babyschale Bild 9 10 f nl Montageanleitung erst 29 03 2000 ps geänd am 06 04 00 ps 19 04 00 ps 29 01 04 ps ...

Страница 25: ...de la coque et l introduire par le bas dans le bloqueur de ceinture sous la pièce de tôle Fig A 3 Introduire maintenant la sangle de bassin dans l autre guidage Fermer la serrure et un déclic doit se faire entendre voir fig B 4 Tendre d abord la sangle de bassin et ensuite la sangle diagonale fermer le bloqueur F 1520 4 00 1 A Klick B 1521 4 00 1 sto1208 4 02 1 disk Storchenmühle Maximum Alternati...

Страница 26: ...zitje en schuif de diagonale gordel van onderaf in de klem onder de plaat zie afbeelding A 3 Leg nu de heupgordel in de andere geleiding Sluit het gordelslot en let daar bij op dat het hoorbaar inklikt zie afbeelding B 4 Trek nu eerst de heupgor del vast dan de diagonale gordel en sluit vervolgens de klem NL 1520 4 00 1 A Klick B 1521 4 00 1 sto1209 4 01 1 disk Storchenmühle Maximum Alternative Mo...

Страница 27: ...sangles d épaule Sortir les rembourrages d épaule des sangles Schoudergordels veranderen Trek de schouderkussens van de gordels 12 1522 4 00 1 11 1530 4 00 1 7 x sto1041 4 01 1 disk Storchenmühle Babyschale Bild 11 12 f nl Montageanleitung erst 29 03 2000 ps geänd am 29 01 04 ps ...

Страница 28: ...eren doorschuiven Let erop dat de gordels niet verdraaid zijn NL Retirer les sangles par l arrière à travers les fentes Trek de gordels door de openingen terug 14 943 4 00 1 13 1523 4 00 1 sto1042 4 01 1 disk Storchenmühle Babyschale Bild 13 14 f nl Montageanleitung erst 29 03 2000 ps geänd am 29 01 04 ps ...

Страница 29: ...zijn Vervolgens de blindering opnieuw aanbrengen NL Pour enfiler les sangles en haut enlever d abord l obturateur en le pressant par l arrière Teneinde de gordels boven te kunnen invoegen moet eerst de blindering worden verwijderd door van achteren ertegen te drukken 16 944 4 00 1 15 945 4 00 1 sto1043 4 01 1 disk Storchenmühle Babyschale Bild 15 16 Montageanleitung erst 29 03 2000 ps geänd am 29 ...

Страница 30: ...k de schouderkussens en het gordelslotkussen van de gordels NL Enlever la garniture Déboutonner le pare soleil Overtrek wegnemen Knoop het zonnedak af 18 1525 4 00 1 17 1524 4 00 1 sto1044 4 01 1 disk Storchenmühle Babyschale Bild 17 18 f nl Montageanleitung erst 29 03 2000 ps geänd am 29 01 04 ps ...

Страница 31: ...centrale versteller los door de clips samen te drukken en naar boven te schuiven Neem het overtrek weg NL Déboutonner la garniture de la coque Knoop het overtrek van de schaal af 20 1527 4 00 1 19 1526 4 00 1 sto1045 4 01 1 disk Storchenmühle Babyschale Bild 19 f nl Montageanleitung erst 29 02 2000 ps geänd am 29 01 04 ps ...

Страница 32: ...te de la serrure sur les sangles et reboutonner le pare soleil Het overtrek wordt in omgekeerde volgorde opnieuw bevestigd Begin met de centrale versteller let erop dat de centrale versteller inklikt knoop het overtrek op de schaal steek de schouder en gordelslotkussens op de gordels en knoop het zonnedak weer aan 21 1528 4 00 1 sto1046 4 01 1 disk Storchenmühle Babyschale Bild 20 Montageanleitung...

Страница 33: ...é testée dans un choc frontal à une vitesse de 50 km h selon ECE 44 03 Remplacer la coque bébé après un accident La coque bébé doit être contrôlée en usine Attention N est pas permise pour sièges avant à airbag La coque bébé doit toujours être fixée dans la voiture suivant les instructions de mise en place même si elle n est pas utilisée Un siège non fixé pourrait blesser les passagers déjà lors d...

Страница 34: ... directe du soleil afin d éviter toute brûlure à votre enfant Le siège et les sangles peuvent être nettoyés à l eau tiède et au savon Une fois enlevée la garniture pourra être lavée selon les indications de l étiquette d entretien La coque bébé ne doit pas être utilisée sans sa garniture Elle ne doit pas être remplacée par une autre garniture non recommandée par le fabricant étant donné qu elle fo...

Страница 35: ...bij een frontale botsing met 50 km h volgens ECE 44 03 getest Na een ongeval moet de babyschaal worden vervangen De babyschaal moet in de fabriek worden gekeurd Attentie Niet toegelaten op de bijrijdersstoel met airbag De babyschaal is steeds overeenkomstig de inbouwaanwij zing in de auto te bevestigen ook als zij niet wordt gebruikt Een niet bevestigde stoel kan reeds bij een noodstop andere pass...

Страница 36: ...len onderdelen teneinde te voorkomen dat zich uw kind verbrandt Stoel en gordel kunnen met handwarm water en zeep worden gereinigd Het afgenomen overtrek kan overeenkomstig de wasaanwijzing blijkens verzorgingsetiket worden gewassen De babyschaal mag niet zonder overtrek worden gebruikt Het stoelovertrek mag nooit door een niet door de fabrikant aanbevolen overtrek worden vervangen omdat dit overt...

Страница 37: ...nmühle Kinderausstattungen GmbH Co Textil u Hartwaren KG 95352 Marktleugast Mannsflur VERTRIEB sto1083 4 00 1 disk Storchenmühle Babyschale Rückseite Montageanleitung erst 19 04 2000 ps geänd am Marke S t o rchenmü h l e ...

Страница 38: ...e vengono assicurate con uno scatto sia a destra che a sinistra della lunga base posteriore Come allacciare la cintura al bambino Premere il bottone sul dispositivo centrale ed estrarre la cintura I 2 1511 4 01 1 1 1510 4 01 1 sto1476 4 02 1 disk Storchenmühle Babyschale Bild 1 2 Montageanleitung erst 03 11 2003 ps geänd am 04 11 03 ps 29 01 04 ps ...

Страница 39: ...rosso e riporre la cintura a lato Posizionare il bambino all interno del seggiolino e chiudere la cintura di sicurezza 3 1512 4 00 1 4 1513 4 01 1 sto1477 4 01 1 disk Storchenmühle Maximum Bild 3 4 Montageanleitung erst 03 11 2003 ps geänd am 29 01 04 ps ...

Страница 40: ...ambino vi sia solo un dito di spazio Posizionamento del seggiolino Posizionare il seggiolino sul sedile posteriore Ripiegare le staffe verso il basso fino a farle incastrare a destra e a sinistra della base posteriore 6 1515 4 00 1 5 1514 4 01 1 sto1478 4 01 1 disk Storchenmühle Babyschale Bild 5 6 Montageanleitung erst 03 11 2003 ps geänd am 29 01 04 ps ...

Страница 41: ...errare la chiusura assicurandosi di sentire uno scatto Tendere la cintura addominale Aprire il morsetto fino all arresto e portare la cintura diagonale davanti 7 1516 4 00 1 8 1517 4 00 1 sto1479 4 01 1 disk Storchenmühle Maximum Bild 7 8 Montageanleitung erst 03 11 2003 ps geänd am 29 01 04 ps ...

Страница 42: ...a Tendere la cintura diagonale e chiudere il morsetto La cintura è stata posizionata correttamente se attraverso la finestrella si vede del bianco 9 1518 4 00 1 10 1519 4 00 1 sto1480 4 02 1 disk Storchenmühle Maximum Bild 9 10 Montageanleitung erst 03 11 2003 ps geänd am 04 11 03 ps 29 01 04 ps ...

Страница 43: ...passare attorno al seggiolino e infilare la cintura diagonale nel morsetto sotto la lamiera figura A 3 Inserire ora la cintura addominale nell altra guida Chiudere la sicura della cintura assicurandosi di sentire uno scatto ved figura B 4 Tendere dapprima la cintura addominale poi quella diagonale ed infine chiudere il morsetto I 1520 4 00 1 A Klick B 1521 4 00 1 sto1481 4 01 1 disk Storchenmühle ...

Страница 44: ...ture a bretella Spostare l imbottitura della cintura di sicurezza Abbottonare il parasole 12 1522 4 00 1 11 1530 4 00 1 7 x sto1482 4 01 1 disk Storchenmühle Babyschale Bild 11 12 Montageanleitung erst 03 11 2003 ps geänd am 29 01 04 ps ...

Страница 45: ...sicurarsi che le cinture non siano attorcigliate Da sotto tirare le cinture attraverso le rispettive fessure 14 943 4 00 1 13 1523 4 00 1 sto1483 4 01 1 disk Storchenmühle Maximum Bild 13 14 Montageanleitung erst 03 11 2003 ps geänd am 29 01 04 ps ...

Страница 46: ...mente fissare di nuovo l aletta Per poter infilare le cinture nella parte superiore è necessario smollare dapprima l aletta spingendola da dietro 16 944 4 00 1 15 945 4 00 1 sto1484 4 03 1 disk Storchenmühle Maximum Bild 15 16 Montageanleitung erst 03 11 2003 ps geänd am 04 11 03 ps 01 12 03 ps 29 01 04 ps ...

Страница 47: ...e spalle e della chiusura della cintura Come rimuovere la fodera Sbottonare e poi rimuovere il parasole 18 1525 4 00 1 17 1524 4 00 1 sto1485 4 01 1 disk Storchenmühle Maximum Bild 17 18 Montageanleitung erst 03 11 2003 ps geänd am 29 01 04 ps ...

Страница 48: ...oraneamente sulle clip laterali e spingendo verso l alto Rimuovere la fodera Sbottonare e poi rimuovere la fodera dal seggiolino 20 1527 4 00 1 19 1526 4 00 1 sto1486 4 01 1 disk Storchenmühle Maximum Bild 19 Montageanleitung erst 03 11 2003 ps geänd am 29 01 04 ps ...

Страница 49: ...centrale assicurarsi che tale dispositivo si chiuda con uno scatto fissare la fodera al seggiolino tramite i bottoni rinfilare le imbottiture delle spalle e della chiusura e riattaccare il parasole 21 1528 4 00 1 sto1487 4 01 1 disk Storchenmühle Maximum Bild 20 Montageanleitung erst 03 11 2003 ps geänd am 29 01 04 ps ...

Страница 50: ...alla velocità di 50 km h conformemente al regolamento ECE 44 03 In seguito ad un incidente il seggiolino deve essere sostituito Il seggiolino deve essere revisionato presso il produttore Attenzione Vietato posizionare il seggiolino sul sedile passeggero provvisto di airbag Il seggiolino deve essere sempre fissato all interno del veicolo in base alle indicazioni relative al montaggio anche se non v...

Страница 51: ...che per evitare che il bambino si possa scottare Il seggiolino e le cinture possono essere puliti con acqua tiepida e sapone Una volta rimossa la fodera è possibile lavarla secondo le indicazioni riportate in etichetta Il seggiolino non deve essere utilizzato privo di fodera Non sostituire mai la fodera del seggiolino con una fodera che non sia stata consigliata dal produttore dato che la fodera o...

Страница 52: ...nmühle Kinderausstattungen GmbH Co Textil u Hartwaren KG 95352 Marktleugast Mannsflur VERTRIEB sto1083 4 00 1 disk Storchenmühle Babyschale Rückseite Montageanleitung erst 19 04 2000 ps geänd am Marke S t o rchenmü h l e ...

Отзывы: