


Chapter 4 Operations instructions
4.1 Power On
4.2 Preview Setup
Startup After powering on correctly, the Power LED will light green. The monitor will be auto-start.
Please refer to 2.6 Rear Panel Connection for details of connection method. The login box will appear
then. Please select proper user and type in relevant password to log in.
It costs about 60 seconds to start up, please wait for a moment.
Modify password by selecting <Toolbar>-<System>-<System Setup>-<Password Setup>. Set
as indicated, new password will take effect instantly.
Default password for User is 666666; default password for Admin is 888888. Admin password can
be restored to factory defaults by short-circuit the JP 10 or JP 15 on main board. User
password can be reset by Admin by IE in
【
User Management
】
Note1:
Note2:
Note3:
"
"
"
"
"
"
"
"
"
"
"
"
"
"
"
" "
"
Note4:
System Setup
Language:
Date/Time:
Video Standard:
Note1:
Note2:
Note3:
The DVR will buzz and NO Hard disk appears when without hard disk.
Please enter <Toolbar>-<System>-<System Setup>-< Language> to set language.
Please enter <Toolbar>-<System>-<System Setup>-<Time Format> to set time format.
12 hours and 24 hours are supported. Please enter <Toolbar>-<System>-<System Setup>-<Time
Setup> to set date and time.
Please enter <Toolbar> <System> <System Setup> <Video Standard> to set video
standard. PAL, SECAME, and NTSC are supported. Please set according to the parameters of camera.
In order to avoid record files time confusion, you d better stop recording before modifying system
time.
Language and Time will take effect instantly. Record Resolution and Video Standard
will take effect after being saved. Will take effect after [Save&Exit]
Users can refer to the navigations on the bottom of the main screen to look for relevant guides.
Meanwhile, the structure will present take effect instantly / take effect after being saved
After start-up system, the screen has live view area/system status/toolbar. Right click mouse in preview
mode or press
on the front panel , the Toolbar will appear.
Videos, OSD of channel name, motion detection notifications will be displayed on the screen.
?
?
?
'
'
4.2.1 Video Channel Preview Area
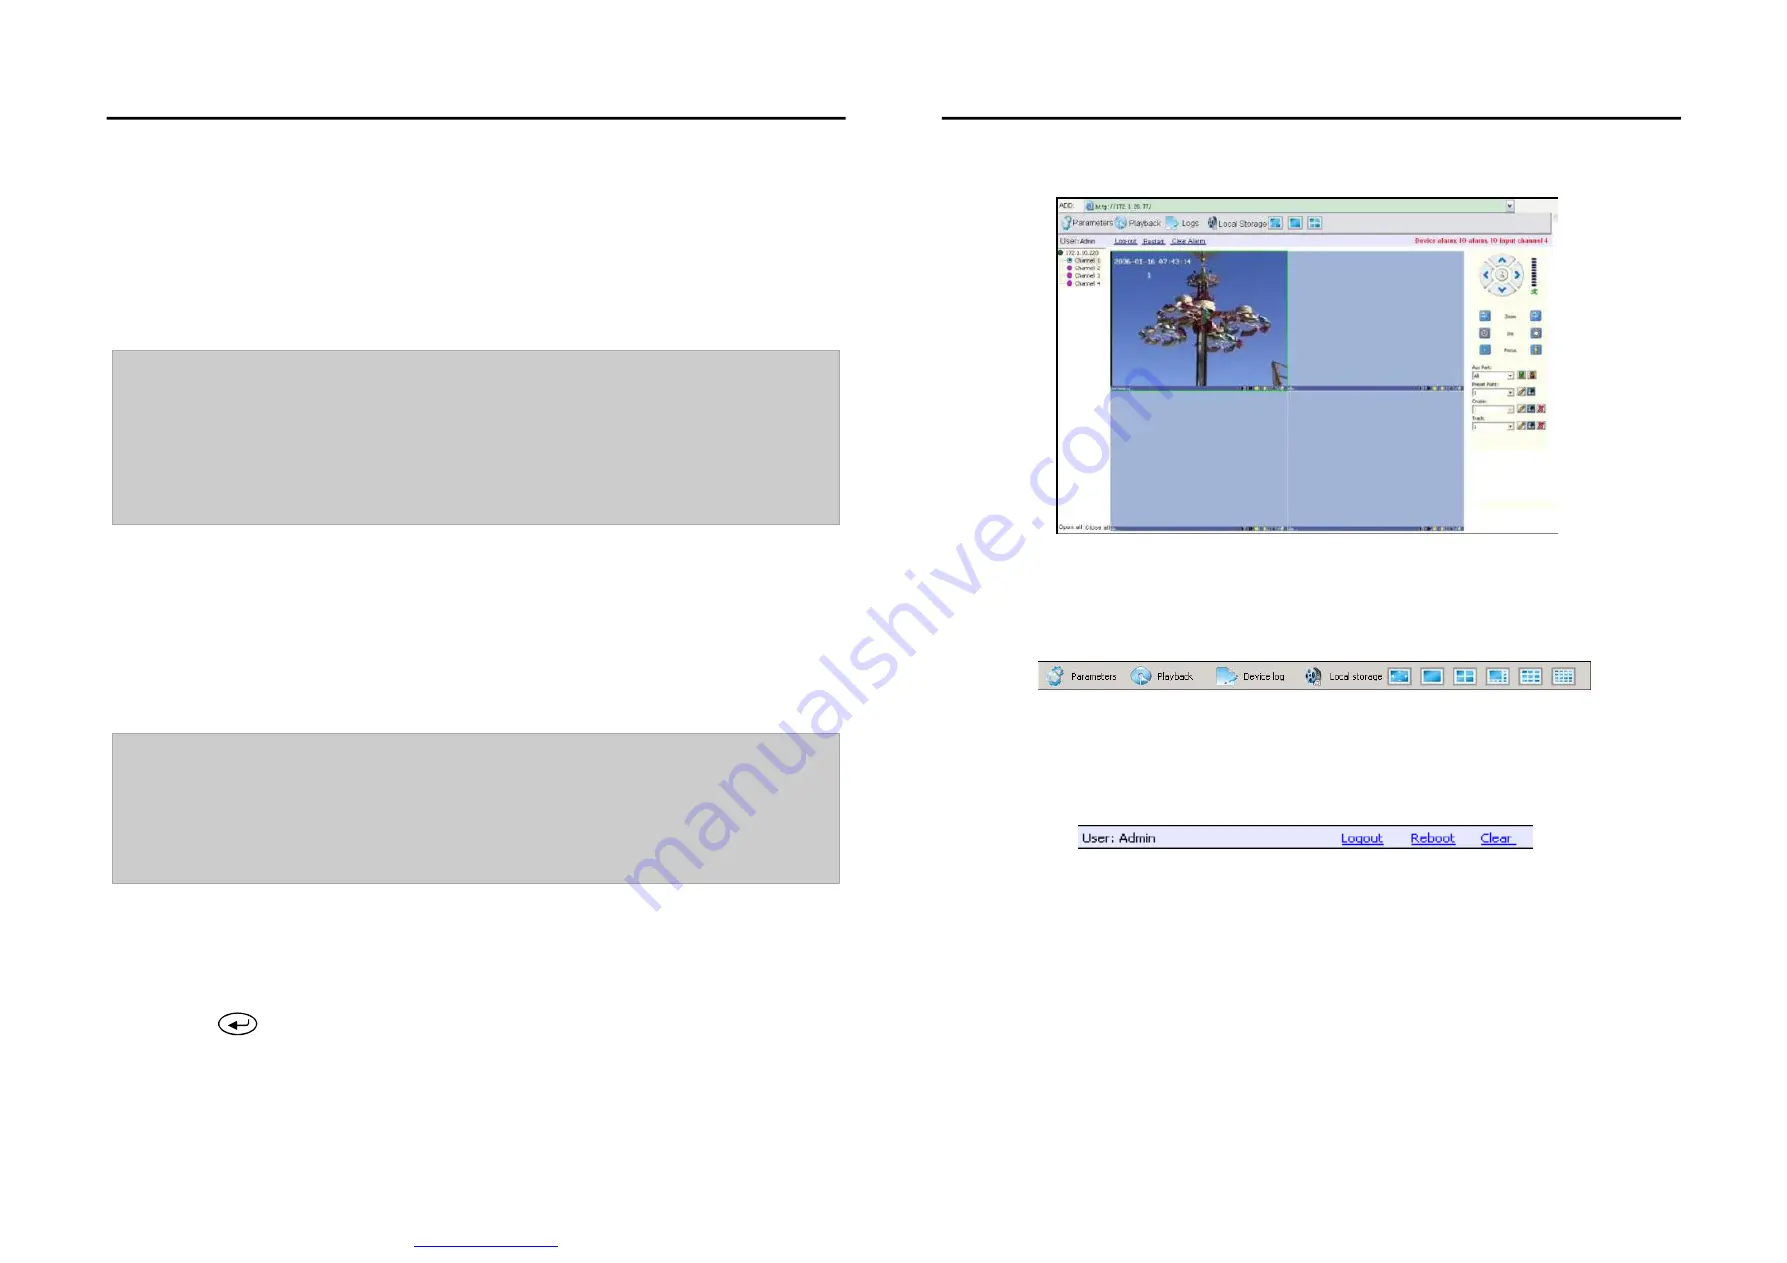
4.8.2.1 Web Interface Brief Introduction
Aderess bar
Tool bar
Information tip zone
Show IP address of login equipment
To read and change Equipment parameter
Search and playback of equipment record file and local file.
Search and Lead-out of equipment operation log.
Swift operation of video image amont Full screen, Single image, quad image.
User Log out, Equipmetn reboot, IE dis-alarm operation
Setup of local record file store list.
When network connection is broken or abnormal, the alarm notification of "No heartbeat of device,
please check the network!" will be displayed in the right up side of the main screen. After recovery of
network, the preview will be displayed automatically.
When alarms of remote notification occur, the alarm notification with alarm input number contained such
as "Device alarm: IO alarm, IO input x" will be displayed in the right up side of the main screen.
When alarms of motion detection with remote notification occur, the alarm notification with the alarm
channel number contained such as "Device alarm: motion detection, channel 1" will be displayed in the
right up side of the main screen.
When alarms of video loss with uploading to center occur, the alarm notification with the alarm channel
number contained such as "Device alarm: video loss, channel x" will be displayed in the right up side of
the main screen.
Picture 4-6 IE Interface
LCD WITH BUILT-IN DVR USER MANUAL
LCD WITH BUILT-IN DVR USER MANUAL
-16-
-29-
文件使用
"pdfFactory Pro"
试用版本创建


