Page 7
A. Cleaning
1. Remove the front gate and install the splashguard.
2. Make a cleaning solution of 1½ to 2 gallons (4-8
liters) of cold water and the correct amount of
cleaning solution. Do not exceed 100 degrees Fahr-
enheit (38 degrees Celsius).
3. Pour the cleaning solution into the hopper pan.
Wash down the sides and bottom of the hopper pan
to dilute remaining mix.
4. Turn the flow control valve to the number “2” posi-
tion to allow sanitizer into the barrel.
5. Turn the beater switch to “ON” and run the clean-
ing solution through the barrel.
Make sure the refrigeration switch is in the “OFF”
position.
6. Repeat the procedure until all mix residue is gone
and the hopper pan is clean.
7. Turn the beater switch to the “OFF” position and
remove the key.
8. Properly dispose of the cleaning solution.
SAFETY WARNING: Do not attempt to remove the
front plate, or beater shaft without first removing
the key from the beater switch. Serious bodily in-
jury may result.
B. Disassembly
IMPORTANT: Make sure to keep the parts for
each individual barrel separated. The parts need to
be installed into the same barrel every time the ma-
chine is disassembled.
1. Remove
key
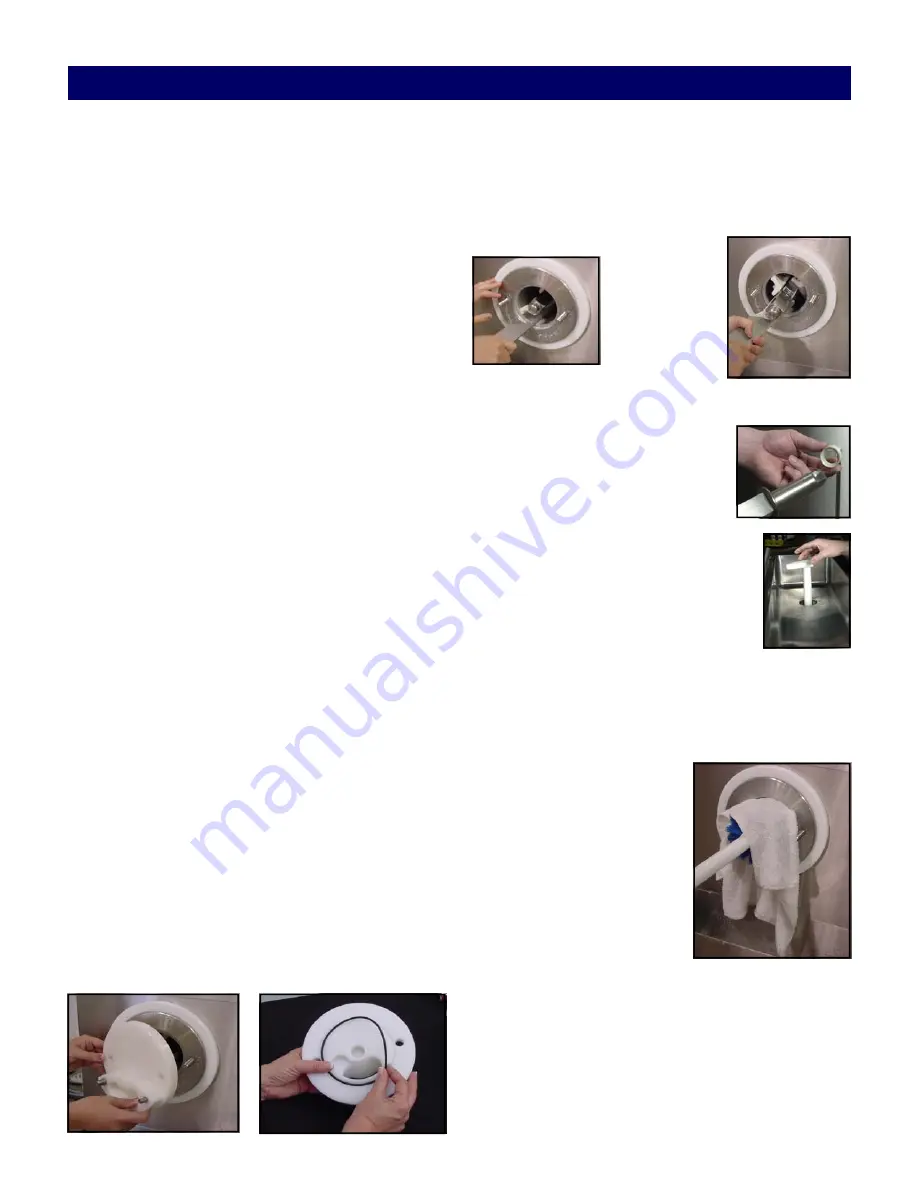
2. Remove the front gate and front plate for washing.
Remove the o-ring from the front plate. Remove
front bushing from beater shaft.
3. Lay the washed parts out on a sanitized counter for
air drying. With the beater shaft wrench, pull the
beater shaft partially out of the barrel by grabbing
behind the first blade. Continue to pull the beater
shaft forward and remove each blade and spring
and place in a container for cleaning.
CAUTION: Be careful not to scratch the inside of
the barrel with the beater shaft.
4. Remove the Rear Gasket and
wipe the lubricant off the hex end
of the beater with a clean towel.
5. Remove the flow control rod and
the flow control valve assembly.
6. Take all parts to the cleaning area for
washing. Add sufficient hot water and
cleaning solution to cover all of the
parts. Let soak for five minutes. Make
sure mix is removed from all small, hard to clean
areas of the parts, including o-ring grooves.
7. While the parts are soaking, use a cleaning solution
and barrel brush to clean inside barrel.
8. Wrap a clean towel soaked
with cleaning solution
around a barrel brush and
run the brush and towel
through the barrel until it is
clean.
Cleaning and Disassembly
Содержание Ross CC303-209A00SIR
Страница 1: ...Model CC303W OPERATING MANUAL Manual No 513621 Rev 5...
Страница 2: ......
Страница 12: ......
Страница 14: ...001 1332808 2...
Страница 24: ......
Страница 28: ......
Страница 30: ......
Страница 34: ......
Страница 35: ......
Страница 36: ......


