16
AFTER SALES SUPPORT
1300 886 649
AUS
MODEL: STR-PGGC75 PRODUCT CODE: 10288 09/2019
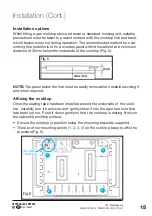
Fig. 7
A
Sealing tape
C
Screw
B
Mounting
bracket
Installation (Cont.)
• Put the mounting brackets in the
appropriate locations (as indicated
in Fig. 6 on the previous page) and,
using the screws provided, affix the
brackets (Fig. 7:
B
) to the cooktop
and tighten the screws (Fig. 7:
C
)
securely. This is very important.
• The other side of the bracket must
be located on the underside of the
benchtop, as shown in Fig. 7.
Electrical connection
• Connection:
The appliance is
equipped with an electrical cord
and power plug, which must be
connected to the mains electricity supply in order for the ignition to work.
Insert the power plug firmly into an appropriate electrical outlet and switch
on power at the outlet.
• Wall socket:
The electric wall outlet must be properly earthed and
accessible. It must be suitable for the power drawn by the appliance. The
outlet voltage and circuit frequency must correspond to the voltage stated
on the appliance rating label.
• Power cord:
When installing the appliance, make sure that the power
supply cord does not come into contact with any parts of the cooktop that
get hot during use, or with hot cookware. If the supply cord is damaged,
it must be replaced by the manufacturer or a similarly qualified person in
order to avoid a hazard.
•
Electrical work:
Should any electrical
work be required asso-
ciated with the electrical
outlet that is to be used
for the cooktop, all such
work must be carried
out by an appropriately
qualified, licensed elec-
trician in accordance
with all applicable rules
and regulations.
序号
修 改 说 明
佛山市沃尔姆斯电器有限公司
审核/
日期
设计/
日期
批准/
日期
工艺/
日期
数量
1
比
例
1
:
1
重量
物料
编码
7
6
5
4
3
2
1
7
6
5
4
3
2
1
4
3
2
1
4
3
2
1
5
7
6
5
7
6
8
8
8
8
F
E
D
C
B
F
E
D
C
B
AA
AA
D
C
B
D
C
B
EE
FF
备注:
1
、材质:银底黑字不干胶
2
、尺寸:
75
*
45
mm
3
、字体图案要求清晰、无毛边
4
、用酒精擦拭
15S
,无掉色
5
、产品符合
rohs
要求
亚 银 龙
五炉头电气原理图
17000149
Fig. 8: Wiring diagram


