background image


Remark: please not not over lubricating, correct lubricationg is the key factor to keep 
the usage life. 
3. Judge the friction 
Unclean  or  less  lubricating  will  cause  the  incresement  of  friction  between  running   
belt and board, will harm to motor and transducer, the features are as follows: 
(1): When off position, it is hard or impossible to move the running belt. 
4. Running belt deviation Adjustment: 

Both  before  delivery  and  after  installation,  we  will  make  the  adjustment  on  the 
running  belt  .After  a  period  of  time  running  belt  running  deviation  phenomenon 
may occur. The causes of this phenomenon are the following several aspects: 

(1) Host is not smooth


(2) The users’ feet are not run with the center of the area when running


5.


Man-made  running  deviation  phenomenon,  no-load  running  two  to  three  minutes 

can  be  back  to  normal.  For  running  deviation  phenomenon  which  cannot  be 
automatically move back, should use the special tools (M10) T Allen key in a quarter 
of a circle (ninety degrees) adjusted end cover screw and the screw hole


6.  Specific  adjustment  method:  if  run  with  partial  slant  to  the  left,  can  adjust  the 
adjusting screw of the left, clockwise or counter-clockwise adjust the adjusting screw 
on  the  right.  If  the  running  belt  to  the  right,  can  adjust  to  the  right  of  the  adjusting 
screw clockwise or counter-clockwise adjust the adjusting screw of the left, Suggest 
every time make the adjustment of ninety degrees (a quarter circle) 
Running belt running deviation does not belong to the warranty scope, mainly by the 
user  on  its  own  maintenance.  Running  belt  running  deviation  will  be  seriously 
damaged belt. Must timely discovery, correct in a timely manner. 
7.Adjusting  methods  for  running  belt:  if  the  running  belt  in  a  loosing  state,  the  user 
may slipping during running; if the running belt in a tighten state, it may increase the 
output  power  of  the  motor  and  transducer.  In  above  two  situation,  the  running  belt 
should both be adjusted. 

      (1)Tighten:  Using  the  professional  tools-M10  “T”arm  inner  hex  wrench,  to  adjusting   

the adjust screw in the left and right  adjusting hole in the back end cover, revolving 
the wrench 1/4    circle clockwise each time.(Same range in both side) 

        (2)Loosing: Using the professional tools-M10 “T”arm inner hex wrench, to adjusting 

the adjust screw in the left and right  adjusting hole in the back end cover, revolving 
the wrench 1/4    circle anticlockwise each time.(Same range in both side) 


8.Running belt adjusting sketch map


Содержание S-900

Страница 1: ...COMMERCIAL TREADMILL S 900 USER MANUAL...

Страница 2: ...2 SPECIFICATION 1 3 SAFETY INSTRUCTION 2 3 4 PACKING LIST 3 5 ASSEMBLY 3 4 5 6 6 PANNEL 7 8 7 DEBUGGING 8 8 USAGE INSTRUCTION 8 9 10 9 WINDOWS 10 11 10 MAINTENANCE 11 12 11 ERRORS SOLUTIONS 12 13 12 A...

Страница 3: ...3 0HP Max power of motor 7HP Working temperature 0 40 Speed range 1 0 20 0 km h Time range 0 00 99 59 min sec Distance range 0 00 99 9 km Calorie range 0 999 Kcal Heart rate range 50 256 times minites...

Страница 4: ...results is only for reference 30 seconds later will have a more accurate heart rate visual ahead Avoid stepping the edge of the running space If first use hold the handrail with two hands to keep bala...

Страница 5: ...in case of any unauthorized users 24 This machine complied with SC type under EN 957 6 4 PACKING LIST Remark 12 pcs 12 25 hexagon socket screw will be needed for a treadmill 4pcs as spare parts 5 ASSE...

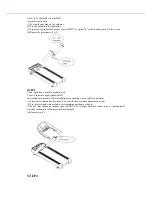
Страница 6: ...by drawing instruction STEP 1 Remove the packing remove the motor shield Tools Phillips screwdriver Assembly instructions 1 Take one Phillips screwdriver 2 Take of the screws from the motor cover 3 Pu...

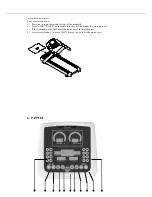
Страница 7: ...on line assembly digital watch Tools T inner hexagon spanner M10 Instruction for assembly This installation step should be two people cooperation 1 Electronic communications leads to dock with the pos...

Страница 8: ...switch in front of the treadmill 2 Press START PAUSE on the console to check if the treadmill is working well 3 If the treadmill works well place the motor cover in the right place 4 A cross screwdri...

Страница 9: ...defined 8 Speed reduction button Press the button to reduce the speed of the treadmill 9 Speed acceleration Press the button to reduce the speed of the treadmill 10 Speed direct selection area in the...

Страница 10: ...from bottom parameter value time window shows the default time 30 00 minutes can be used to speed up slow down button to change the time value After the machine start to set the time value of recipro...

Страница 11: ...nt In manual mode pressing accelerator slow down button or press speed direction button can change the speed of the treadmill In the process of fixed program it can not change the speed value manually...

Страница 12: ...isplayed in manual mode a ladder diagram is displayed in fixed program safe is displayed when emergency stop available and safe also displayed in Time window Pause is displayed in matrix when pause A...

Страница 13: ...of the left clockwise or counter clockwise adjust the adjusting screw on the right If the running belt to the right can adjust to the right of the adjusting screw clockwise or counter clockwise adjus...

Страница 14: ...nverter power module temperature rise is too high Examination content Machine in operation process whether converter cooling fan to stop working SAFE The abrupt stop switch is wrong Cause Stop device...

Страница 15: ...ough pressing the speed button Setting over Press the Start Pause button to save the settings and also shift to the time setting interface The speed window will show 9 and the time window will show th...

Отзывы: