RC-3030
Operating Manual
36
TPS #5, #6, & #7
5
6
7
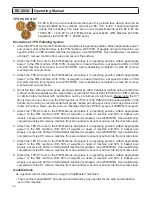
#5, #6 & #7 are resin bonded tools that have the pictured face design and can be
clearly identified by the numbers on back as “#5,” “#6,” & “#7.” These tools feature
orange Velcro backing. The tools are run wet. Approximate life of #5, #6 & #7 are
15,000 SF / 1,440 M
2
for all P/M Machines except 4430. (P/M Machine 4430 life
expectancy is 20,000 SF / 1,858 M
2
each.)
Execution of TPS Polishing System
1. Attach the TPS #1 tools to the P/M Machine and place it in operating position. Attach appropriate power*
and vacuum dust collection hose to the P/M machine. With 100% of weights on head of machine, set
speed to 40Hz on VSD and start machine (for propane, run at 2350 RPM). Upon satisfactory completion
of step #1, remove machine from area and vacuum the surface.
2. Attach the TPS #2 tools to the P/M Machine and place it in operating position. Attach appropriate
power* to the P/M machine. With 100% of weights on head of machine, set speed to 40Hz on VSD
and start machine (for propane, run at 2350 RPM). Upon satisfactory completion of step #2, remove
machine and vacuum clean.
3. Attach the TPS #3 tools to the P/M Machine and place it in operating position. Attach appropriate
power* to the P/M machine. With 100% of weights on head of machine, set speed to 40Hz on VSD
and start machine (for propane, run at 2350 RPM). Upon satisfactory completion of step #3, remove
machine and vacuum clean.
4. Grout the floor with approved epoxy grouting material by either traditional method using marble flour
(calcium carbonate powder) and a steel trowel, or with the STI Grout Pans (TPS #3.5) on P/M machine
(or similar rotary machine) with marble flour. Let dry a minimum of eight hours.
Please note: the STI
Grout Pans can only be run on the P/M machine at 15Hz or 2100 RPM with the pocket weights on the
handle. Not running as recommended will greatly reduce pan life expectancy and may produce burn
marks in the floor. Never use the pans on machines that have RPM in excess of 250RPM tool speed.
5. Attach the TPS #4 tools to the P/M Machine and place it in operating position. Attach appropriate
power* to the P/M machine. With 50% of weights on head of machine and 50% in basket over
wheels, set speed to 45Hz on VSD and start machine (for propane, run at 2500 RPM). Upon satisfactory
completion of step #4, remove machine from area and wet vacuum or auto-scrub the concrete clean.
6. Attach the TPS #5 tools to the P/M Machine and place it in operating position. Attach appropriate
power* to the P/M machine. With 50% of weights on head of machine and 50% in basket over
wheels, set speed to 45Hz on VSD and start machine (for propane, run at 2500 RPM). Upon satisfactory
completion of step #5, remove machine from area and wet vacuum or auto-scrub the concrete clean.
7. Attach the TPS #6 tools to the P/M Machine and place it in operating position. Attach appropriate
power* to the P/M machine. With 50% of weights on head of machine and 50% in basket over
wheels, set speed to 45Hz on VSD and start machine (for propane, run at 2500 RPM). Upon satisfactory
completion of step #6, remove machine from area and wet vacuum or auto-scrub the concrete clean.
8. Attach the TPS #7 tools to the P/M Machine and place it in operating position. Attach appropriate
power* to the P/M machine. With 50% of weights on head of machine and 50% in basket over
wheels, set speed to 45Hz on VSD and start machine (for propane, run at 2500 RPM). Upon satisfactory
completion of step #7, remove machine from area and wet vacuum or auto-scrub the concrete clean.
Qualifications
As a general rule for all operations using the Prep/Master
®
machines:
• The machine manual MUST be read and understood by any operator for the safe and productive
use of the machine.


