background image

19

RU

KZ

EN

forward and may cause the opera tor to lose control. Pull-in frequently occurs when the bumper spike of 

the chain saw is not held securely against the tree or limb and when the saw chain is not rotating at full 

speed before it contacts the wood.
Use extreme caution when cutting small size brush and saplings which may easily catch the saw chain, 

be whipped towards you or pull you off balance. 

How to avoid pull in :

1) Always start a cut with the saw chain rotating at full speed and the bumper spike in contact with the 

wood.
2) The risk of pull-in may also be reduced by using wedges to open the kerf or cut.

Push-back

Push-back occurs when the saw chain on the top of the bar is suddenly stopped when it is pinched, 

caught or encounters a foreign object in the wood. The reaction of the saw chain may drive the chain 

saw rapidly straight back toward the operator and may cause loss of chain saw control, which, in turn, 

may cause serious or fatal injury. Push-back frequently occurs when the top of the bar is used for cutting. 

How to avoid push-back :

1 ) Be alert to forces or situations that may cause material to pinch the top of the saw chain. Do not cut 

more than one log at a time.
2 ) Do not twist the chain saw when withdrawing the bar from a plunge cut or under-buck cut because 

the saw chain can pinch. 

4.7 AFTER USE

Switch the product off and let it cool down. Check, clean and store the product as described below. 

5.  TRANSPORTATION

Transporting the machine may require that you meet certain requirements specific to your country. 

Please make sure to respect them by contacting the authorities of your country, in order to respect them 

all. Ensure temperature during transportation will never be out of temperature range given on chapter 

storage. Switch the product off. 

Protect the product from any heavy impact or strong vibrations which may occur during transportation 

in vehicles. Secure the product to prevent it from slipping or falling over.

6.  WINTERING

Follow all instructions given on chapter storage below. 

We recommend using the original package 

for storage or covering the product with a suitable cloth or enclosure to protect it against dust. 

7.  STORAGE 

Store the machine  : Illustration  6.1

Shutdown the power tool. Examine the unit thoroughly for worn, loose or damaged parts. Clean the unit 

before storing and remove the oil from the tank. Remove the chain and the chain bar.
Only store the machine in a clean, dry, ventilated place with a temperature range of 4°C to 24°C. Cover it 

in order to provide added protection. We recommend using the original package for storage or covering 

the product with a suitable cloth or enclosure to protect it against dust. Be sure to secure the unit while 

transporting 
Do not expose the product to sunlight. Make sure the product is always protected from cold and humidity.

Содержание 3276007088533

Страница 1: ...rical Chainsaw EAN 3276007088533 2020 1007 Перевод оригинала инструкции Аударма Гүпнұска нұсқаулар Original instruction manual RU Руководство По Сборке и Эксплуатации KZ Жннау лайдаланужэнетехникалық қызметкөрсетунұсқаулығы EN Assemby Use Maintenance Manual ...

Страница 2: ......

Страница 3: ...ы қауіпсіздікждне құқықтық қамтамасыз ету Legal Safety Instructions XXX XXX Сборка Монтаждау Assembly XXX Подготовка Дайындау Preparation XXX Использование Пайдалану Use XXX XXX Уход Қызмет көрсету Maitenance XXX XXX Зимний период Қысқы мерзімде сақтау Winter storage XXX 1 2 3 4 5 6 ...

Страница 4: ...ld be no thicker than the guide bar s maximum cutting capabilities It must not be used for cutting other materials such as plastic stone metal or wood that contains foreign objects Do not use it for others purposes The maximum cutting capacity must be observed Do not cut branches exceeding the stated maximum capacity Do not use it for others purposes The product is not intended to be used by child...

Страница 5: ...alltheelementsneededforsettinguptheproducthavebeen provided Iftheproductisdamagedorhasdefects donotuseitandtakeitbacktothe neareststore Theterm powertool inthewarningsreferstoyourmains operated corded power toolorbattery operated cordless powertool 2 2 SYMBOLS ON THE PRODUCT Single mark of circulation of products on the market of the Member States of the Customs Union Electrical products should no...

Страница 6: ...ection class II That means it is equipped with enhanced or double insulation Kick back Tip contact may cause the guide bar to move suddenly upward and backwards which may cause serious injury to the user Do not cut the trunk from the bottom Always use the product with two hands Do not use one hand when operating the product 2 3 SYMBOLS IN THIS MANUAL Type and source of the danger Failure to observ...

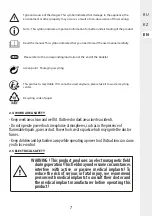
Страница 7: ... it to waste recycling center Recycling code of paper 2 4 WORK AREA SAFETY Keepworkareacleanandwelllit Clutteredordarkareasinviteaccidents Donotoperatepowertoolsinexplosiveatmospheres suchasinthepresenceof flammableliquids gasesordust Powertoolscreatesparkswhichmayignitethedustor fumes Keepchildrenandbystandersawaywhileoperatingapowertool Distractionscancause youtolosecontrol 2 5 ELECTRICAL SAFETY...

Страница 8: ...alert watchwhatyouaredoingandusecommonsensewhenoperatingapower tool Donotuseapowertoolwhileyouaretiredorundertheinfluenceofdrugs alcohol ormedication Amomentofinattentionwhileoperatingpowertoolsmayresultin seriouspersonalinjury Usepersonalprotectiveequipment Alwaysweareyeprotection Protectiveequipment suchasdustmask non skidsafetyshoes hardhat orhearingprotectionusedfor appropriateconditionswillre...

Страница 9: ...Ensurethatguardsand handlesareinplaceandproperlysecured Alwaysinspectthetoolbeforeuse andafteranyimpact checkforsignofwearor damageandrepairasnecessary especiallythepartsofthecuttinghead Neverusetheproductstandingonstepsoraladder Donotworkovershouldheight Neveroperatetheproductwithdefectiveguardsorshields orwithoutsafetydevices suchasdebriscollector inplace Cleartheworkareabeforeeachuse Wearafacef...

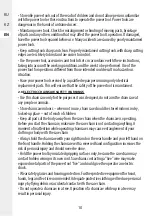
Страница 10: ...ETY WARNINGS Usethischainsawonlyforthepurposesitwasdesigned donotaimthechainsawat anypeopleoranimals Storechainsawindoors whennotinuse chainsawshouldbestoredindoorsindry locked upplace outofreachofchildren Keepallpartsofthebodyawayfromthesawchainwhenthechainsawisoperating Beforeyoustartthechainsaw makesurethesawchainisnotcontactinganything A momentofinattentionwhileoperatingchainsawsmaycauseentang...

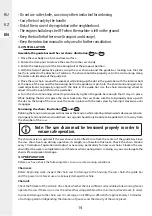
Страница 11: ...lyhandlesareslippery causinglossofcontrol Cutwoodonly Donotusechainsawforpurposesnotintended Forexample donot usechainsawforcuttingplastic masonryornon woodbuildingmaterials Useofthe chainsawforoperationsdifferentthanintendedcouldresultinahazardoussituation Itisrecommendedthatfirst timeusersshould asaminimumpractice cutlogsona saw horseorcradle 2 9 RESIDUAL RISKS Familiarizeyourselfwiththeuseofthi...

Страница 12: ... bar width 1 3mm Oil type Anti wear hydraulic oil Oil control Automatic Oil tank capacity cm 3 120 cm3 Chain speed m s No load 14 m s No load speed min 1 7500 Guaranteed sound power level dB A Measured sound power level dB A No load current 5A Maximum current IP Degree IP2X Max Vibration level K 1 5m s2 Max Sound Pressure Level The declared vibration total value has been measured in accordance wit...

Страница 13: ...embled before operation Do not use a product that is only partly assembled or assembled with damaged parts 4 1 UNBOXING 15 5 3 4 6 1 14 2 11 13 12 13 7 8 9 10 1 Front handle 2 Safety chain brake lever 3 Chain 4 Guide bar 5 Clamp nut 6 Chain cover 7 Metal bump spikes 8 Locking pin 9 Sprocket 10 Chain tension screw 11 Main switch 12 Safety lock off button 13 Rear handle 14 Chain oil cap 15 Guide bar...

Страница 14: ...the slot on the body of the saw Lock the cover in place with the lock screw by turning it clockwise until it engages Tensioning the chain illustration 2 5 and 2 9 Rotating the tension screw upwards increases the tension while rotating it downwards decreases tension A properly tensioned chain should have no sag and should only be able to be pulled 2 3 mm away from the chain bar of the saw Note The ...

Страница 15: ...e chain saw is NOT supplied filled with oil It is essential to fill with oil before use Never operate the chain saw without chain oil or at an empty oil tank level as this will result in extensive damage to the product Chain life and cutting capacity depends on optimum lubrication Therefore the chain is automatically oiled during operation via the oil outlet This chain saw features an auto oiling ...

Страница 16: ...t use Make the first trial on a free space with no obstacle and no surrounding element 4 5 OPERATION Switching on off illustration 4 1 To turn the tool ON push and hold the safety lock off button with your thumb while squeezing the ON OFF trigger switch Once the trigger switch engages you can release the safety lock off button and proceed with operation The safety lock off button reduces the risk ...

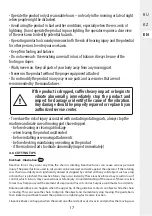
Страница 17: ...gpartshavestopped beforecleaningorclearingablockage whenleavingtheproductunattended beforeinstallingorremovingattachments beforechecking maintainingorworkingontheproduct ifthemachinestartstovibrateabnormally inspectimmediately 4 6 CUTTING TIPS Kickback Illustration 4 2 Reactive forces may occur any time the chain is rotating Reactive forces can cause serious personal injury The powerful force used...

Страница 18: ...r the limb may fall causing loss of control If a pinch occurs stop the engine and remove the saw by lifting the limb Remove the small limbs in one cut Branches under tension should be cut from the bottom up to avoid binding the product Bucking is cutting a log into lengths It is important to make sure your footing is firm and our weight is evenly distributed on bath feet When possible the log shou...

Страница 19: ...in can pinch 4 7 AFTER USE Switch the product off and let it cool down Check clean and store the product as described below 5 TRANSPORTATION Transporting the machine may require that you meet certain requirements specific to your country Please make sure to respect them by contacting the authorities of your country in order to respect them all Ensure temperature during transportation will never be...

Страница 20: ...as these can attack the plastic and weaken the structural integrity of the product Remove and brush clean the cover plate chain and chain bar after 1 to 3 hours of use Clean the area under the cover plate the drive sprocket and chain bar assembly using a soft brush Clean oil outlet with a clean cloth Do not place other objects on the chain saw 8 2 REPLACEMENT Part Action Before After each usage Ev...

Страница 21: ...ting When you sharpen the cutting tip the depth gauge setting between the tip and the side plate ridge will decrease To maintain optimal cutting performance the ridge has to be fi led down to achieve the recommended depth gauge setting To sharpen the chain 1 Using protective gloves ensure the chain is correctly tensioned on the guide bar 2 Use a round file with a diameter 1 1 times the cutting too...

Страница 22: ... the entire outside edge of the chain bar 4 Place the saw chain around the sprocket while lining up the slot in the chain bar with the internal bolt at the base of the saw and the chain tensioning pin in the chain bar s pin hole The chain tensioning pin may need adjustment to properly align with the hole in the chain bar Use the chain tensioning wheel to adjust its location until it fits in the ch...

Страница 23: ... 1 4 Wrenches 1 5 Hex Flange Nut 1 6 End cap assembly 1 6 1 Shaft Sleeve 1 6 2 Cover 1 6 3 End Cover Seal Ring 1 7 Open Ring 1 8 Chain Wheel 1 9 Shaft Sleeve 1 10 Case assembly 1 10 1 cabinet 1 10 2 Thermal Insulation Gasket 1 10 3 Self Tapping Screw 4 10 4 Seal ring 1 10 5 Tightening Nut 1 ...

Страница 24: ...Double Micro Switch 1 27 Female terminal 2 28 Cable press plate 1 29 Self Tapping Screw 2 30 Cable jacket 1 31 Power cable 1 32 Output Shaft Assembly 1 32 1 Bearing 1 32 2 Output shaft 1 32 3 Torsional Spring 1 32 4 Wheel Gear 1 32 5 Bearing 1 32 6 Open Ring 1 33 Motor assembly 1 33 1 Hex Flange Nut 1 33 2 Wheel Gear 1 33 3 Facing Bar 1 33 4 Oil pump assembly 1 33 5 Bearing 1 33 6 Wind Scooper 1 3...

Страница 25: ...ystem is defective Test it and change it by a new one No engine start The power cable is defective Check the integration of the power cable The power cable is defective Change the power cable After sales service The trigger is defective Change the trigger After sales service The motor protection has blocked the machine because of overload Wait a few minutes for the engine to cool down Power supply...

Страница 26: ...kage The chain is too tight Unscrew the chain tightening screw The chain is not lubricated enough Check if the oil tank is not empty and fill it The chain is not lubricated enough The oil pump is defective change it After sales service The chain is not lubricated enough Check the setting of the oil consumption and adjust it The chain is wasted Remove it and change it by a new one Chain guide break...

Страница 27: ...t enough strong Change carbon brushes spring support Cutting performance is insufficient The chain is not tense enough Tense it correctly The chain is dull damaged Sharpen it or change it by a new one Lubricant oil tank is empty Fill it or adjust the oil consumption when it s possible Loss of the chain The blade is not the good one in terms of dimension The customer needs to check the instruction ...

Страница 28: ...incorrect use of the product The following items are not covered by warranty The tool have been used incorrectly or Damage occurring upon transporting or setting up this product or Repairs and or change of parts carried out by a third party or Damage caused by external factors or foreign objects such as sand or stones or Damage resulting from non compliance with the safety and usage instructions o...

Страница 29: ......

Страница 30: ...A B D E C STERWINS 56PCS 1 3mm 3 8 28PCS 37cm ...

Страница 31: ...2 1 2 2 2 2 3 A E E 33 CLIC 31 ...

Страница 32: ...2 4 2 5 E B C 34 2 3 1 2 3 1 32 ...

Страница 33: ...2 6 2 7 E 2 3 mm 35 33 ...

Страница 34: ...2 8 2 9 E 2 3 mm 5mm 36 34 ...

Страница 35: ...3 1 3 3 2 37 CLIC 35 ...

Страница 36: ...3 3 3 4 STERWINS OIL STERWINS OIL 38 36 ...

Страница 37: ...39 4 2 2 3 4 1 4 1 4 CLIC 37 ...

Страница 38: ...40 4 4 4 3 38 ...

Страница 39: ...41 4 5 39 ...

Страница 40: ...42 5 1 5 5 2 56PCS 1 3mm 3 8 28PCS Aftersales 37cm 1 40 ...

Страница 41: ...43 5 3 5 4 41 ...

Страница 42: ...48 4 с 24 с 6 1 6 42 ...

Страница 43: ... жасалған SERIAL NUMBER Гарантия 3 года Кепілдік 3 жыл 3 year guarantee ADEO business name Adeo Services Adress 135 rue Sadi Carnot CS 00001 59790 RON CHIN France Импортер Продавец Лицо уполномоченное принимать претензии по качеству товара на територии Российской Федерации ООО ЛЕРУА МЕРЛЕН ВОСТОК 141031 МО г Мытищи Осташковское шоссе д 1 РФ Импорттаушы Тауардың сапасы бойынша наразылықтарды қабылд...

Отзывы: