XRLED
1843 CONVERSION KIT
6/14 STERNBERG LIGHTING. ALL RIGHTS RESERVED. PRINTED IN THE USA.
800-621-3376
555 Lawrence Ave., Roselle, IL 60172
www.sternberglighting.com
INSTALLATION INSTRUCTIONS
WARNING:
TO AVOID FIRE, SHOCK OR DEATH, TURN OFF AND LOCKOUT POWER BEFORE PERFORMING ANY MAINTENANCE.
CAUTION:
THIS FIXTURE MUST BE WIRED IN ACCORDANCE WITH THE NATIONAL ELECTRIC CODE AND ALL APPLICABLE LOCAL
CODES. PROPER GROUNDING IS REQUIRED. ALL WORK SHOULD BE DONE BY A QUALIFIED ELECTRICIAN.
STEP
5
STEP
6
STEP
7
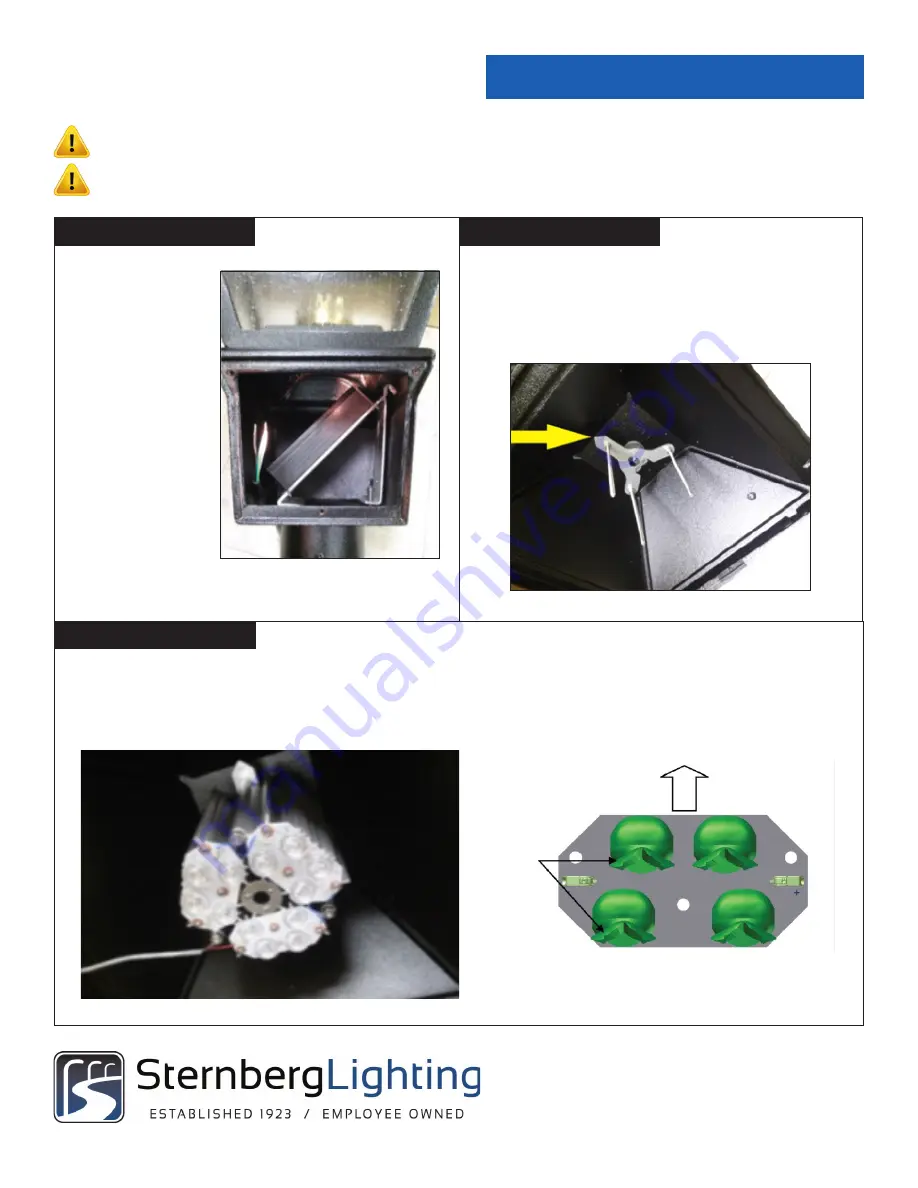
Lean the bracket for-
ward toward the fit-
ter opening to allow
the locking tab to
enter the right side
of the fitter where
the roof is lower.
Slide the bracket to
the left and twist to
engage the driver
against the front
left wall and tighten
the thumb screw to
restrict movement of
the assembly.
Remove the hex nut from the stud in the center of the roof. Slide the
LED bracket assembly over the stud and tighten the hex nut in place.
Align the pointer labelled “STREET” (see arrow) so that it will face the
street when the fixture is reassembled. Apply silicone sealant around
hex nut.
Align the mounting studs on the bracket with the large, round outer slots on the LED assembly and slide into place. (See note.)
Secure assembly with lockwashers and nuts provided.
Note:
If backlight shields are present on the LED boards, align the LED module to the bracket pointer as shown.
Street Side / Target Area
Backlight
Shield
(Note orientation of Backlight Shields
House Side


