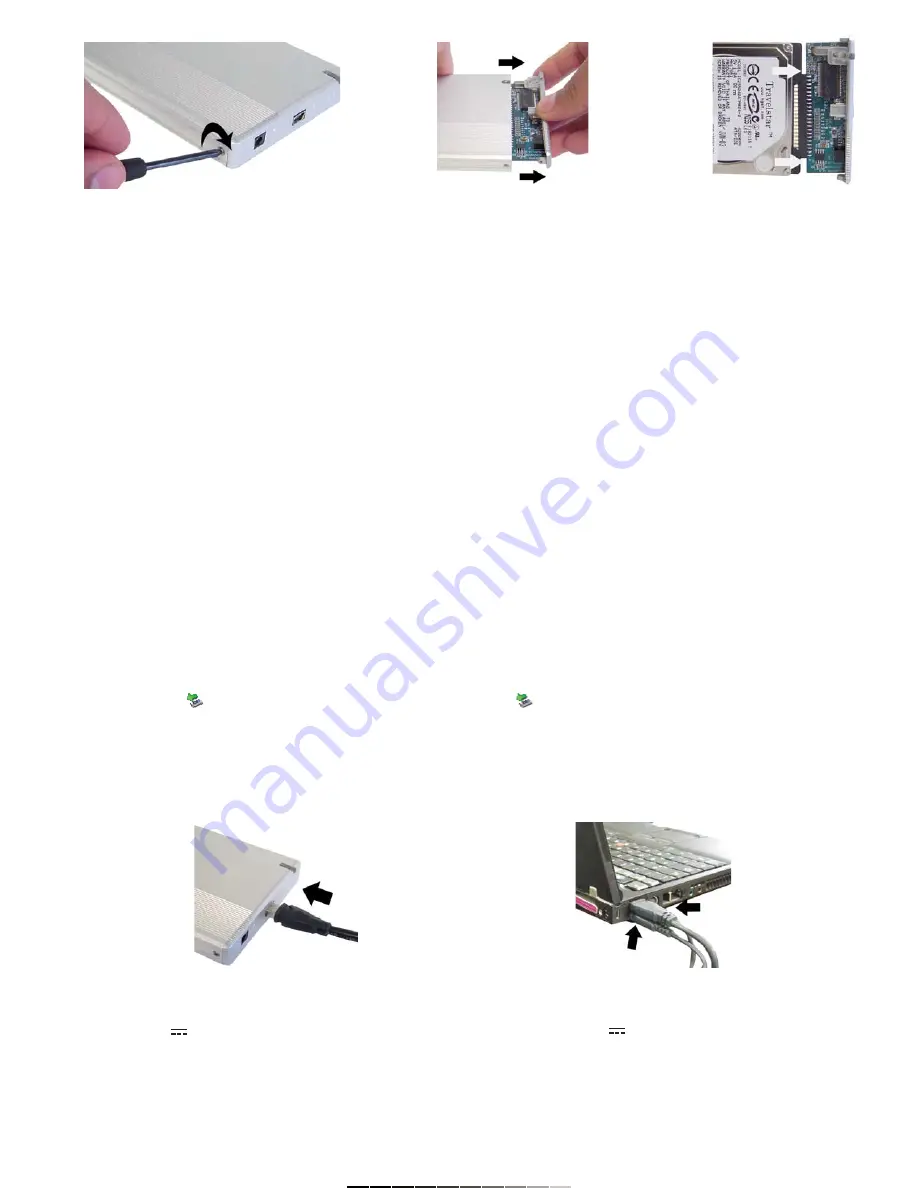
Fig. 1
Fig. 2
Fig. 3
Notas:
En caso de que no tenga conocimientos acerca de modificaciones en el
disco duro se recomienda acudir con un técnico especialista, de otra
forma podría dañar el equipo.
El disco duro obtiene la energía necesaria para su funcionamiento a
través del puerto USB.
INSTALACIÓN DE DRIVERS
Si tiene instalado Windows ME, Windows 2000 o Windows XP en su
computadora, no necesita instalar drivers.
UTILIZANDO POR PRIMERA VEZ LA UNIDAD EXTERNA PARA DISCO
DURO
Una vez que ha realizado las conexiones internas correspondientes, usted
podrá comenzar a utilizar su nueva unidad externa para disco duro.
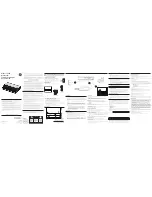
1.- Inserte el cable USB en la entrada de la unidad externa, el extremo
contrario conéctelo a un puerto USB 2.0 disponible en la computadora
(Fig. 4).
2.- Conecte un adaptador de corriente a la unidad externa y a un
tomacorriente casero (Opcional).
3.- La computadora detectará el nuevo equipo y comenzará un proceso de
actualización automática.
4.- Una vez que termine este proceso, aparecerá el mensaje de que el
equipo estará listo para usarse.
5.- Su disco duro aparecerá como un Dispositivo de Almacenamiento
Masivo USB y será identificado con una letra (F ó G normalmente, pero
podría aparecer otra).
6.- Para realizar la transferencia de archivos entre diversas unidades,
simplemente copie y pegue los archivos utilizando el Explorador de
Windows.
7.- Cuando desee retirar el equipo, presione el botón el botón izquierdo
del ratón sobre el icono “ ” y seleccione Extracción Segura. Cuando
el mensaje Es Seguro Retirar el Hardware aparezca, podrá desconectar el
equipo de la computadora.
Nota:
En caso de que requiera utilizar un disco duro de más de 150GB es
necesario que inserte los dos conectores USB a la computadora a fin de
proporcionarle la energía suficiente al disco (Fig. 5).
ESPECIFICACIONES
Entrada:
5V
(a través de puerto USB)
Dimensiones:
126 x 77 x 13mm
Peso:
167g (sin disco duro, sin convertidor)
Nota:
El diseño del producto y las especificaciones pueden cambiar sin previo
aviso.
Notes:
If you don’t have enough knowledge about how to change the HDD
internal configuration, we recommend that you ask a technician, otherwise
may cause several damages on the equipment.
The HDD enclosure obtains the power supply from the USB port.
SOFTWARE INSTALLATION
If you use Windows ME, Windows 2000 or Windows XP OS, you don’t
need to install any driver.
HOW TO USE BY FIRST TIME THE USB TO IDE 2.5” HDD
ENCLOSURE
Once you have made the right internal connections, you can start to use
your new USB to IDE 2.5” HDD enclosure.
1.- Plug the USB cable into the right input jack on the enclosure, then,
insert the opposite side into an available USB 2.0 port in the computer
(Fig. 4).
2.- Plug the AC power adaptor to the enclosure and connect it into an AC
household outlet (Optional).
3.- Automatically, the PC will detects the new hardware, and then begins
an updating process.
4.- Once the process finished, the next message displays on the screen:
your new hardware is correctly installed. This message means that you
can start to use the new hardware.
5.- The external HDD appears such as USB Mass Storage Device and you
can identify it by a letter (usually by letter F or letter G, but it could displays
another one).
6.- If you want to transfer any kind of files between different drives, just
click and drag the desired files using Windows Explorer.
7.- When you want to remove the device, click on the icon in the system
tray “ ” using the left button of the mouse and choose Safety Remove.
When the message: “you may safely remove this device” displays on the
screen, you can unplug the equipment from the computer.
Note:
If you need to use a Hard Disk with a capacity higher than 150GB, you
must plug both USB connectors to the computer, in order to power the
equipment up, correctly (Fig. 5).
SPECIFICATIONS
Input:
5V
(through
USB
port)
Dimensions:
4,9 x 3,3 x 0,5in
Weight:
167g (without HDD and AC converter)
Note:
Product design and specifications are subject to change, without notice.
Fig.
4
Fig.
5


