I M P O R T A N T
The instructions of this manual are for reference about the product. There may
be differences due to updates.
Please check our website (www.steren.com) to obtain the latest version of the
instruction manual.
Before using your new Steren´s product, please read this instruction
manual to prevent any damage.
WARRANTY
This Steren product is warranted under normal usage against defects in workmanship and materials to the original purchaser for one year from the
date of purchase and three months on its battery.
CONDITIONS
1. This warranty card with all the required information, invoice or purchase ticket, product box or package, and product, must be presented when
warranty service is required.
2. If the product is in the warranty time, the company will repair it free of charge.
3. The repairing time will not exceed 30 natural days, from the day the claim was received.
4. Steren sell parts, components, consumables and accessories to customer, as well as warranty service, at any of the addresses mentioned later.
THIS WARRANTY IS VOID IN THE NEXT CASES:
If the product has been damaged by an accident, acts of God, mishandling, leaky batteries, failure to follow enclosed instructions, improper repair by
unauthorized personnel, improper safe keeping, among others.
a) The consumer can also claim the warranty service in the purchase establishment.
b) If you lose the warranty card, we can reissue it, if you show the invoice or purchase ticket.
RETAILER INFORMATION
Name of the retailer ____________________________________
Address _____________________________________________
Product ______________________________________________
Brand _______________________________________________
Serial number _________________________________________
Date of delivery _______________________________________
In case your product fails or have questions, please contact your nearest dealer. If you are in Mexico, please call to our Call Center.
01 800 500 9000
Product design and specifications are subject to change without notice.
Product: 325 Ft VGA UTP extender
Part number: COM-325
Brand: Steren
E S P E C I F I C A C I O N E S
Transmitter
Input: 5 V---1 A
Receiver
Input: 5 V--- 1 A
Operating temperature: 0 – 70 °C
RH: <90% non condensed
Power converter
Input: 100-240 V~ 50/60 Hz 200 mA
Output: 5 V--- 1 A
H I G H L I G H T S
• Do not try to open the device, may cause damages and warranty will be void.
• Do not expose to extreme temperatures.
• Do not use or store the equipment near wet or damp places. It may cause malfunction
or shock hazard.
• Avoid dropping the unit as this may cause damage.
• Do not place the device or accessories on surfaces that are tilted, unstable or subject
to vibration.
• Do not expose the device or accessories to dust, smoke or steam.
• Clean with a soft, dry cloth.
For best performance we recommend to use VGA cables such as our family
507-xxx.
I N S T R U C T I O N S
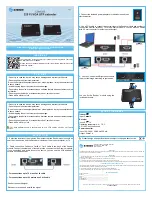
Sender: to send the signal
Receiver: to receive and amplify the signal.
1. Select the location of the modules. Remember that the Sender module should be
near the video source and the Receiver module near the monitor, projector, or TV.
2. Cable connection. Connect a Cat5e or Cat 6 cable in the back of the Sender
module. Connect the other end of the cable to the connector on the Receiver module.
If you need video and audio close to the source, you can use the VGA and Audio
outputs on the transmitter.
• For connections up to 70 m use Cat 5e cable
• For connections up to 100 meters use Cat 6 cable
C A U T I O N S
4. Use a VGA cable to connect the source video to the Sender module and another to
connect the monitor, screen or TV to the Receiver module. You can also use cables
with 3.5 mm connector for audio input and output.
3. Connect the included power adapters to the modules and to an
electrical outlet.
5. Use the Contrast and Brightness controls
to adjust the image according to your needs.
You can fix the “Sender” module using the
included breckets.


