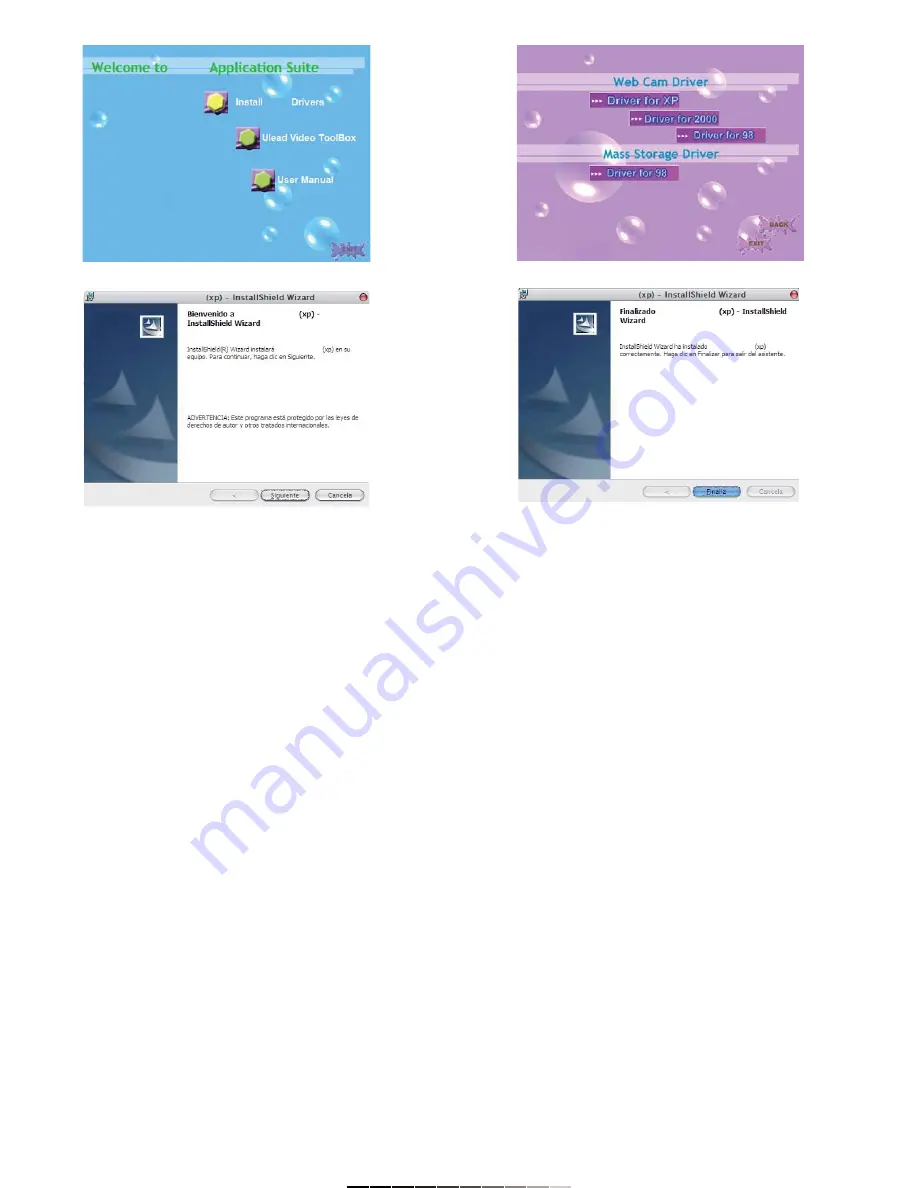
Nota:
Si no aparece la ventana principal de instalación, busque el archivo
setup.exe en la unidad E: (si la letra E corresponde a su unidad de
CD-ROM) y ejecútelo.
El archivo setup.exe lo encontrará en la carpeta que corresponda a su
sistema operativo.
COMO TOMAR FOTOGRAFÍAS
1.- Deslice el interruptor de Encendido / Apagado (12) a la posición de
REC. En pantalla se mostrará la imagen actual.
2.- Seleccione el modo de cámara, presionando el botón de Modo (9) una
vez.
3.- Sostenga la cámara y presione el botón disparador (8).
4.- En pantalla aparecerá el mensaje Exposing y escuchará un bip,
durante este tiempo, no mueva la cámara.
5.- Una vez que vuelva a aparecer en la pantalla la imagen en
movimiento, podrá volver a tomar otra fotografía.
AJUSTANDO LA CALIDAD DE IMAGEN Y EL TAMAÑO
La cámara digital le permite ajustar el tamaño de las imágenes así como
su calidad a fin de obtener la imagen perfecta.
Los ajustes de calidad de imagen son:
(5*) Ultra fino (Ultra fine)
(*4) Super fino (Super fine)
(*3) Fino (Fine)
(*2) Normal
Para ajustar la calidad de imagen:
1.- Presione el botón de Menú (10).
2.- Seleccione la opción Conf. de Calidad (Quality Settings).
3.- Ubique y seleccione la opción Cal Imagen y seleccione la calidad de
imagen deseado. Presione ENTER para confirmar. Utilice el botón de
Selección (8) para realizar los ajustes.
4.- Presione el botón de Menú (10) para salir.
Note:
If the main installation window cannot displays, search the SETUP.EXE file
on E: unit (if the letter E correspond to your CD-ROM drive) and run it.
To locate the setup.exe file, looks for the operating system folder of your
computer and you will find it inside.
TAKING PICTURES
1.- Slide the On / Off switch (12) to REC position. The current image
displays on the screen.
2.- Choose camera mode, just pressing Mode button (9) once.
3.- Keep the camera up firmly and press the ENTER button (8).
4.- The message Exposing shows on the LCD screen and then you will
hear a BIP, while taking pictures do not move the camera.
5.- When the current image displays once again on the LCD screen, you
can take another picture.
SETTING PICTURE QUALITY AND PICTURE SIZE
To take a better picture, learn how to change the quality and size of the
pictures.
The picture quality settings are:
(5*) Ultra fine
(*4) Super fine
(*3) Fine
(*2) Normal
To set the picture quality:
1.- Press Menu (10) button.
2.- Choose Quality Settings option.
3.- Locates and choose Image Quality option and choose the desired
picture quality. Press ENTER to confirm. Use the 5-way button (8) to make
the changes.
4.- Press Menu (10) button to exit.


