Page 6 of 8
939549946 Rev G
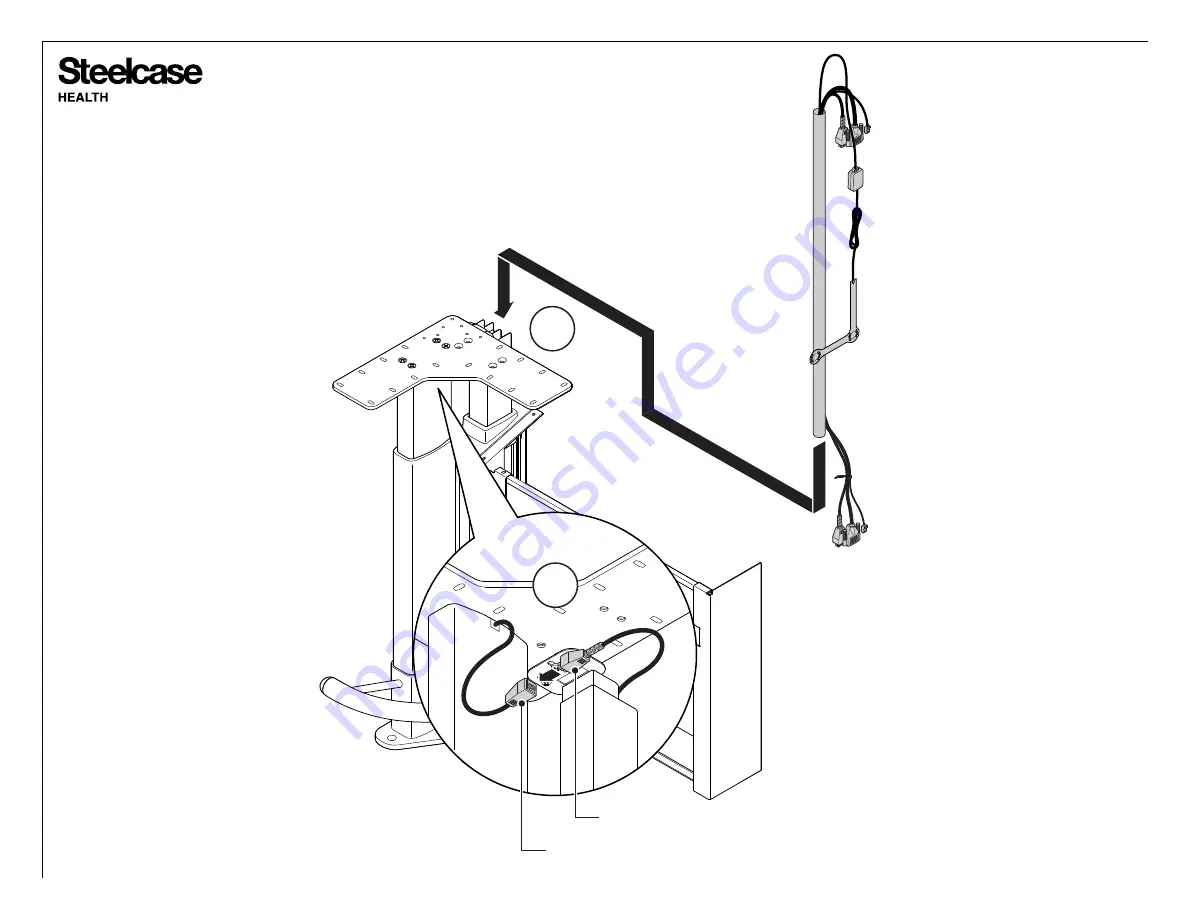
6.
Feed cords and sheathing into column as
shown.
7.
Make the power cord connections from the
top of the leg to the leg power cord.
6
7
LEG POWER CORD
LEG POWER
®
Страница 1: ...erload condition Press to reset the circuit breaker to restore power SERVICING OF DOUBLE INSULATED PRODUCTS In a double insulated product two systems of insulation are provided instead of grounding No grounding means is provided on a double insulated product nor is a means for grounding to be added to the product Servicing a double insulated product requires extreme care and knowledge of the syste...
Страница 2: ...lan for a minimum 1 gap to adjacent furniture 1 2 3 This powered adjustable height desk appliance is not intended for use by persons including children with reduced physical sensory or mental capabilities or lack of experience and knowledge unless they have been given supervision or instruction concerning use of the appliance by a person responsible for their safety Children should be supervised t...
Страница 3: ...Page 3 of 8 939549946 Rev G 1 Remove the top cover 1a and tile 1b 2 For single leg units mount the control box in the stretcher as shown 2 1b 1a TOP COVER TILE NUT CONTROL BOX SCREW ...
Страница 4: ...46 Rev G 3 If you are installing a USB hub it should be mounted underneath the worksurface as well If there is not enough room for the control box in a single leg unit mount it in this location as well 3 OPTIONAL USB HUB ...
Страница 5: ...aid in routing them through the cord sheathing 5b This typically includes cables such as VGA USB monitor power LED power adjustable leg power adjustable leg switch etc ALL CORDS MUST BE ROUTED THROUGH THE SHEATHING PRIOR TO BEING ROUTED THROUGH THE EXTENDABLE CABLE MANAGER FOR THE CORDS TO SAFELY TRAVEL THE FULL RANGE OF HEIGHT ADJUSTABILITY 5a 5b COUPLER 4a 4b SWITCH SWITCH SWITCH CORD SWITCH COR...
Страница 6: ...Page 6 of 8 939549946 Rev G 6 Feed cords and sheathing into column as shown 7 Make the power cord connections from the top of the leg to the leg power cord 6 7 LEG POWER CORD LEG POWER ...
Страница 7: ...he leg to its maximum height making sure the cords reach through the full travel requirement If leg fails to operate press the down button until the worksurface comes to a stop at the lowest position Release the down button Press and hold the down button for approximately 10 seconds while the table synchronizes itself The surface will lower itself approximately 5mm then rise approximately 5mm and ...
Страница 8: ...ided CPU straps secure the CPU making sure to orient the cable connections away from the leg 12 Cycle the leg through the full range of adjustment to ensure proper cable management 13 Reinstall the tile and top cover that was removed on step 1 11 ...