background image

12

To view manuals, videos, drivers, downloads, technical drawings, and more visit www.startech.com/support

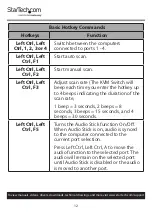
Basic Hotkey Commands

Hotkeys

Function

Left Ctrl, Left 

Ctrl, 1, 2, 3 or 4

Switch between the computers 

connected to ports 1 - 4.

Left Ctrl, Left 

Ctrl, F1 

Start auto scan.

Left Ctrl, Left 

Ctrl, F2

Start manual scan.

Left Ctrl, Left 

Ctrl, F3

Adjust scan rate (The KVM Switch will 

beep each time you enter the hotkey up 

to 4 beeps indicating the duration of the 

scan rate,
1 beep = 3 seconds, 2 beeps = 8 

seconds, 3 beeps = 15 seconds, and 4 

beeps = 30 seconds.

Left Ctrl, Left 

Ctrl, F5

Turns the Audio Stick function On/Off. 

When Audio Stick is on, audio is synced 

to the computer connected to the 

current port selection. 
Press Left Ctrl, Left Ctrl, A to move the 

audio function to the selected port. The 

audio will remain on the selected port 

until Audio Stick is disabled or the audio 

is moved to another port.

Содержание SV431DHD4KU

Страница 1: ...ual Revision 03 29 2019 User Manual For the latest information and specifications visit www startech com SV431DHD4KU 4 Port Dual HDMI KVM Switch 4K 30Hz Actual product may vary from photos SKU SV431DHD4KU ...

Страница 2: ...rence and 2 this device must accept any interference received including interference that may cause undesired operation Changes or modifications not expressly approved by StarTech com could void the user s authority to operate the equipment Industry Canada Statement This Class A digital apparatus complies with Canadian ICES 003 CAN ICES 3 A NMB 3 A Use of Trademarks Registered Trademarks and other...

Страница 3: ...certifié et dans le respect des normes locales et du code de construction local Les câbles y compris les câbles d alimentation et de chargement doivent être placés et acheminés de façon à éviter tout risque électrique de chute ou de sécurité 安全対策 電源が入っている状態の製品または電線の終端処理を行わないでくださ い 製品の設置やマウントは 使用地域の安全ガイドラインおよび建築基準に 従い 有資格の専門業者が行うようにしてください ケーブル 電源ケーブルと充電ケーブルを含む は 適切な配置と引き回し を行い 電気障害やつまづきの危険性など 安全上のリ...

Страница 4: ... endast göras av behöriga yrkespersoner och enligt gällande lokala förordningar för säkerhet och byggnormer Kablar inklusive elkablar och laddningskablar ska dras och placeras på så sätt att risk för snubblingsolyckor och andra olyckor kan undvikas Warning Statements Make sure to assemble this product according to the instructions Failure to do so might result in personal injury or property damage...

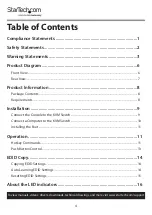
Страница 5: ...uct Diagram 6 Front View 6 Rear View 7 Product Information 8 Package Contents 8 Requirements 8 Installation 9 Connect the Console to the KVM Switch 9 Connect a Computer to the KVM Switch 10 Installing the Feet 11 Operation 11 Hotkey Commands 11 Push Button Control 13 EDID Copy 14 Copying EDID Settings 14 Auto Learning EDID Settings 14 Resetting EDID Settings 15 About the LED indicators 16 ...

Страница 6: ...uals videos drivers downloads technical drawings and more visit www startech com support Troubleshooting 17 PC BIOS Change 17 EDID 18 Keyboard and Mouse 19 Connected USB Device 19 Functionality 20 Display Device 21 ...

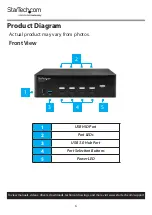
Страница 7: ...vers downloads technical drawings and more visit www startech com support Product Diagram Actual product may vary from photos Front View 1 USB HID Port 2 Port LEDs 3 USB 3 0 Hub Port 4 Port Selection Buttons 5 Power LED 2 1 3 4 5 ...

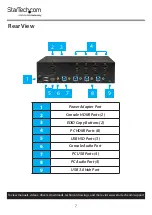
Страница 8: ... drawings and more visit www startech com support Rear View 1 Power Adapter Port 2 Console HDMI Ports 2 3 EDID Copy Buttons 2 4 PC HDMI Ports 8 5 USB HID Ports 3 6 Console Audio Port 7 PC USB Ports 4 8 PC Audio Port 4 9 USB 3 0 Hub Port 1 2 3 4 5 6 7 9 8 ...

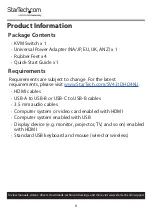
Страница 9: ... 4 Quick Start Guide x 1 Requirements Requirements are subject to change For the latest requirements please visit www StarTech com SV431DHD4KU HDMI cables USB A to USB B or USB C to USB B cables 3 5 mm audio cables Computer system or video card enabled with HDMI Computer system enabled with USB Display device e g monitor projector TV and so on enabled with HDMI Standard USB keyboard and mouse wire...

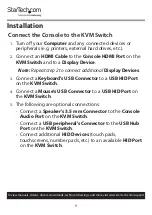
Страница 10: ...to a Display Device Note Repeat step 2 to connect additional Display Devices 3 Connect a Keyboard s USB Connector to a USB HID Port on the KVM Switch 4 Connect a Mouse s USB Connector to a USB HID Port on the KVM Switch 5 The following are optional connections Connect a Speaker s 3 5 mm Connector to the Console Audio Port on the KVM Switch Connect a USB peripheral s Connector to the USB Hub Port o...

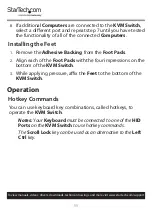
Страница 11: ...VM Switch and to an HDMI port on a Computer 3 Connect a USB Cable to the PC USB Port on the KVM Switch and to a USB port on the Computer 4 Optional Connect an 3 5 mm Audio Cable to the PC Audio Port on the KVM Switch and to an Audio Output Port on the Computer Note Repeat step 1 4 to connect additional Computers 5 Connect the Universal Power Adapter to the Power Adapter Port on the KVM Switch and ...

Страница 12: ...Feet 1 Remove the Adhesive Backing from the Foot Pads 2 Align each of the Foot Pads with the four impressions on the bottom of the KVM Switch 3 While applying pressure affix the Feet to the bottom of the KVM Switch Operation Hotkey Commands You can use keyboard key combinations called hotkeys to operate the KVM Switch Notes Your Keyboard must be connected to one of the HID Ports on the KVM Switch ...

Страница 13: ...an rate The KVM Switch will beep each time you enter the hotkey up to 4 beeps indicating the duration of the scan rate 1 beep 3 seconds 2 beeps 8 seconds 3 beeps 15 seconds and 4 beeps 30 seconds Left Ctrl Left Ctrl F5 Turns the Audio Stick function On Off When Audio Stick is on audio is synced to the computer connected to the current port selection Press Left Ctrl Left Ctrl A to move the audio fu...

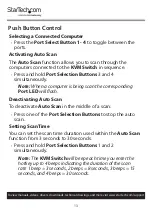
Страница 14: ...multaneously Note When a computer is being scan the corresponding Port LED will flash Deactivating Auto Scan To deactivate Auto Scan in the middle of a scan Press one of the Port Selection Buttons to stop the auto scan Setting Scan Time You can set the scan time duration used within the Auto Scan function from 3 seconds to 30 seconds Press and hold Port Selection Buttons 1 and 2 simultaneously Not...

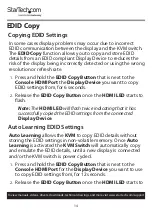
Страница 15: ...want to copy EDID settings from for 6 seconds 2 Release the EDID Copy Button once the HDMI LED starts to flash Note The HDMI LED will flash twice indicating that it has successfully copied the EDID settings from the connected Display Device Auto Learning EDID Settings Auto Learning allows the KVM to copy EDID details without storing the EDID settings in non volatile memory Once Auto Learning is ac...

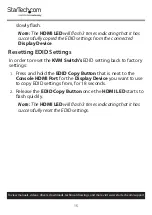
Страница 16: ...splay Device Resetting EDID Settings In order to reset the KVM Switch s EDID setting back to factory settings 1 Press and hold the EDID Copy Button that is next to the Console HDMI Port for the Display Device you want to use to copy EDID settings from for 18 seconds 2 Release the EDID Copy Button once the HDMI LED starts to flash quickly Note The HDMI LED will flash 3 times indicating that it has ...

Страница 17: ... Port selection link LED for each port as well as a power LED For more information about the LEDs consult the table below LED Behavior Scenario Power LED Illuminated KVM Switch is receiving power Port LEDs Illuminated green Connected Computer is turned on Illuminated red Connected Computer is currently selected Blinking Auto Scan process is in progress ...

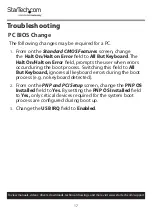
Страница 18: ...But Keyboard The Halt On Halt on Error field prompts the user when errors occur during the boot process Switching this field to All But Keyboard ignores all keyboard errors during the boot process e g no keyboard detected 2 From on the PNP and PCI Setup screen change the PNP OS Installed field to Yes By setting the PNP OS Installed field to Yes only critical devices required for the system boot pr...

Страница 19: ...ting that it has successfully reset the EDID settings 3 Power cycle the KMV Switch Disconnect all USB cables from the KVM Switch Disconnect the Universal Power Adapter from the KVM Switch wait 60 seconds and Reconnect the Universal Power Adapter to the KVM Switch If the KVM Switch looses EDID settings when switching ports and cannot detect the Display Device 1 Press and hold the EDID Copy Button n...

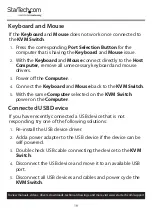
Страница 20: ...and mouse drivers 3 Power off the Computer 4 Connect the Keyboard and Mouse back to the KVM Switch 5 With the same Computer selected on the KVM Switch power on the Computer Connected USB Device If you have recently connected a USB device that is not responding try one of the following solutions 1 Re install the USB device driver 2 Add a power adapter to the USB device if the device can be self pow...

Страница 21: ...ct computer Wait a minimum of 5 seconds before switching Computers to ensure proper USB connection Note You may need to unmount or power off connected USB devices before switching Computers Auto Scan When preforming an Auto Scan the KVM Switch does not automatically switch to the next computer and beeps 1 Disable Auto Scan 2 Ensure that all connected systems are powered up and accessible Note Ther...

Страница 22: ...it www startech com support Display Device If there is no video signal when connecting a Display Device to the Console HDMI Port or when switching ports Make sure that you have plugged a Display Device to the Console HDMI Port and reboot the Computer while the KVM Switch is on ...

Страница 23: ... damages whether direct or indirect special punitive incidental consequential or otherwise loss of profits loss of business or any pecuniary loss arising out of or related to the use of the product exceed the actual price paid for the product Some states do not allow the exclusion or limitation of incidental or consequential damages If such laws apply the limitations or exclusions contained in thi...

Страница 24: ... tools StarTech com is an ISO 9001 Registered manufacturer of connectivity and technology parts StarTech com was founded in 1985 and has operations in the United States Canada the United Kingdom and Taiwan servicing a worldwide market Reviews Share your experiences using StarTech com products including product applications and setup what you love about the products and areas for improvement StarTe...

Отзывы: