background image

Instruction Manual

3

Disk Installation

1.  Connect the Dock to an available power outlet, using the provided power adapter.
2.  Connect the Dock to the (powered) Host Computer, using the provided USB/eSATA 

cables.

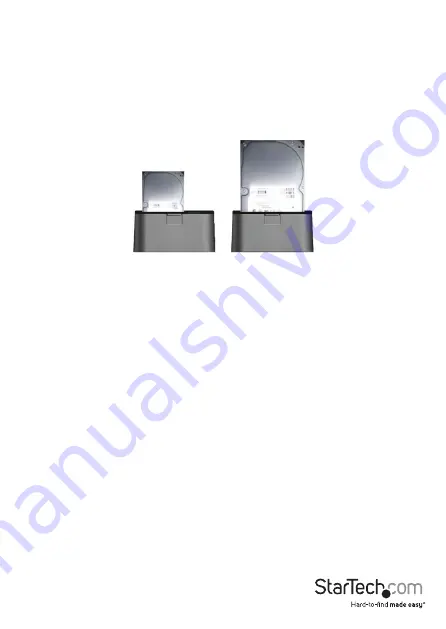
3.  Insert the 2.5” or 3.5” SATA/SATA II drive(s) you wish to install, such that the SATA 

power and data connectors at the back of the drive are properly aligned with the 

corresponding connectors inside the Dock.


4.  Switch the power switch to “ON” position.
Once the drive has been inserted, the operating system will detect that it has been 

connected and automatically update the drivers for proper operation.

SATA Drive Removal

If you are using the SATADOCKU2 or SATADOCKU2E, you can remove SATA drives from 

the docking station by gently pulling them out from the top of the dock.
When removing the installed drive from the Dock, please ensure that you have 

followed the appropriate steps (dependant on the operating system) to disconnect 

removable storage. In Windows for example, click on the Safe Remove icon located in 

the taskbar. Select the drive from the menu provided, then click Stop. Select the device 

to disconnect, and click OK.

Содержание SATADOCKU2

Страница 1: ... de startech com FR Guide de l utilisateur fr startech com ES Guía del usuario es startech com IT Guida per l uso it startech com NL Gebruiksaanwijzing nl startech com PT Guia do usuário pt startech com SATADOCKU2 SATDOCKU2GB SATDOCKU2EU USB 2 0 to SATA Hard Drive Docking Station actual product may vary from photos ...

Страница 2: ...receiving antenna Increase the separation between the equipment and receiver Connect the equipment into an outlet on a circuit different from that to which the receiver is connected Consult the dealer or an experienced radio TV technician for help Use ofTrademarks RegisteredTrademarks and other Protected Names and Symbols This manual may make reference to trademarks registered trademarks and other...

Страница 3: ...able of Contents Introduction 1 Features 1 Package Contents 1 SATADOCKU2 2 Rear View 2 Disk Installation 3 SATA Drive Removal 3 Preparing the Hard Drives for Use 4 Specifications 7 Technical Support 8 Warranty Information 8 ...

Страница 4: ... it to a PC or notebook The StarTech com SATA HD Docking Station is a perfect solution for data recovery drive imaging and testing centers or any environment requiring fast access to uninstalled archived drives Features Hot Swap Compatible Plug and Play support for most operating systems Supports both SATA 2 5 and SATA 3 5 hard drives without and adapters Package Contents SATADOCKU2 SATA hard driv...

Страница 5: ...Instruction Manual 2 SATADOCKU2 Rear View DC Power Adapter On Off Switch USB Port ...

Страница 6: ...drive has been inserted the operating system will detect that it has been connected and automatically update the drivers for proper operation SATA Drive Removal If you are using the SATADOCKU2 or SATADOCKU2E you can remove SATA drives from the docking station by gently pulling them out from the top of the dock When removing the installed drive from the Dock please ensure that you have followed the...

Страница 7: ...select Manage In the left pane of the Computer Management window click Disk Management 2 In the bottom right pane of the Computer Management window you should see your drives listed as unallocated Click on the unallocated drive and select New Partition The New Partition Wizard will launch 3 When the New Partition Wizard appears click Next to continue ...

Страница 8: ...on you wish to create You must select a partition size that is between the maximum and minimum sizes typically the maximum disk space available Once you have done so click Next to continue 6 Select Format this partition with the following settings Using the drop down buttons select the file system allocation unit size and volume label you wish to use Select Perform a Quick Format and click Next to...

Страница 9: ... Wizard Click Finish to commence the formatting of the drive 8 The status of the drive as shown in the Computer Management window will be updated to reflect the selections you have made Please wait while the drive is being formatted 9 Once the drive has been successfully partitioned and formatted it will display as Healthy ...

Страница 10: ...ives Specifications SKU Specification SATADOCKU2 SATDOCKU2EU SATDOCKU2GB Internal Connectors 1 x SATA Power 15 Pin Female 1 x SATA Data 7 Pin Female External Connectors 1 x USB B Female 1 x DC Power Adapter Drive Compatibility 2 5 3 5 SATA Hard Drives OS Support Windows 2000 2003 XP Vista 7 x64 x86 Mac OS 10 0 and up Linux Power Adapter 12V 2 0A ...

Страница 11: ... returned for repair or replacement with equivalent products at our discretion The warranty covers parts and labor costs only StarTech com does not warrant its products from defects or damages arising from misuse abuse alteration or normal wear and tear Limitation of Liability In no event shall the liability of StarTech com Ltd and StarTech com USA LLP or their officers directors employees or agen...

Страница 12: ...rts and we quickly deliver them wherever they need to go Just talk to one of our tech advisors or visit our website You ll be connected to the products you need in no time Visit www startech com for complete information on all StarTech com products and to access exclusive resources and time saving tools StarTech com is an ISO 9001 Registered manufacturer of connectivity and technology parts StarTe...

Отзывы: