IIn
ns
stta
alllla
attiio
on
n
Installing a Hard Drive in the Enclosure
Use caution when installing a hard drive in the enclosure. Excessive shock or force
could damage the drive and/or the enclosure, resulting in data loss.
CAUTION:
Always ensure that you are properly grounded when handling a hard drive or
the enclosure tray, since electronic components can be damaged by static electricity. If
an anti-static mat or similar product is not available, ground yourself by touching a
computer case or other metal surface for several seconds before handling any
components.
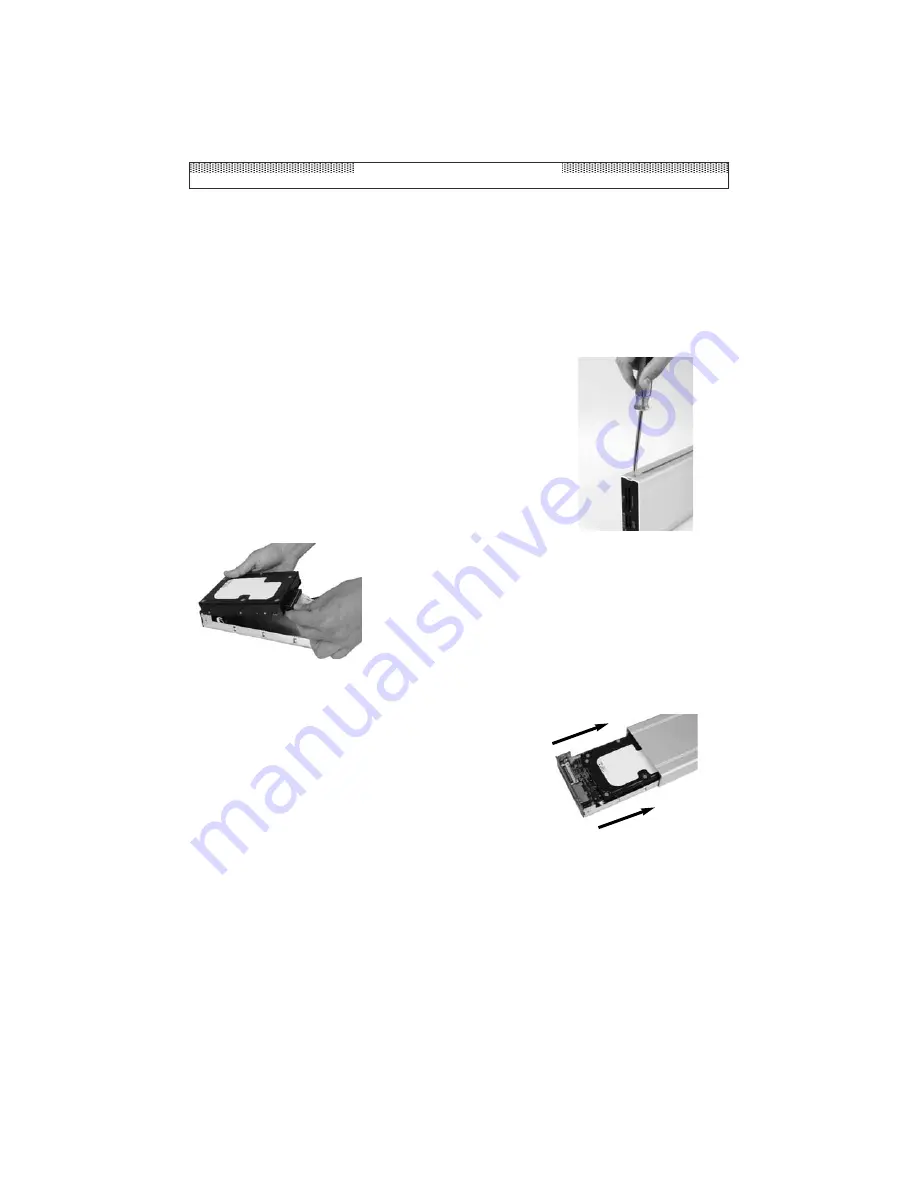
1. Using a Phillips-head screwdriver, remove the two screws
located on the top of the case.
2. Gently slide the inner tray out of the enclosure.
3. Attach the IDE connector to the hard drive. To
avoid damaging the drive and the enclosure,
please refrain from using excessive force.
4. Attach the power connector to the hard drive.
5. Attach the hard drive to the tray, using the screws
provided with the hard drive.
6. Gently re-insert the tray back into the enclosure
7. Re-fasten the Phillips-head screws that were removed
in
Step 1
.
Connecting and powering the Enclosure
1. Attach the provided USB cable to the Mini B port, located on the enclosure.
2. Connect the opposite end of the USB cable into an available USB port on the host
computer.
3. Connect the 5V/12V DC 1.5 Amp switching power supply to the power port located
next to the On/Off switch. Connect the opposite end to an available power source.
PostScript
Picture
Instruction Manual
2


