14
To view manuals, videos, drivers, downloads, technical drawings, and more visit www.startech.com/support
4.
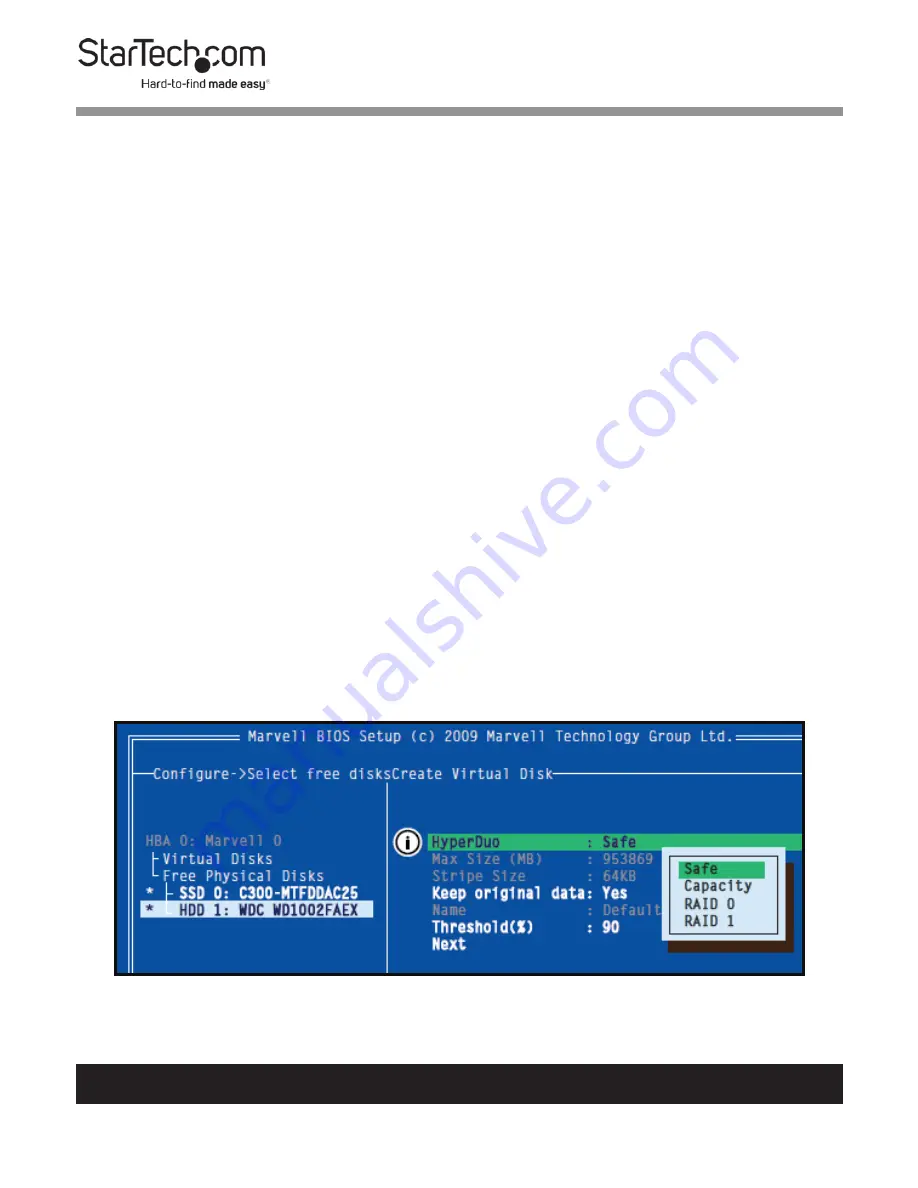
Use the arrow keys to scroll through the list of free physical
disks to select the drives that will be part of the HyperDuo
set. Press Space to select/de-select a disk.
Note:
When a disk is selected, an asterisk (*) appears to the
left of the disk label.
5.
After selecting the required disks, press Enter to continue.
6.
The “Create Virtual Disk” configuration options appear in the
“Information” pane (right-side), here you are able to select
HyperDuo or RAID options
Note:
The default HyperDuo mode is Safe mode.
7.
Highlight “Keep original data” and press Enter to select.
Select Yes or No and press Enter.
Warning!
Selecting “No” will destroy all data on the disks
included in the virtual disk set. Make sure to back up all data
before continuing. The “Keep original data” option is disabled
when you choose Capacity mode, as it is inherently data-
destructive.
Create Virtual Disk option


