- 35 -
6.7 Bulb Replacement (Fiber-optic Lighting)
NOTE:
The lights of a fiber-optic metrology system generate heat. To preserve lamp
life and reduce unnecessary heat buildup, turn the lights down when the system is
not in use.
WARNING:
Power the system down properly and unplug the unit from the power
supply before opening the electronics enclosure.
CAUTION:
The lamp bulbs are very hot and can cause burns if not allowed to cool
properly.
Do not touch any part of the new bulb when inserting. The inner reflective surface
of the lens and the filament housing are particularly susceptible to damage. Oils
from fingers and hands can contaminate the surface and shorten the bulb life. Use
a clean cloth or tissue, or wear clean latex gloves to handle the new bulb.
Do not to get any part of a tissue or cloth caught in the bulb contacts to avoid a
potential fire hazard.
The bulb must be fully seated in the socket to prevent arcing and premature failure
of the bulb and damage to the socket.
Remove Bulb Housing
Steps to replace the bulbs:
1.
Verify which lamp needs to be replaced before powering the system down. The lamp sockets are
labeled TOP, BOT and AUX corresponding to the three system lights.
2.
Properly power the system down and unplug the unit from the power source.
3.
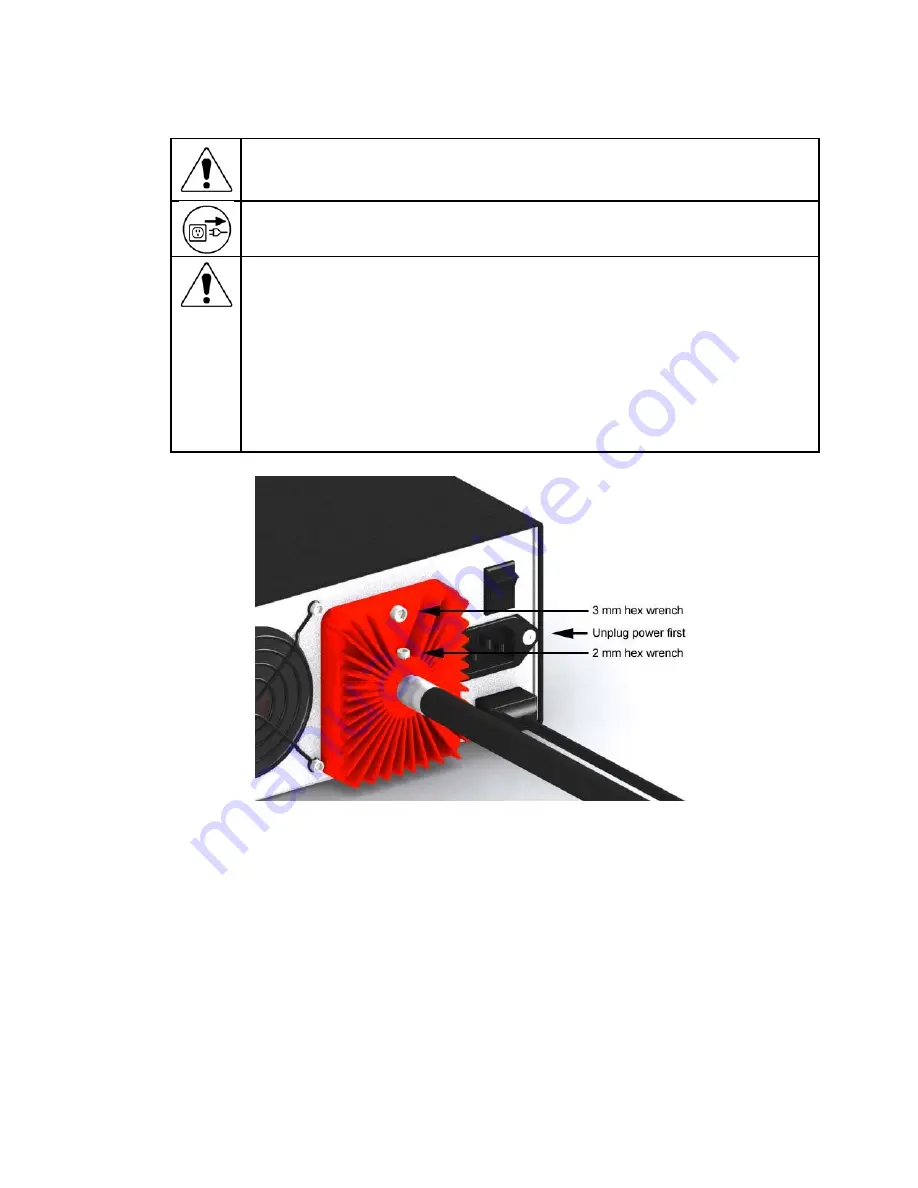
Using a 2 mm hex wrench, loosen the light bundle retaining screw and remove the light bundle
from the heat sink.
4.
Using a 3 mm hex wrench, remove the heat sink / enclosure cover retaining screw.
5.
Allow the bulbs to cool completely before removing the old bulb.
6.
Using the ejector lever as shown, push the old bulb out of its socket.
7.
Remove the old bulb by hand when the pins have cleared the socket.


