Starlight Xpress Oculus PRO Скачать руководство пользователя страница 6

Oculus PRO Handbook Issue 3 


Imaging with the Starlight Xpress software


With the Oculus PRO connected to the PC, open ‘Oculus PRO_USB.exe’ and find the ‘Set program 

defaults’ menu under the ‘File’ heading. If this is the first run of the software, you will get a warning 

about the ‘ini file not found’, but ignore this and click on OK – then open ‘set program defaults’ from 

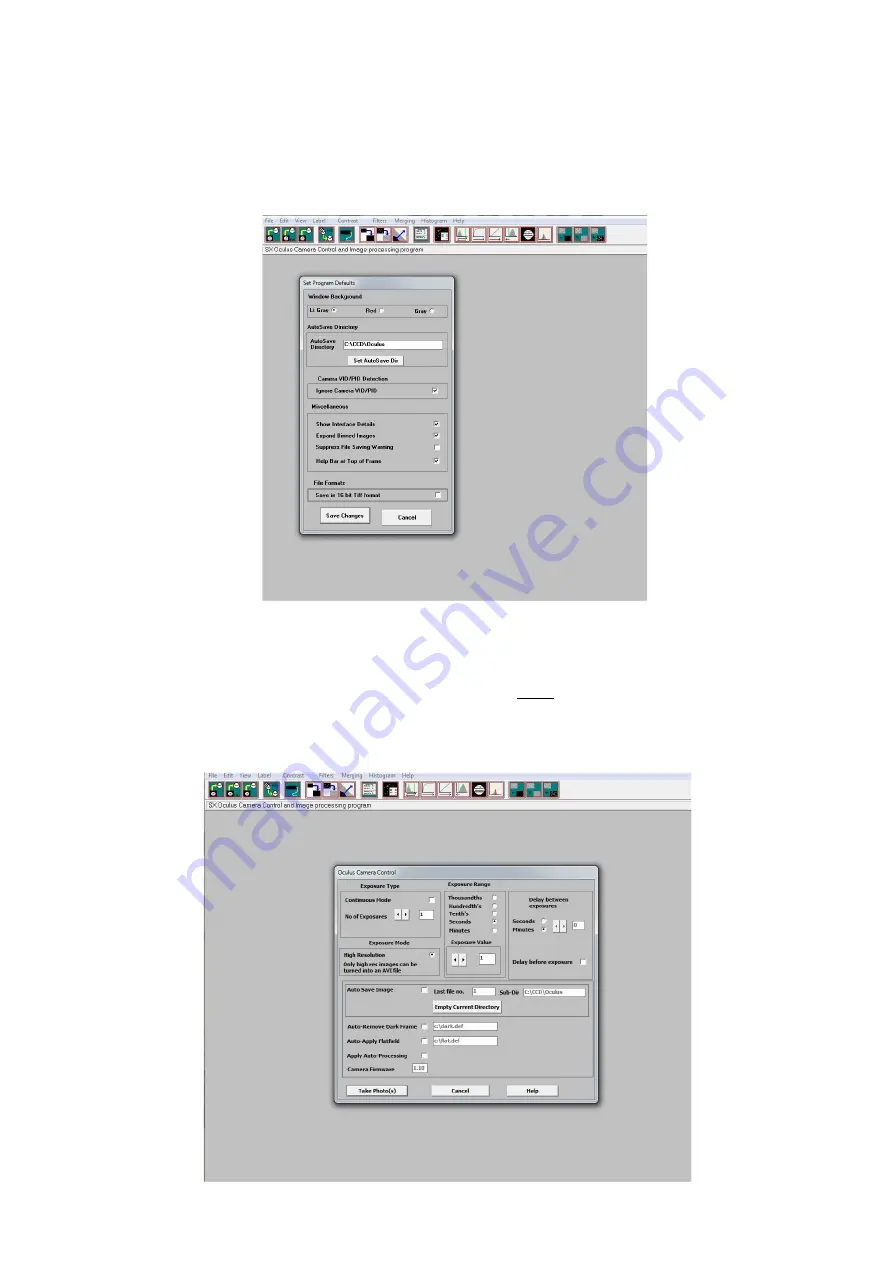
the text icon . You should now see a screen similar to the one shown below: 


The defaults shown above are a typical example, but you can change the settings to suit your 

preferences. The main thing to do is to set up the address of the ‘Autosave’ folder, so that your 

images will be saved to a defined location. The ‘Ignore VID/PID’ 

MUST

 be selected for the software 

to recognise your Oculus PRO camera. Once the defaults have been set to values which you think 

will be approximately correct, save the settings and open the camera interface by pressing the 

camera icon in the top menu. You will see something like this: 


Содержание Oculus PRO

Страница 1: ...ye lens provides horizon to horizon coverage with very little star image distortion across the entire field The Oculus PRO utilises a sensitive Sony CCD the ICX825AL with an array of 1392 x 1040 pixel...

Страница 2: ...me Typically 0 6 seconds at full resolution using USB 2 0 Power requirements Camera Dew Heater require 12v at 1 amp max Input connection Mini B USB socket for USB2 0 and a 2 1mm jack for 12v Camera De...

Страница 3: ...sked for initially has now been created and you will no longer see the Warning message The Oculus PRO control software is Oculus PRO_USB exe and the latest version may be downloaded from the Starlight...

Страница 4: ...essary to have a fairly long lead if the Oculus PRO is mounted high on a mast or roof As the camera power is taken from the 12V supply any long leads should be as heavy as possible to reduce the inter...

Страница 5: ...by powering the internal heater via the 12v socket on the rear of the assembly This socket can accept a 2 1mm coaxial power plug from any 12v DC supply capable of driving at least 1 amp the polarity...

Страница 6: ...d now see a screen similar to the one shown below The defaults shown above are a typical example but you can change the settings to suit your preferences The main thing to do is to set up the address...

Страница 7: ...de An exposure time of 30 seconds is generally good for basic sky monitoring but shorter exposures might be better to minimise sky glow when meteor imaging Set up a suitable number of image frames in...

Страница 8: ...Max palette stretch options in the View menu Adjust the brightness and contrast to give a nice result and then run the AVI create The program will use your view settings on all the images while creati...

Страница 9: ...be purchased from our dealers The Oculus PRO dome is spaced off from the base ring by small pads This allows air to circulate through the vent holes and inside of the dome to reduce the tendency for...

Страница 10: ...standard operating instructions and within the relevant safety standards of the country where the equipment is used 2 Repairs under guarantee will be free of charge providing proof of purchase is prod...

Отзывы: