


M
SOHORAID SR4-TB3 User Manual
2
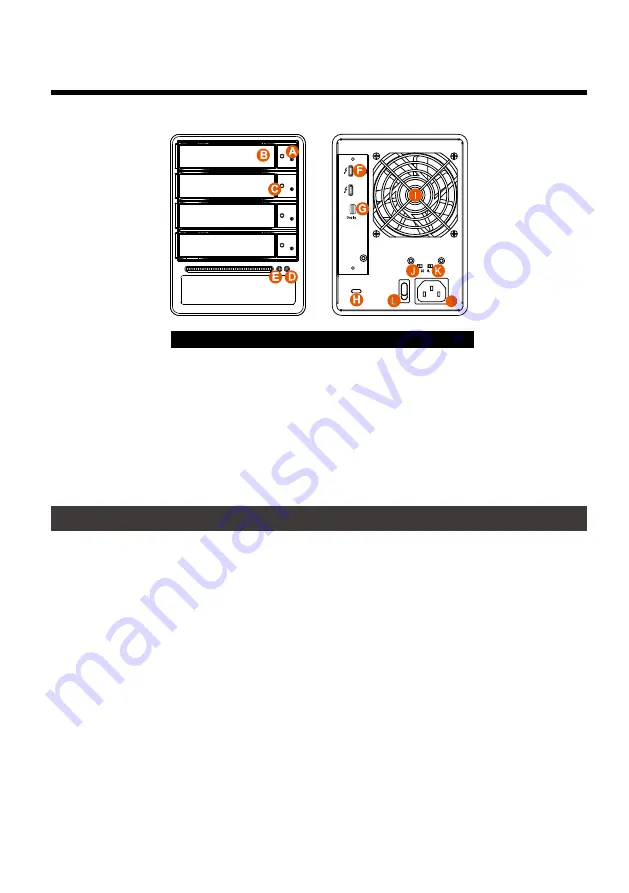
Front and rear view
3. Hardware Requirements and Precautions
1. This system can only transfer data to one computer through one interface at a time.
2. The capacity of RAID 5 is the size of capacity of the smallest hard disk multiplied by 3 while RAID
0 is multiplied by 4. The result will be treated as one single high-capacity drive. A hard disk must
therefore be installed in every bay before this system can be used. We also recommend using
brand new hard disks with identical specifications from the same brand. If a hard disk needs to be
changed, please be sure to buy a hard disk with the same specifications, capacity, and brand. If
this is not possible, then the capacity of the new hard disk should be at least 20GB larger than the
existing hard disk.
3. After the hard disk is formatted, the actual total capacity of the SR4-TB3 detected by the computer
operating system will vary from the sum of all hard disk capacities stated by the manufacturer.
4.
All existing data will be deleted when this product is set up for the first time. Please ensure that all
data on the hard disk has been backed up before installation to avoid data loss.
5. Before a new HDD is installed in the SR4-TB3, please make sure that there are no bad tracks or
defects to avoid data loss.
6. If the SR4-TB3 needs to be shut down or disconnected, please ensure the HDD is safely removed
through your operating system before turning off the power.
7. To prevent data loss, do not remove any of the hard disks while the system is running.
8. Once the system has been initialized, do not switch hard disks around during use. Doing so may
prevent the RAID from being recognized by the system.
A. HDD access light
B. HDD enclosure handle
C. HDD enclosure keyhole
D. Power status light
E. System status light
F. Thunderbolt™ port
G. Mini DisplayPort
H. Anti-theft lock
I. Fan
J. Fan speed switch (set to "High" by default)
Front View
Hard Disk
Location 0
Hard Disk
Location 1
Hard Disk
Location 2
Hard Disk
Location 3
Note: A hard disk must be installed at HDD location 0
Rear View
K. Mute switch
L. Power switch
M. Power socket
Содержание SOHORAID SR4-TB3
Страница 1: ...SOHORAID User Manual SR4 TB3...
Страница 20: ...SOHORAID SR4 TB3 User Manual 18 3 4 RAID 5 RAID 5 Stripe Size...
Страница 22: ...SOHORAID SR4 TB3 User Manual 20 P S VD virtual disk 9 New_VD 10 11...
Страница 23: ...SOHORAID SR4 TB3 User Manual 21 1 Operation Delete VD 2 OK 3 OK RAID...
Страница 27: ...SOHORAID SR4 TB3 User Manual 25 http www stardom com tw...


