PAIR THE UNITS & START TO FLY
SPEED ADJUSTMENTS & TRIMMING THE DRONE
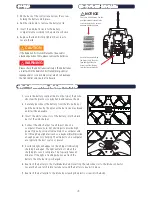
Place your StarBlade on a flat, leveled surface. On the top of the drone body is the power switch,
switch it to ON. The drone’s LEDs will begin to blink*.
1.
In the center of the Radio Control Transmitter is the power switch, switch it to ON. The Radio
Control’s LEDs will turn on.
2.
Move the left stick on the controller (the throttle stick)
UP and then DOWN. The controller will
beep and the LEDs on the drone will stop blinking ensuring the drone and the controller are
paired.
*If the lights do not stop blinking repeat steps 1-3. In the case where the lights do not turn on on
the drone or on the remote, the batteries are dead and need to be charged/replaced.
3.
Please Note: Before every flight, the drone will have to be paired to the Radio Control Transmitter. Ensure that the
rechargeable battery is fully charged and in place before each flight.
Be sure to place the quadcopter on a level surface to ensure a proper and neutral alignment of the gyro.
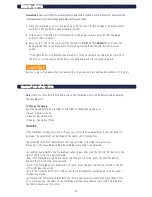
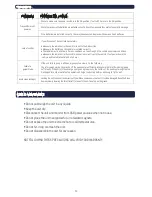
Note: There are three different speed levels on the StarBlade which can be determined by pushing
the Speed Button.
To Change the Speed
Push the Speed button before flight or mid-flight to change the speed level.
•
1 Beep - Speed level one
•
2 Beeps - Speed level two
•
3 Beeps - Speed level three
TRIMMING:
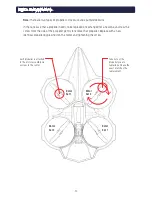
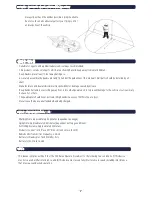
If the StarBlade is flying erratically, without your control, than an adjustment to the trim needs to
be made. The adjustment can be made on the radio control transmitter.
The following are the four adjustments that you can make to the flight characteristics:
Please Note: The Yaw and Ascending/Descending rarely need to be adjusted.
•
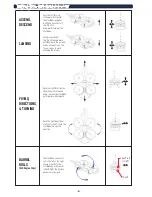
Ascending/Descending: If the StarBlade ascends or descends click the throttle trim button, to the
right of the throttle stick, until centered.
•
Yaw: If the StarBlade is spinning in circles or drifting in a rotation, press the yaw trim button,
beneath the throttle stick, until centered.
•
Pitch: If the StarBlade drifts backward or forward, press the pitch trim button located to the left
of the right directional stick.
•
Roll: If the StarBlade drifts left or right, press the roll trim button located below the directional
stick until centered.
•
Automatic Trim Command: Holding both the throttle and the directional sticks, move them to the
7:00 o’clock position. The lights on the StarBlade will blink twice then become solid. This indicates
the trim has been reset to normal.
NOTICE


