SPINNER PRO+ MANUFACTURED by STAR TRAC OWNER’S MANUAL |
15
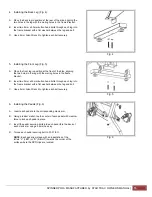
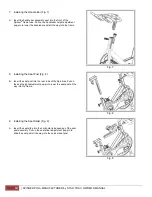
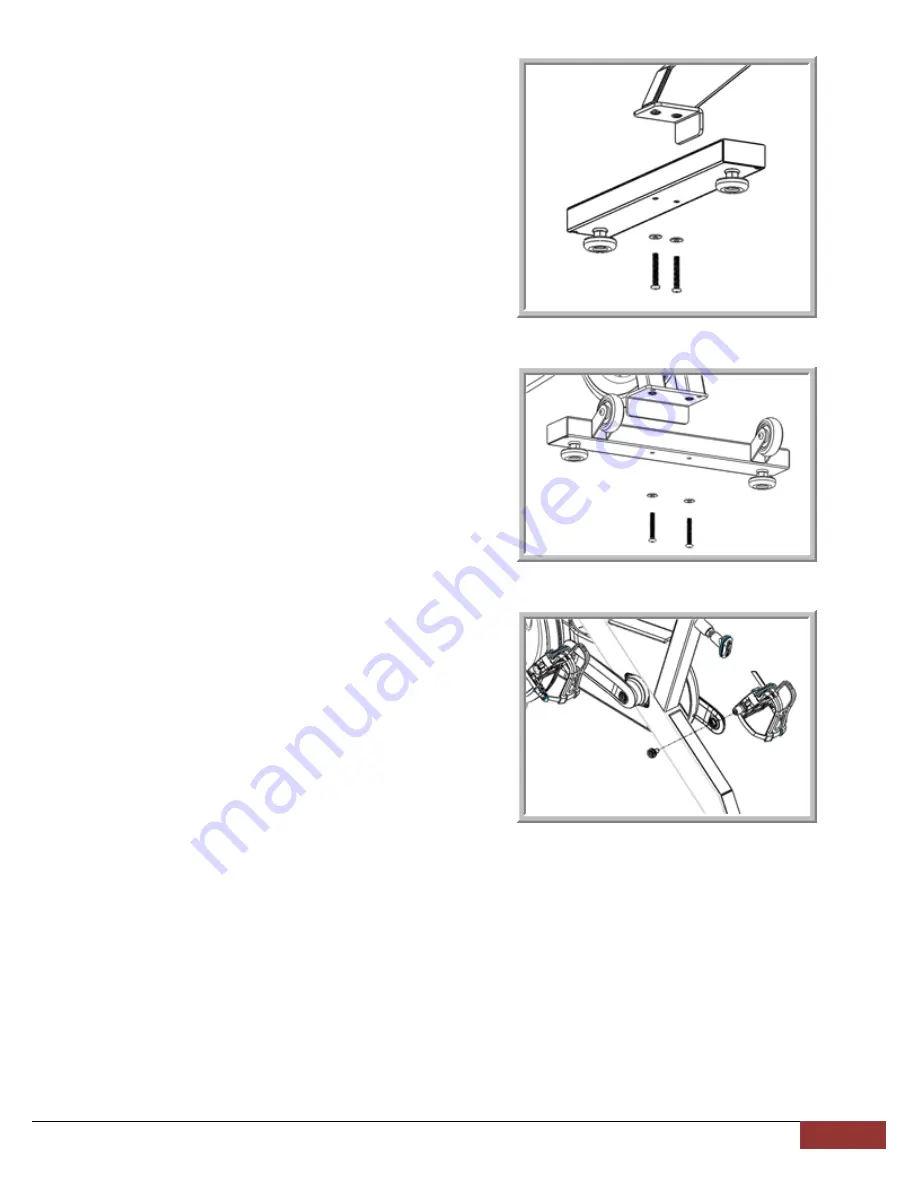
4. Installing the Back Leg
(Fig. 4)
Fig. 4
A. Place the back leg in position at the rear of the bike, aligning the
two holes in the leg with the mating holes in the frame bracket.
B. Insert two 8mm x 50mm button head bolts through each leg into
the frame bracket with a flat washer between the leg and bolt.
C.
Use a 5mm Allen Wrench to tighten each bolt securely
.
5. Installing the Front Leg (Fig. 5)
Fig. 5
A. Place the front leg in position at the front of the bike, aligning
the two holes in the leg with the mating holes in the frame
bracket.
B. Insert two 8mm x 50mm button head bolts through each leg into
the frame bracket with a flat washer between the leg and bolt.
C. Use a 5mm Allen Wrench to tighten each bolt securely.
6. Installing the Pedals (Fig. 6)
Fig. 6
A. Insert each pedal into the corresponding crank arm.
B. Using a rubber mallet; tap the center of each pedal with medium
force to lock each pedal in place.
C. Insert the pedal securing bolts into each pedal thru the back of
each crank arm using an 8mm hex key.
D. Torque each pedal securing bolt to 33-37 lb-ft.
NOTE:
Each pedal is marked with an indentation of the
letters “L” (LEFT) or “R” (RIGHT) towards the corner of the
surface where the SPD clips are located.


