background image

7

LIGHTING INSTRUCTIONS

When griddle is first lit, it will smoke until the preservation oils and impurities are burned off.

.  Turn off main valve to unit and wait 5 minutes to clear gas.
.  Turn off all knobs and pilot valves.
.  Turn on main valve and light all pilots.
4.  Turn burner knobs to desired setting.
5.  To turn burners off, turn knobs off.

NOTE: The griddles are equipped with standing pilots and should be lit immediately after 

the gas is turned on.

Pilot flames can be lit and observed through the front panel view ports.  However, best access for 

lighting the pilot is from the bottom of the unit just behind the center wall.

LIGHTING INSTRUCTIONS (TCHSD and TSPD SERIES)

.  Turn the control knobs to the "OFF" position.  

If the gas valves have been on and gas has escaped through the burners, turn the burners 

"OFF" and wait 5 minutes to clear the gas.

.  Turn the control knob to the "PILOT" position, depress and hold the knob while lighting the pilot.  

Hold the knob in for 60 seconds or until the pilot stays lit.  (Repeat for all burner sections.)

.  Depress and turn the control knob to the desired temperature.
4.  To turn the burners off turn the knob to the "PILOT" position.
5.  To turn off all gas turn the knob to the "OFF" position.  The pilots must be relit to resume cooking 

settings.

PILOT LIGHT REGULATION

Adjust pilot light flames as small as possible, but high enough to light burner immediately when burner 

valve is turned on high.

ADJUSTING SAFETY PILOTS (SERIES TCHSD and TSPD ONLY)

A manual pilot valve is provided on the left side of the control to adjust the pilot flame.  Adjust the pilot 

flame so that it is approximately 3/8 to 1/2" tall and a uniform cone shape.  

BURNER ADJUSTMENT (MODELS MD and MDS ONLY)

.  Remove the front panel.
.  Turn burner valve knob to "HI" position.

3.  Close the air shutter on the front of the burner to give a soft blue flame having luminous tips and 

open to a point where the yellow tips disappear and a hard blue flame is obtained.  Repeat for all 

burners.

BURNER ADJUSTMENT (MODELS TD, TCHSD and TSPD ONLY)

.  Remove the front panel.
.  Push dial in and set thermostat of one burner to 450°F (9.9°C).

3.  Close the air shutter on the front of the burner to give a soft blue flame having luminous tips and 

open to a point where the yellow tips disappear and a hard blue flame is obtained. Repeat for all 

burners.

BURNER OPERATION (MODELS MD and MDS ONLY)

To ignite burners, turn burner valve knob to "HI" position. Each burner is controlled by an individual 

high-low, on-off valve. An infinite number of temperatures may be obtained by turning the burner valve 

knob to any position between high and low.  For overnight shutdown, turn the valves to the "OFF" 

position.

CAUTION

Содержание 615MD

Страница 1: ... GAS GRIDDLE MODEL 615TD 615MD 624TD 624MD 624MDS 624TSPD 624TCHSD 636TD 636MD 636MDS 636TSPD 636TCHSD 648TD 648MD 648MDS 648TSPD 648TCHSD Installation and Operation Instructions 2M Z13220 Rev 12 01 09 ...

Страница 2: ...rate we are not responsible for errors or omissions in information provided or conclusions reached as a result of using the specifications By using the information provided the user assumes all risks in connection with such use MAINTENANCE AND REPAIRS Contact your local authorized service agent for service or required maintenance Please record the model number serial number voltage and purchase da...

Страница 3: ...2 Controls 40 000 BTU 498 sq in 3213 sq cm Grid Area 3 4 1 9 cm Plate Thickness Approximate Weight Installed 165 Lb 74 8 kg Shipping 175 Lb 79 4 kg Dimensions 24 Width 27 3 4 Depth 15 1 2 Height 61 cm Width 70 5 cm Depth 39 4 cm Height 636TD 636TD LP Type Thermostat Control 3 Controls 60 000 BTU 747 sq in 4820 sq cm Grid Area 3 4 1 9 cm Plate Thickness Approximate Weight Installed 247 Lb 112 kg Sh...

Страница 4: ...hrome Plate 3 Controls 84 900 BTU 747 sq in 4820 sq cm Grid Area 3 4 1 9 cm Plate Thickness Approximate Weight Installed 247 Lb 112 kg Shipping 262 Lb 118 8 kg Dimensions 36 Width 27 3 4 Depth 15 1 2 Height 91 4 cm Width 70 5 cm Depth 39 4 cm Height 648TCHSD Type Thermostat Safety Pilot Control with Chrome Plate 4 Controls 113 200 BTU 996 sq in 6426 sq cm Grid Area 3 4 1 9 cm Plate Thickness Appro...

Страница 5: ...sure testing of that system at test pressures in excess of 1 2 PSIG 3 45KPA This appliance and its pressure regulator must be isolated from the gas supply piping system by closing its individual manual shutoff valve during any pressure testing of the gas supply piping system at test pressures equal to or less than 1 2 PSIG 3 45KPA For your protection we recommend a qualified installing agency inst...

Страница 6: ...ppliance GAS CONVERSION This griddle is equipped with fixed orifice hoods and is shipped from the factory for use on either natural or LP gas To convert to propane gas install the burner orifice hoods located in the grease drawer NAT orfices are not included as follows 1 Remove front panel by removing screws located on the front and the bottom 2 Remove the burner s from the orifice hood s This is ...

Страница 7: ...be relit to resume cooking settings PILOT LIGHT REGULATION Adjust pilot light flames as small as possible but high enough to light burner immediately when burner valve is turned on high ADJUSTING SAFETY PILOTS SERIES TCHSD and TSPD ONLY A manual pilot valve is provided on the left side of the control to adjust the pilot flame Adjust the pilot flame so that it is approximately 3 8 to 1 2 tall and a...

Страница 8: ...f grease is permitted to accumulate it will form a gummy cake and then carbonize into a hard substance which is extremely difficult to remove To prevent this condition the following suggestions for cleanliness should be followed 1 After each use scrape the griddle with a scraper or flexible spatula to remove excess grease and food A waste drawer is provided for the scrapings If there is an accumul...

Страница 9: ...ation This limited warranty is void if it is determined by Star Manufacturing International Incorporated or one of its authorized representatives that the chrome surface has been misused or abused or subjected to the following situations 1 Improperly installed 2 By pass adjustments not set properly on gas units allowing the appliance to overheat and discolor the chrome surface See by pass adjustme...

Страница 10: ...ntinuous contact with the roller coating This warranty does not apply to the non stick properties of such materials This warranty does not apply to Special Products but to regular catalog items only Star s warranty on Special Products is six 6 months on parts and ninety 90 days on labor This warranty does not apply to any item that is disassembled or tampered with for any purpose other than repair...

Страница 11: ...11 2 3 Max Star 1 4 5 6 7 8 9 10 11 12 13 14 15 17 18 19 21 22 23 16 40 STAR MANUFACTURING INTERNATIONAL INC MODEL 624MD 624TD 624TSPD 624TCHSD SK1980 REV A 05 9 03 2M Z13220 Star Max Gas Griddles ...

Страница 12: ...NG INTERNATIONAL INC MODEL 624MD 624TD 624TSPD 624TCHSD SK1988 Rev B 9 3 2010 26 27 28 29 30 24 20 Manual Control 29 28 30 31 32 33 34 35 36 37 25 29 27 33 37 38 39 25 28 Thermostat Control 2M Z13220 Star Max Gas Griddles ...

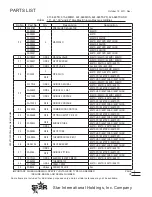
Страница 13: ...48TCHSD 2 G3 Z5906 1 FLUE 615MD 615TD G3 Z5916 624MD 624TD 624TSPD 624TCHSD G3 Z5926 636MD 636TD 636TSPD 636TCHSD G3 Z5936 648MD 648TD 648TSPD 648TCHSD 3 G5 Z4817 1 FLUE DIVIDER ALL 636 648 4 G3 Z5945 2 SIDE PANEL ALL 5 G3 624302 1 SIDE LINER ASSEMBLY LEFT ALL 6 G3 Z5951 1 REAR PANEL 615MD 615TD G3 Z5953 624MD 624TD 624TSPD 624TCHSD G3 Z5955 636MD 636TD 636TSPD 636TCHSD G3 Z5957 648MD 648TD 648TSP...

Страница 14: ...82 1 GRAPHIC PANEL 615MD 2M Z5983 615TD 2M Z5984 624MD 2M Z5985 624TD 2M Z5986 636MD 2M Z5987 636TD 2M Z5988 648MD 2M Z5989 648TD 2M Z5990 624TSPD 624TCHSD 2M Z5991 636TSPD 636TCHSD 2M Z5992 648TSPD 648TCHSD 2M Z6545 624MDS 2M Z6546 636MDS 2M Z6547 648MDS 18 G3 Z5974 1 FRONT PANEL 615MD G3 Z5975 615TD G3 Z5976 624MD G3 Z5977 624TD 624TSPD 624TCHSD G3 Z5978 636MD G3 Z5979 636TD 636TSPD 636TCHSD G3 ...

Страница 15: ...624TCHSD 636TCHSD 648TCHSD 30 2J Y7216 1 2 3 4 ORIFICE NATURAL 615MD 624MD 636MD 648MD 615TD 624TD 636TD 648TD 2A Z4930 1 2 3 4 ORIFICE 41 NAT 624TSPD 636TSPD 648TSPD 624TCHSD 636TCHSD 648TCHSD 2J Y7250 1 2 3 4 ORIFICE PROPANE 615MD 624MD 636MD 648MD 615TD 624TD 636TD 648TD 2A Y1255 2 3 4 ORIFICE PROPANE 624TSPD 636TSPD 648TSPD 624TCHSD 636TCHSD 648TCHSD 31 2J Z5959 2 3 4 COMBINATION CONTROL 624TS...

Страница 16: ......
Страница 17: ...rronée a fait l objet d un usage abusif ou a été sujette aux situations suivantes 1 Installation inappropriée 2 Ajustements de dérivation non effectués adéquatement sur les appareils à gaz ce qui a pour conséquences une surchauffe de l appareil et une décoloration de la surface chromée Voir ajustement de dérivation dans le manuel d instructions fourni avec l appareil 3 Utilisation erronée de tout ...

Страница 18: ...çon qu un ustensile de cuisson ordinaire Le tiroir s enlève en tirant vers l avant le haut et l extérieur ENTRETIEN DU GRIL SURFACES CHROMÉES Il faut très peu de temps et d efforts pour garder la surface de ce gril en chrome industriel étincelante et maintenir ses prestations optimales NE PAS laisser la graisse s accumuler car elle deviendra carbonisée et difficile à enlever Pour prévenir cette si...

Страница 19: ...ion entre haut et bas Pour l arrêt durant la nuit tournez les valves à la position de OFF CONDITIONNEMENT DE LA SURFACE CHAUFFANTE DU GRIL SURFACES NON CHROMÉES Nettoyer soigneusement la surface du gril Une fois bien nettoyé le gril devrait être conditionné pour empêcher les aliments de coller Avant usage et après chaque nettoyage en profondeur conditionner la surface chauffante du gril de la mani...

Страница 20: ...r la vanne d alimentation principale à l appareil et attendre 5 minutes jusqu à disparition du gaz 2 Fermer tous les boutons et les robinets des flammes de veille 3 Ouvrir la vanne principale et allumer toutes les flammes de veille 4 Tourner les boutons de brûleur au réglage désiré 5 Pour fermer les brûleurs tourner les boutons à la position d arrêt REMARQUE Les grils sont équipés de lampes de vei...

Страница 21: ...gaz suffisant pour répondre aux besoins de gaz de l appareil Si l appareil doit être raccordé à une canalisation existante il faut la vérifier pour déterminer si sa capacité est adéquate Du mastic à joints doit être utilisé modérément et uniquement sur les filets mâles des joints de tuyau Ces mastics devront être résistants à l action des gaz de propane liquéfié MISE EN GARDE Toute particule lâche...

Страница 22: ...ivement les instructions d installation d utilisation et d entretien avant d installer ou de réparer l équipement MISE EN GARDE POUR VOTRE SÉCURITÉ NE PAS CONSERVER NI UTILISER DE L ESSENCE OU D AUTRES VAPEURS ET LIQUIDES INFLAMMABLES À PROXIMITÉ DE CET APPAREIL OU DE TOUT AUTRE APPAREIL TENIR TOUT COMBUSTIBLE À L ÉCART DE L APPAREIL Cet appareil son régulateur de pression et son robinet d arrêt i...

Страница 23: ...dans ce manuel sont susceptibles de changer sans préavis Quoique STAR Manufacturing exerce la bonne foi de fournir le renseignement correct STAR n est pas responsable pour les erreurs ou les omissions dans le renseignement pourvu ou les conclusions tirées à la suite de l utilisation des spécifi cations En utilisant le renseignement pourvu l utilisateur assume tous les risques en relation avec telle...

Страница 24: ... GRILS A GAZ MODEL 615TD 615MD 624TD 624MD 624MDS 624TSPD 624TCHSD 636TD 636MD 636MDS 636TSPD 636TCHSD 648TD 648MD 648MDS 648TSPD 648TCHSD Instructions d installation et d opération 2M Z13220 Rev 12 01 09 ...

Отзывы: