background image

Before using the Machine

16


IC Identification on Class of ITE 


    CAN ICES-3 (B)/NMB-3 (B)


DECLARATION OF CONFORMITY

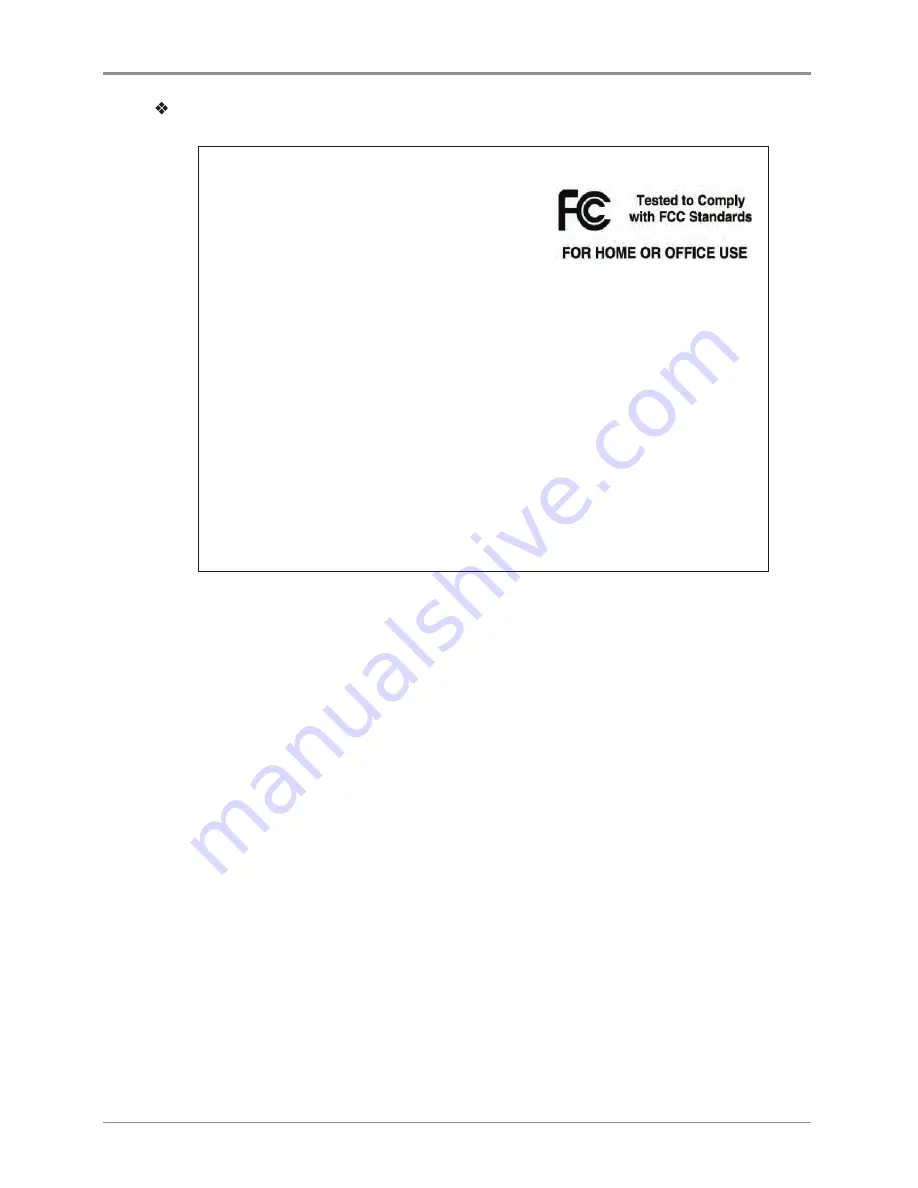
Product name : USB Flash Drive                                                              
Model name : 8GB-WJ004, 4GB-WJ004
FCC Rules : Tested to comply with FCC Part 15, Class B
Operating Environment : For HOME OR OFFICE USE

FCC COMPLIANCE STATEMENT

This device complies with part 15 of the FCC Rules. Operation is subject to the following two condi-
tions: (1) this device may not cause harmful interference, and (2) this device must accept any inter-
ference received, including interference that may cause undesired operation.

RESPONSIBLE PARTY

Name : Sindoh America, Ltd.      
Address : 6047 Tyvola Glen Circle, Suite #115, Charlotte, NC 28217
Phone No. : 1-704-414-6690

We hereby declare that the above specified equipment with the trade name and model number 
was tested conforming to the applicable FCC Rules under the most accurate measurement standards 
possible, and that all the necessary steps have been taken and are in force to assure that production 
units of the same equipment will continue to comply with the Commission’s requirements.
Manufacturer : Sindoh Co., Ltd.
Address : 3, Seongsuiro24(isipsa)-gil, Seongdong-gu, Seoul, 04797 REPUBLIC OF KOREA

Содержание MODEL 1

Страница 1: ...www stanleytools com User Manual...

Страница 2: ...pied for a long period of time as it may cause abrupt fire accidents Protect device from humid or wet conditions eg rain snow etc Remove power cord from receptacle on the wall before moving device Be...

Страница 3: ...ual is subject to change without notice We are not responsible for the direct and or indirect loss or damages caused by results of handling or operating the product in any case and for results occurri...

Страница 4: ...r 15 Chapter 1 Preparations for Machine Operation 1 Machine Specifications 1 2 1 1 Printing 1 2 1 2 Temperature Speed 1 2 1 3 Machine 1 2 1 4 Software Support 1 2 1 5 Default Setting of Print layer Wi...

Страница 5: ...AVING MODE 2 31 BEEP SOUND 2 32 NOZZLE SETTING 2 34 LANGUAGE 2 36 E MAIL 2 38 UNIT 2 42 TIME SETTING 2 43 TIME ZONE 2 45 SOFTWARE UPDATE 2 46 1 3 Information 2 48 Chapter 3 Printing 1 Printing 3 2 1 1...

Страница 6: ...e out of the nozzle Fix for EC401 5 6 3 2 In Cases where Filament is Cut Between the Extruder and Nozzle 5 7 3 3 When Filament End is Visible Outside the Cartridge After Unloading 5 7 4 Replenishing C...

Страница 7: ...d or personal use other usage is prohibited by law The above details present only a part of the applicable laws and regulations and the details of the law may not be stated as they are Sindoh is not r...

Страница 8: ...afe operations of the machine Important Indicates points to pay attention to when using the machine and explanations of likely causes of filament misfeeds damage to originals or loss of data Be sure t...

Страница 9: ...been lowered to room temperature Caution Electric Shock Proceed your work after turning off the machine and unplugging the power cord from the outlet in case of accessing the system board or installi...

Страница 10: ...the power switch off then unplug the power cord from the power outlet Unplug and release all the cords and cables before moving the machine Only use the power cords provided with this machine or cord...

Страница 11: ...l however if the area of where the machine is located is not ventilated make sure to ventilate the area appropriately time to time Caution Install the machine with its vents spaced at least 10 cm away...

Страница 12: ...be sure to unplug the power cord from the outlet When moving the printer it is recommended that two people lift and move the printer for safety Hold the bottom handles of the machine when moving it B...

Страница 13: ...occurs after touching the filament please see a doctor Important Do not keep the cartridge unit in the following places Exposed to fire Exposed to direct sunlight Where temperature or humidity may ri...

Страница 14: ...e inside It may become the cause of injuries or burns Never operate the machine in the way this manual does not specifically instruct Notification for California customers USA Warning This product use...

Страница 15: ...for your health Ventilate it on a regular basis Do not block vents Inappropriate cooling may lead to high temperatures inside the machine In general a new machine may produce small amount of gaseous c...

Страница 16: ...he FCC Rules Operation is subject to the following two conditions 1 This device may not cause harmful interference and 2 this device must accept any interference received Including interference that m...

Страница 17: ...consumption Mode Description Power Consumption W Printing A device is printing using electronic input data 150W Standby A device is in standby mode 21W Power Off A power plug is plugged into the outl...

Страница 18: ...l of Used Battery Control board uses a Lithium battery Please discard used batteries following the environmentally friendly procedure stated on the manufacturer guidelines To replace batteries please...

Страница 19: ...sed for any purposes related to human lives Do not expose this product to water humidity or liquid Do not expose this product to direct light hot temperature or fire Warning If the machine has been mo...

Страница 20: ...dbm MHz IEEE 802 11g 10mW 10dbm MHz IEEE 802 11n 20MHz 10mW 10dbm MHz IEEE 802 11n 40MHz 10mW 10dbm MHz No of Channels IEEE 802 11b 14 IEEE 802 11g 14 IEEE 802 11n 20MHz 14 IEEE 802 11n 40MHz 9 Modula...

Страница 21: ...uarantee that interference will not occur in a particular installation If this equipment does cause harmful interference to radio or television reception which can be determined by turning the equipme...

Страница 22: ...er ference received including interference that may cause undesired operation RESPONSIBLE PARTY Name Sindoh America Ltd Address 6047 Tyvola Glen Circle Suite 115 Charlotte NC 28217 Phone No 1 704 414...

Страница 23: ...1 Preparations for Machine Operation MODEL 1 User Manual...

Страница 24: ...age Maximum Temperature 80 C Recommended 100 C max Recommended printing speed maximum speed 40mm s Recommended 200mm s max Continuous operation at maximum temperature can cause malfunction Please use...

Страница 25: ...needed for product exchange or repair service 3D Printer USB Cable Cartridge Scrapper Please attach the Core to the LAN cable in use Reference Guide Power Cable USB Drive Cable Ferrite Core Filter Wa...

Страница 26: ...nd hold for 2 seconds to turn off the printer Power Button Indicator Lamp On Power is On 1 second interval flickering Can be turned on instantly power cable is connected Caution If in case of not usin...

Страница 27: ...3 Bed heater Heats the printables bottom surface to stabilize it on the bed 4 Aluminum bed bed sheet Seating space for Printable 1 Nozzle 2 6 4 3 5 No Part Name Description 1 Body Main body of the no...

Страница 28: ...cated on top of the machine 3 After main menu is displayed on the LCD screen install the cartridge Refer to UI manual LOAD 4 Connect the one end of the USB cable to the back of the printer and the oth...

Страница 29: ...he installation of STANLEY 3D program 4 A window that shows the End User License Agreement will appear as shown below The Next button will be activated upon accepting the terms of the license agreemen...

Страница 30: ...Preparations for Machine Operation 1 8 1 6 The file gets saved and the installation starts 7 After all installation is complete you can see that the STANLEY 3D created on the desktop of your computer...

Страница 31: ...2 UI Menu Functions MODEL 1 User Manual...

Страница 32: ...ZLE CLEANING CLEANING CASE NETWORK Wifi Options Wifi On Off SELECT NETWORK LIST DHCP Static Clear SSID Wired Options DHCP Static LAMP Options Always On Always Off On only in printing BED LOWERING TEST...

Страница 33: ...D PW UNIT Celsius C Fahrenheit F meter m feet ft TIME SETTING YYYY MM DD HR MIN TIME ZONE SOFTWARE UPDATE INFORMATION Name PW Change Name PW Name PW Reconfirm PW Cancel OK Model Name Serial No Version...

Страница 34: ...UI Menu Function description 2 4 2 LOAD This function automatically loads filament to the Nozzle 1 From the HOME screen press CARTRIDGE 2 Press LOAD to activate Cartridge load...

Страница 35: ...oceed The filament reaches to the nozzle and it is heated up to the specified temperature Then the filament is inserted into the heated nozzle After the process has finished screen will automatically...

Страница 36: ...tridge unload confirming message cartridge unloading will automatically procceed To remove filament the nozzle is heated up to the specified temperature and the filament unload starts After the filame...

Страница 37: ...ck can also be manually done by the user When unlock screen automatically appears after cartridge unload 1 For 10 seconds LOCK state is deactivated and the user can detach cartridge from printer If th...

Страница 38: ...UI Menu Function description 2 8 2 To manually unlock later 1 From home screen press CARTRIDGE 2 Press UNLOCK to activate UNLOCK function...

Страница 39: ...te is deactivated and the user can detach cartridge from printer If the cartridge can t be pulled out even after unlock gently push it forward and then try to pull out again 4 After 10 seconds printer...

Страница 40: ...Options Wifi On Off SELECT NETWORK LIST DHCP Static Clear SSID Wired Options DHCP Static LAMP Options Always On Always Off On only in printing BED LOWERING TEST PRINT Options SELECT FILE START PAUSE C...

Страница 41: ...Address e mail Server Info Address Port ID PW UNIT Celsius C Fahrenheit F meter m feet ft TIME SETTING YYYY MM DD HR MIN TIME ZONE SOFTWARE UPDATE X Y Z Use to change the position on the X Y and Z ax...

Страница 42: ...UI Menu Function description 2 12 2 2 Press the X Y Z button to enter X Y Z 3 Press 0 1 1 10 100 to select the distance user to move To move to each axis home location press All X Y or Z...

Страница 43: ...2 13 UI Menu Function description 2 EXTRUDER This function is used to fine control the filament to its position 1 From home screen press SETTING 2 Press EXTRUDER to enter EXTRUDER settings...

Страница 44: ...I Menu Function description 2 14 2 3 To Control EXTRUDER Nozzle temperature needs to be raised 4 Press 1 10 50 100 to select an amount In the image shown below press the direction to move the filament...

Страница 45: ...LING This function is used to perform the leveling of the bed 1 From home screen press SETTING 2 Press the BED LEVELING button to enter BED LEVELING settings If nozzle s temperature is higher than 80...

Страница 46: ...measured first and then both sides of the bottom level are measured If the height of the bed is perfect then levelling process will be finished but if the height of the bed and nozzle does not match s...

Страница 47: ...k the z offset This Menu allows user to control the GAP in between Nozzle and BED Standard is 0 25mm and can be customi zed button widens the GAP button shortens the GAP For higher adhesive strength b...

Страница 48: ...UI Menu Function description 2 18 2 2 Press the Z OFFSET button to access Z Offset screen 3 Default value is 0 25mm Use buttons to move in 0 05 mm unit...

Страница 49: ...djust the gap and to save the setting The saved value is applied when next time the print starts These values will be reset if bed leveling is initiated NOZZLE CLEANING Function used when nozzle needs...

Страница 50: ...nozzle cleaning settings 3 In order to get rid of filament residue the nozzle needs to be heated When the specified temperature is reached it moves on to the next step to remove filament residue Once...

Страница 51: ...enu Function description 2 CLEANING CASE Function used to clean out the case for the collected filament residue 1 From home screen press SETTING 2 Press the CLEANING CASE button to enter CLEANING CASE...

Страница 52: ...o be visible and accessible Like shown in the image empty the CASE press OK when done and user will be returned to the settings screen NETWORK This is a menu to configure users network setting IP addr...

Страница 53: ...tton to access network configuration screen 3 The default network setting is Wired connection using LAN line Press DHCP for automatic IP address setup To manually input a fixed IP address press Static...

Страница 54: ...nction description 2 24 2 4 In any case to use Wifi press the Wifi tab Wifi setting can be turned ON or OFF 5 To select a Wifi network click Choose a network and the printer shows all available Wifi c...

Страница 55: ...he network For a password protected network a dialog pops up and asks for the password You can refresh the network list by clicking Search 7 After successful connection printer may ask for DHCP Static...

Страница 56: ...UI Menu Function description 2 26 2 LAMP Menu to configure settings for machine lamp 1 From home screen press SETTING 2 Press Next to enter LAMP setting screen...

Страница 57: ...2 27 UI Menu Function description 2 3 Settings available for LAMP are Always On Always Off and On only in printing Use arrow buttons to select an option and press OK...

Страница 58: ...Use this function in times of moving printer to a different location Bed will be lowered to the bottom and will be locked into position 1 Press SETTING from the home screen 2 Press Next to move to ne...

Страница 59: ...u Function description 2 3 Upon selection the bed will automatically be lowered TEST PRINT This function allows the user to test print a sample model already saved in the printer 1 From home screen pr...

Страница 60: ...UI Menu Function description 2 30 2 2 Press Next button to move to the next page and press TEST PRINT 3 Select the test file to print...

Страница 61: ...I Menu Function description 2 POWER SAVING MODE Function to set timer for printer energy saver mode 1 From home screen press SETTING 2 Press Next button to move to the next page and press POWER SAVING...

Страница 62: ...f energy savor mode are 0 100 min The time can be adjusted in 5 min unit select the desired time using the then press OK button to save changes BEEP SOUND The volume level of beep sound can be adjuste...

Страница 63: ...ion description 2 2 Tap on the Next button to move to next page and press BEEP SOUND 3 Currently available sound settings are Low Middle High and Off Select the desired setting and press the OK button...

Страница 64: ...2 34 2 NOZZLE SETTING Use this menu only when the nozzle has been replaced Refer to P 5 10 4 4 Exchanging Nozzle 1 Press SETTING button from the home screen 2 Tap on the Next button to move to next p...

Страница 65: ...to a new nozzle Entering the menu a notification message will pop up Press the OK button to move to the next screen 4 Click inside the input field to insert the values for the new nozzle Each nozzle...

Страница 66: ...UI Menu Function description 2 36 2 LANGUAGE Menu to set language for machine 1 From home screen press SETTING 2 Press Next 2 times to go to the screen where the LANGUAGE menu is...

Страница 67: ...2 37 UI Menu Function description 2 3 Currently supported languages are English Spanish French Using the arrows select a language and press OK...

Страница 68: ...urrent printing status and sends the information to the email address specified Printer will send information of completion based on the PC program standard settings Maximum of 10 emails can be sent 1...

Страница 69: ...providers do not allow the use of port number 465 If port number 465 is not available please use 25 587 or the port number that the service provider recommends ID SMTP server login ID e g sender Enter...

Страница 70: ...ditional recipient addresses can be added by using semicolon e g recipient1 test com recipient2 test com recipient3 test com The maximum number of notification emails that can be sent is 10 Regardless...

Страница 71: ...w less scure apps criteria Set it to On to enable the option Printer Setting 1 Set smtp google com for the settings of the email address 2 For Google 25 and 587 ports are compatible Caution According...

Страница 72: ...UI Menu Function description 2 42 2 UNIT Settings for the units of measurments displayed on the printer 1 From the home screen press SETTING 2 Press Next 2 times and select UNIT...

Страница 73: ...2 43 UI Menu Function description 2 3 The units for temperature and length can be changed TIME SETTING You can view or change the time setting 1 From the home screen press SETTING...

Страница 74: ...UI Menu Function description 2 44 2 1 Press Next 2 times and select TIME SETTING 3 The time setting can be changed in this screen...

Страница 75: ...2 45 UI Menu Function description 2 TIME ZONE You can view or change the time zone setting 1 From the home screen press SETTING 2 Press Next 2 times and select TIME ZONE...

Страница 76: ...ne can be selected from the time zone list Once Time Zone has been set the printer will restart to apply the new settings S W UPDATE With the printer connected to the internet user is able to download...

Страница 77: ...I Menu Function description 2 2 Press Next 2 times and select S W UPDATE 3 Press the Start Update button and printer will start updating After it has finished restart the printer and updates will be a...

Страница 78: ...irm PW Cancel OK Model Name Serial No Version Wired IP MAC Wireless IP Wireless MAC HISTORY Guide In this menu user is able to view the detail information of the printer and set device name password I...

Страница 79: ...nu Function description 2 2 To set password and name for printer select Change Name PW 3 By entering the password you can edit name and set a new password Pressing OK saves the changes Initial passwor...

Страница 80: ...UI Menu Function description 2 50 2 4 In INFO screen press Guide to access to the Quick Guide for the printer 5 Other useful information is also available in INFO screen...

Страница 81: ...3 Printing MODEL 1 User Manual...

Страница 82: ...cting USB flash drive to the printer In order to print using an USB flash drive insert the flash drive into the USB port When the USB flash drive is connected while in the home screen a list of files...

Страница 83: ...3 3 Printing 3 2 Printing Files Select a file to print in the USB list 3 Print Preview Once selected a preview of the model appears on the screen...

Страница 84: ...temperature is reached the printing starts 5 Pausing Print Pressing during a print will pause the progress Press again and nozzle is heated again and the printer will continue printing 6 Exchanging Ca...

Страница 85: ...nting job is canceled Another message requesting the removable of left print will popup press OK and screen will return to home screen 8 Printing Completion After printing has completed follow the ins...

Страница 86: ...Y 3D Slicer program 3 Press the Print button 4 Following Steps Same as steps 3 7 of printing via USB Note For fan speed configuration Pause print cancelation please refer to USB printing section 1 3 P...

Страница 87: ...3 7 Printing 3 2 The print jobs in queue are listed 3 You may click the list to look at the information of the print job and delete it if necessary...

Страница 88: ......

Страница 89: ...4 Printed Output Check MODEL 1 User Manual...

Страница 90: ...ching Bed Press Bed Lock on the screen to fix the bed in place Pressing and holding the PUSH buttons on the bed handles pull the bed out 3 Detaching the printed output Caution Risk of Injuries The scr...

Страница 91: ...ally released if bed is unlocked press the lock button again to fix the bed into position before installation 1 Like the picture gently place the aluminum bed s end corners on top of the bed heater 2...

Страница 92: ...fect the quality of the printed product There is no absolute value for optimum temperature Testing various temperatures and finding the optimum temperature are needed Material Appropriate nozzle tempe...

Страница 93: ...Cannot be Turned On 1 Open the Front door shown below and turn the belt counter clockwis 2 After the bed is lowered remove printed output and turn the power on 3 If the problem persists please dial t...

Страница 94: ......

Страница 95: ...5 Maintenance MODEL 1 User Manual...

Страница 96: ...nt residue within the printer If the residue goes into conveyor belt or fan wings it can cause printer malfunction Please clean the inside of the printer regularly or right after a print job 1 3 Perio...

Страница 97: ...hing that might be interfering with the operation of the fan If problem persists after reboot please contact service center ERROR EC 5XX Please Reboot machine Error related with motor travel on X Y an...

Страница 98: ...if there are more than 5 difference between the cartridge quantity and recorded usage levels Replace Cartridge Notification 472 473 476 482 483 484 487 488 Remove cartridge Is there any remaining fil...

Страница 99: ...e Z axis The printing job has exceeded the minimum printable range Press the OK button and the pop up message will disappear Notification 408 Model has exceeded the maximum print range of the X axis N...

Страница 100: ...artridge unlock Remove the cartridge from the printer Use the extruder jog mode to remove the filament Cut the removed filament Use below image as reference re install the cartridge and run LOAD Note...

Страница 101: ...or is not seen After attaching the Snap Ring gentely push the tube in Approx 1 5mm Use Extruder mode to transfer the filament towards the nozzle and check that filament is coming out of the end of the...

Страница 102: ...e printed output may not adhere on the bed properly and should consider exchanging the bed to a new one Bed sheet is a consumable Please replace the bed sheet if models don t get attached to it due to...

Страница 103: ...he filter and it will detach from the printer 3 Gently pull the filter to separate from printer 4 As shown below slightly hang the lower half of the filter and gently push the top side to click it in...

Страница 104: ...reviously used color may be seen in the beginning of printing If the color is the only difference from the previous filament it doesn t affect the printing quality Difference in material however may a...

Страница 105: ...E HOLDER 3 Push the hook on the top and lift open the cover HOOK COVER 4 Push the 2 hooks on the harness connector to disengage the connector To remove the left hand side connector press on the hook u...

Страница 106: ...r power of machine is turned OFF and after all power cables are disconnected 1 With the cover lifted up attach the nozzle The Nozzle attaches with magnet power but please make sure that the component...

Страница 107: ...VER Please be careful not to position the harness near the left right and center section of the cover The harness can get caught in between covers when closing Caution Harness 4 Insert Tube Note Push...

Страница 108: ...Ring Insert the Snap Ring in between the Fitting and Holder SNAP RING SNAP RING INSERTION POINT 6 Finally push tube in all the way through Approximately 1 5mm can be additionally inserted TUBE 7 Use...

Страница 109: ...6 Appendix MODEL 1 User Manual...

Страница 110: ...Appendix 6 2 6 1 Type of Consumables Material Color Material PLA and ABS are compatible Color white black gray green blue yellow red...

Страница 111: ...uipment This equipment is a Class A EMC electromagnetic compatible equipment and should not be used in household locations This equipment is a Class B EMC electro magnetic compatible equipment for hou...

Страница 112: ...STANLEY sont des marques de Stanley Black Decker Inc ou une de ses filiales et sont utilis s sous licence Manufactured by Sindoh Co Ltd 3 Seongsuiro 24 isipsa gil Seongdong gu Seoul 04797 REPUBLIC OF...

Отзывы: